Client Installer
How to Download the Client Installer
A Step-by-Step Guide for Downloading the Client Installer
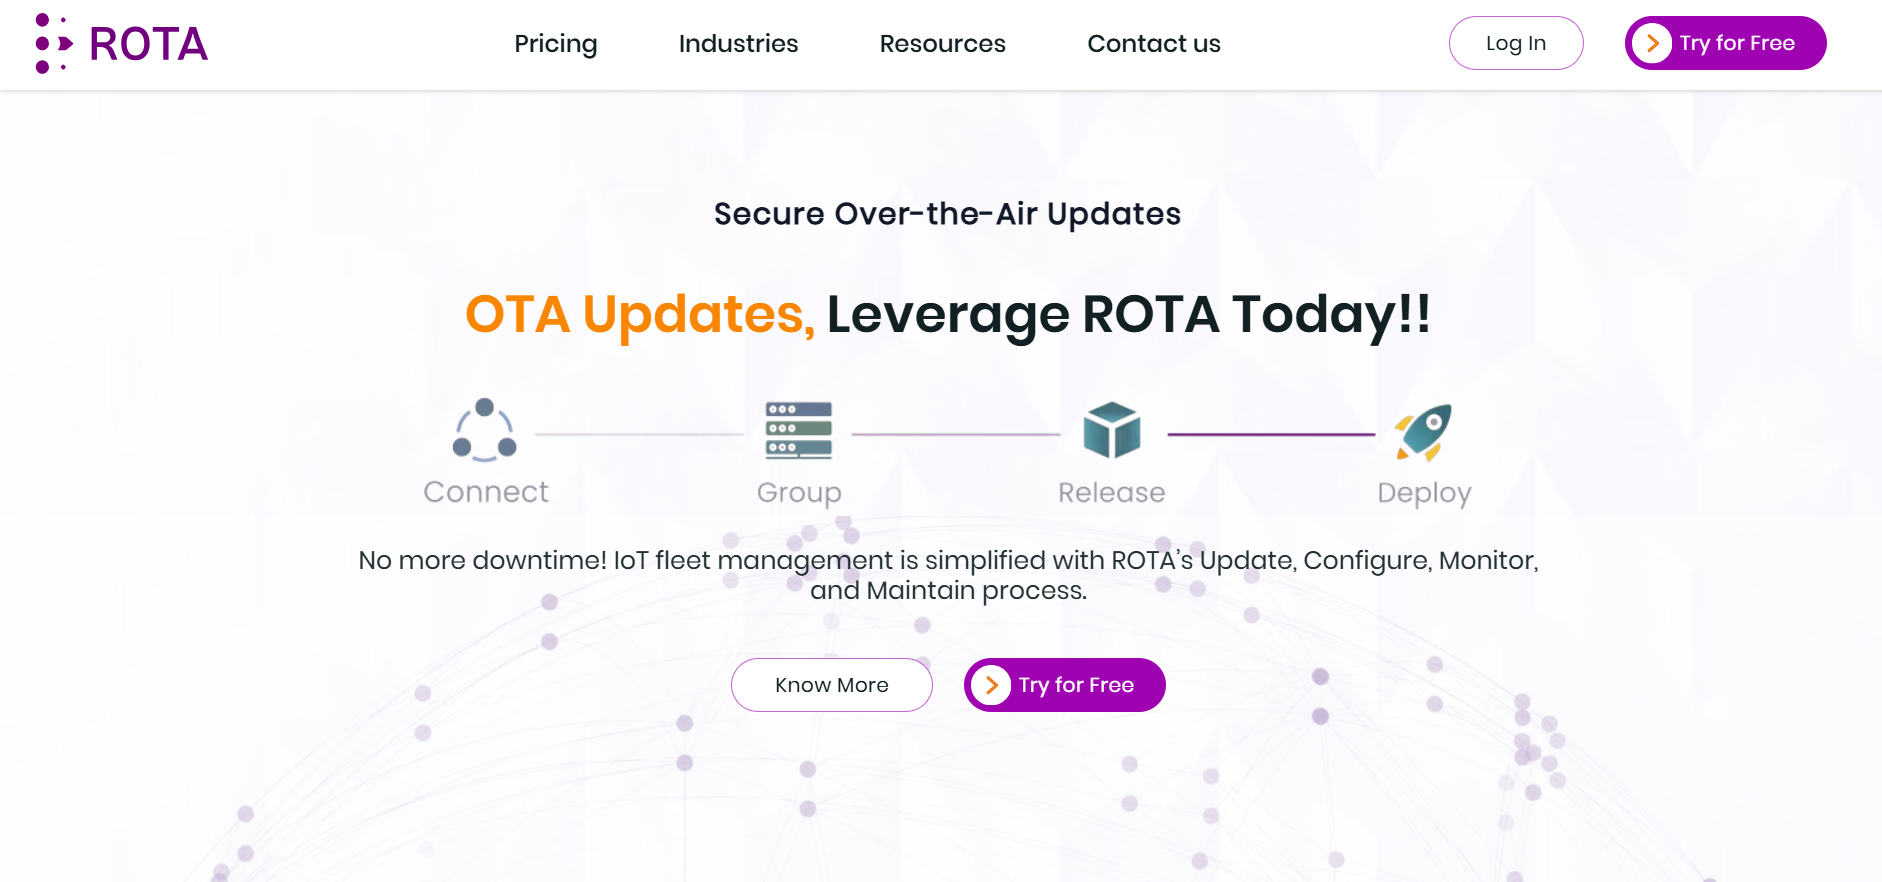
Step 1: Visit the Regami OTA Website
Open your browser and go to Regami OTA Website. On the homepage, locate and click on the “Try for Free” button at the top right corner of the page.
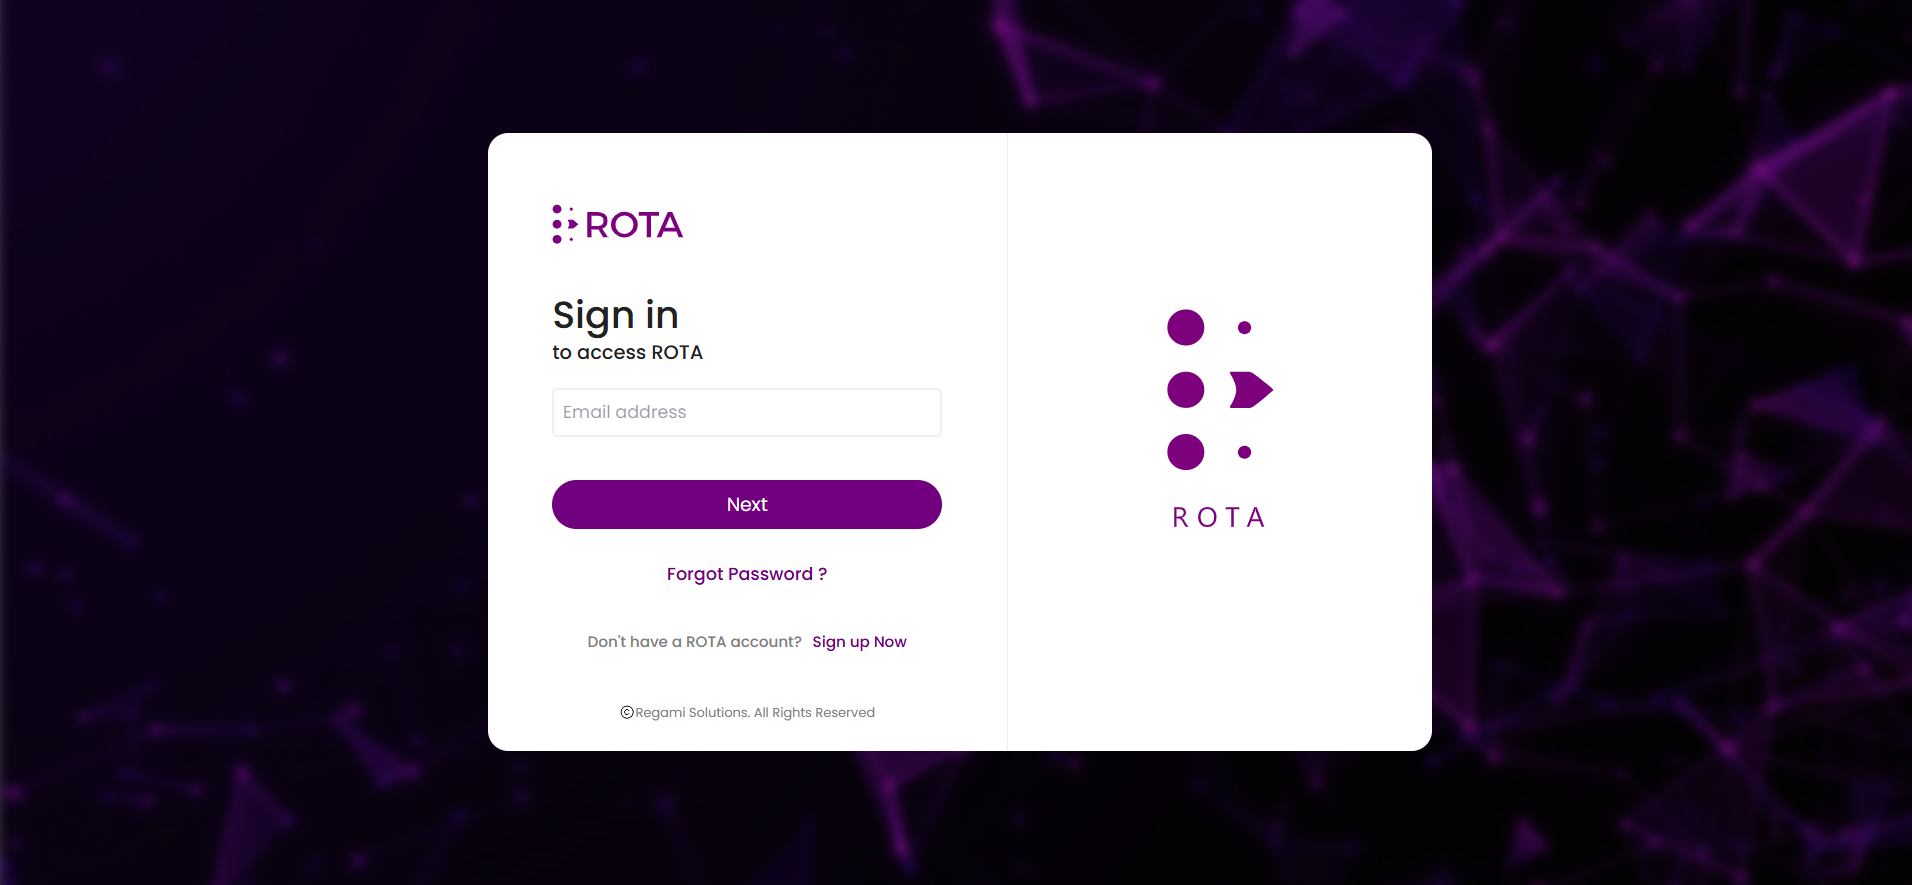
Step 2: Sign Up for the ROTA Portal
You will be redirected to the sign-up page. Complete the sign-up process by entering your required details. Follow all the prompts and instructions provided during the Sign Up process.

Step 3: Log in to the Portal
Once you have successfully signed up, return to the ROTA Portal. Log in using the credentials (Email and password) you created during the sign-up process.
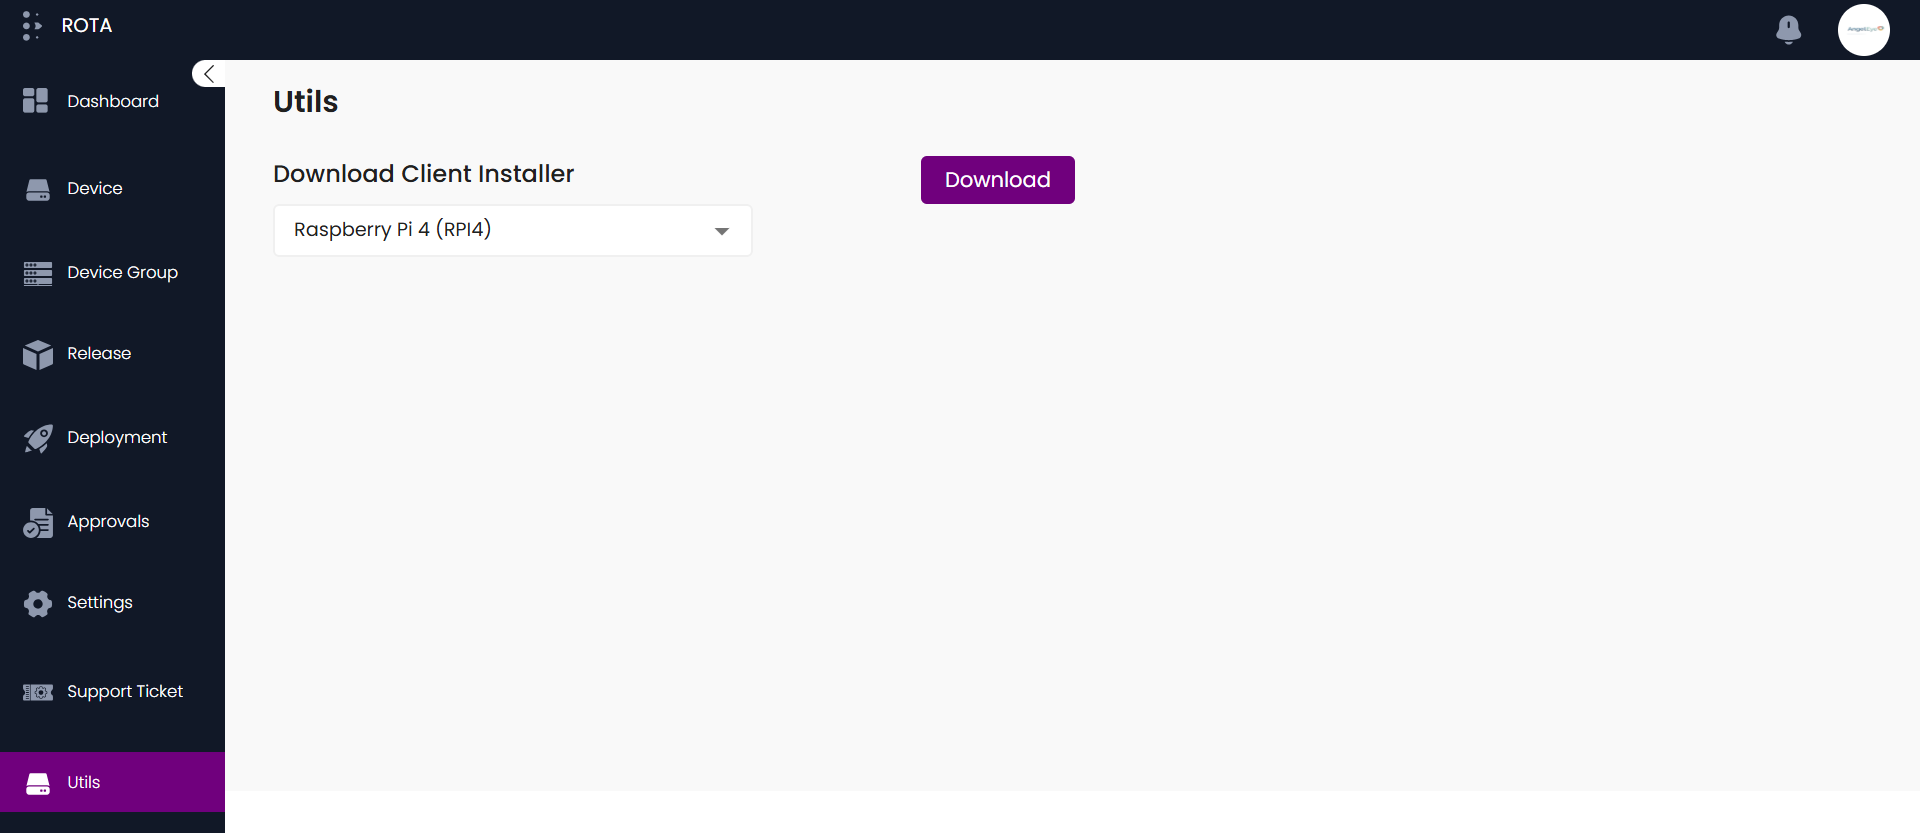
Step 4: Dashboard page of the ROTA Portal
After logging in, you will see a Dashboard page of the ROTA Portal. There will be a sidebar navigation menu on the left. Locate the “Utils” section, which is usually at the bottom of the menu.
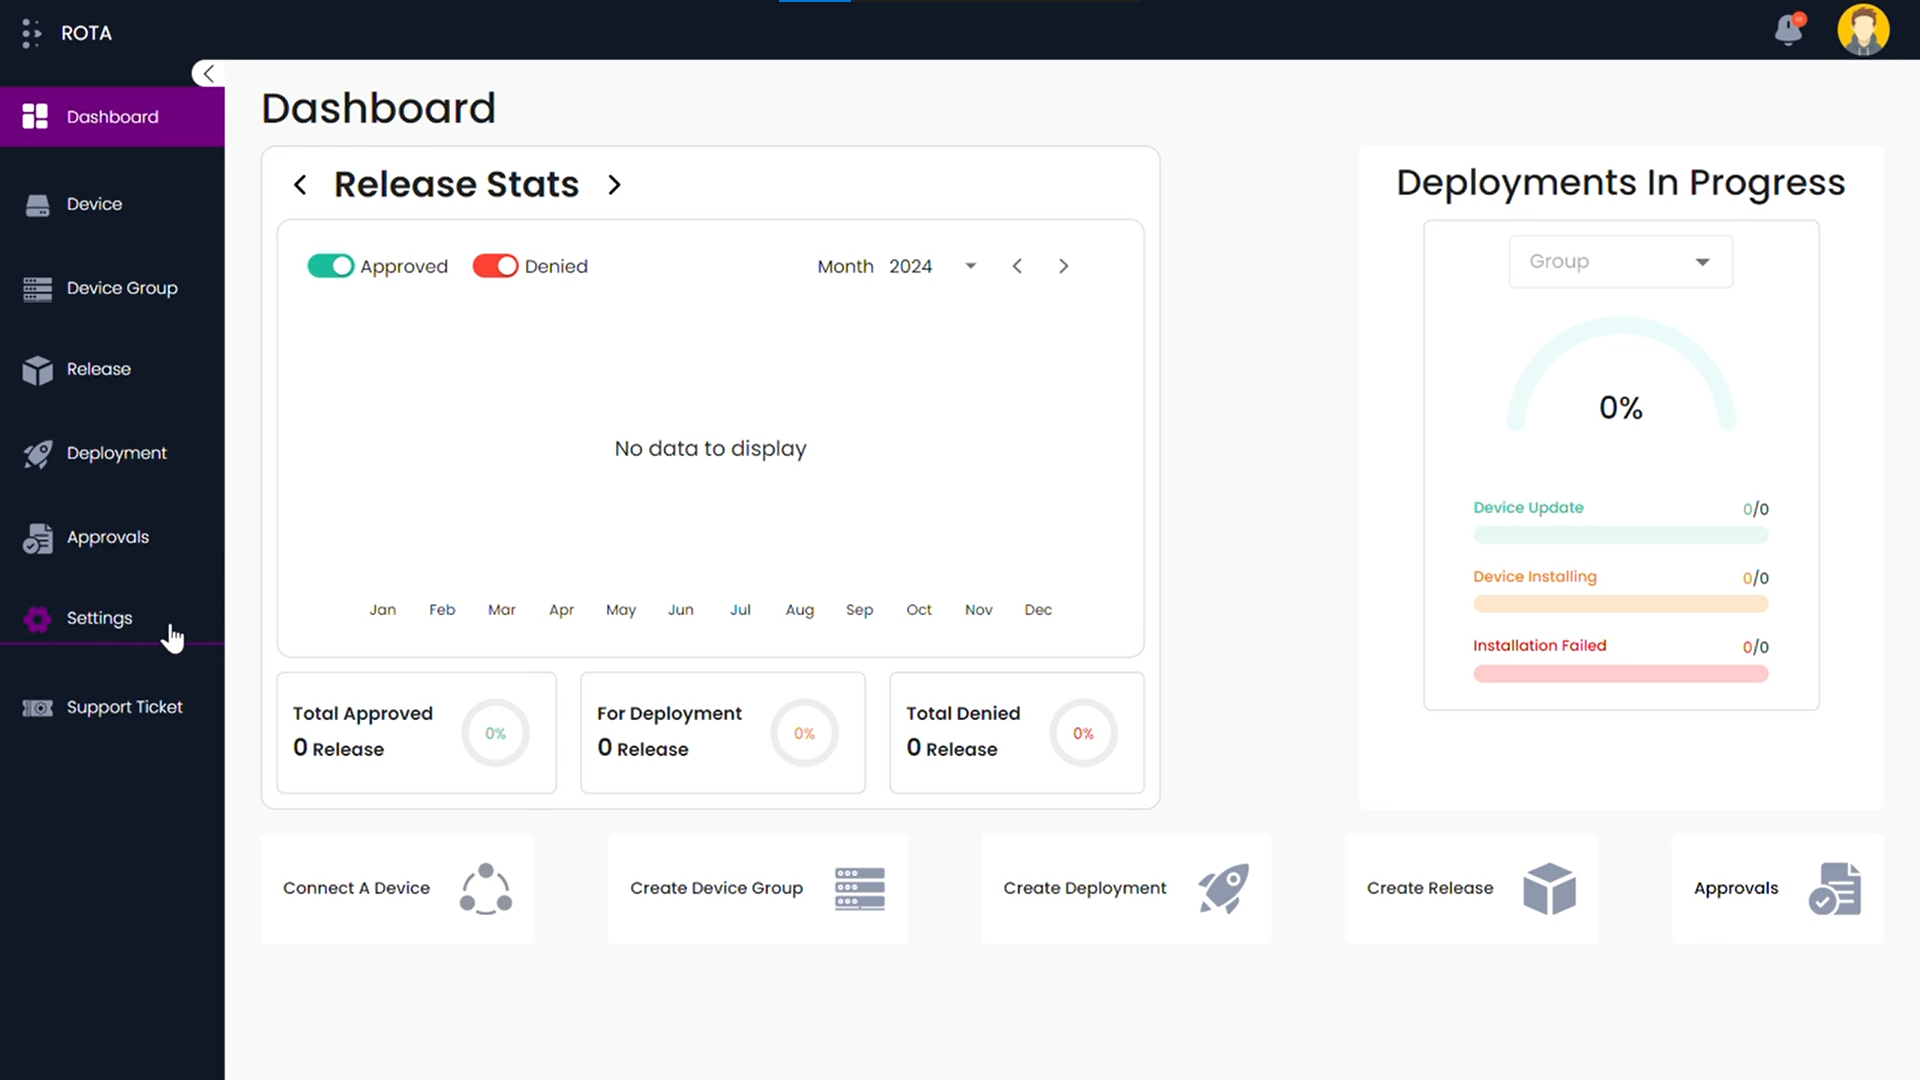
Step 5: Click on “Utils” to view the page.

Step 6: Choose Your Installer
In the “Utils” section, you will see a dropdown menu labeled “Download Client Installer”. Click on the dropdown and select the required device.
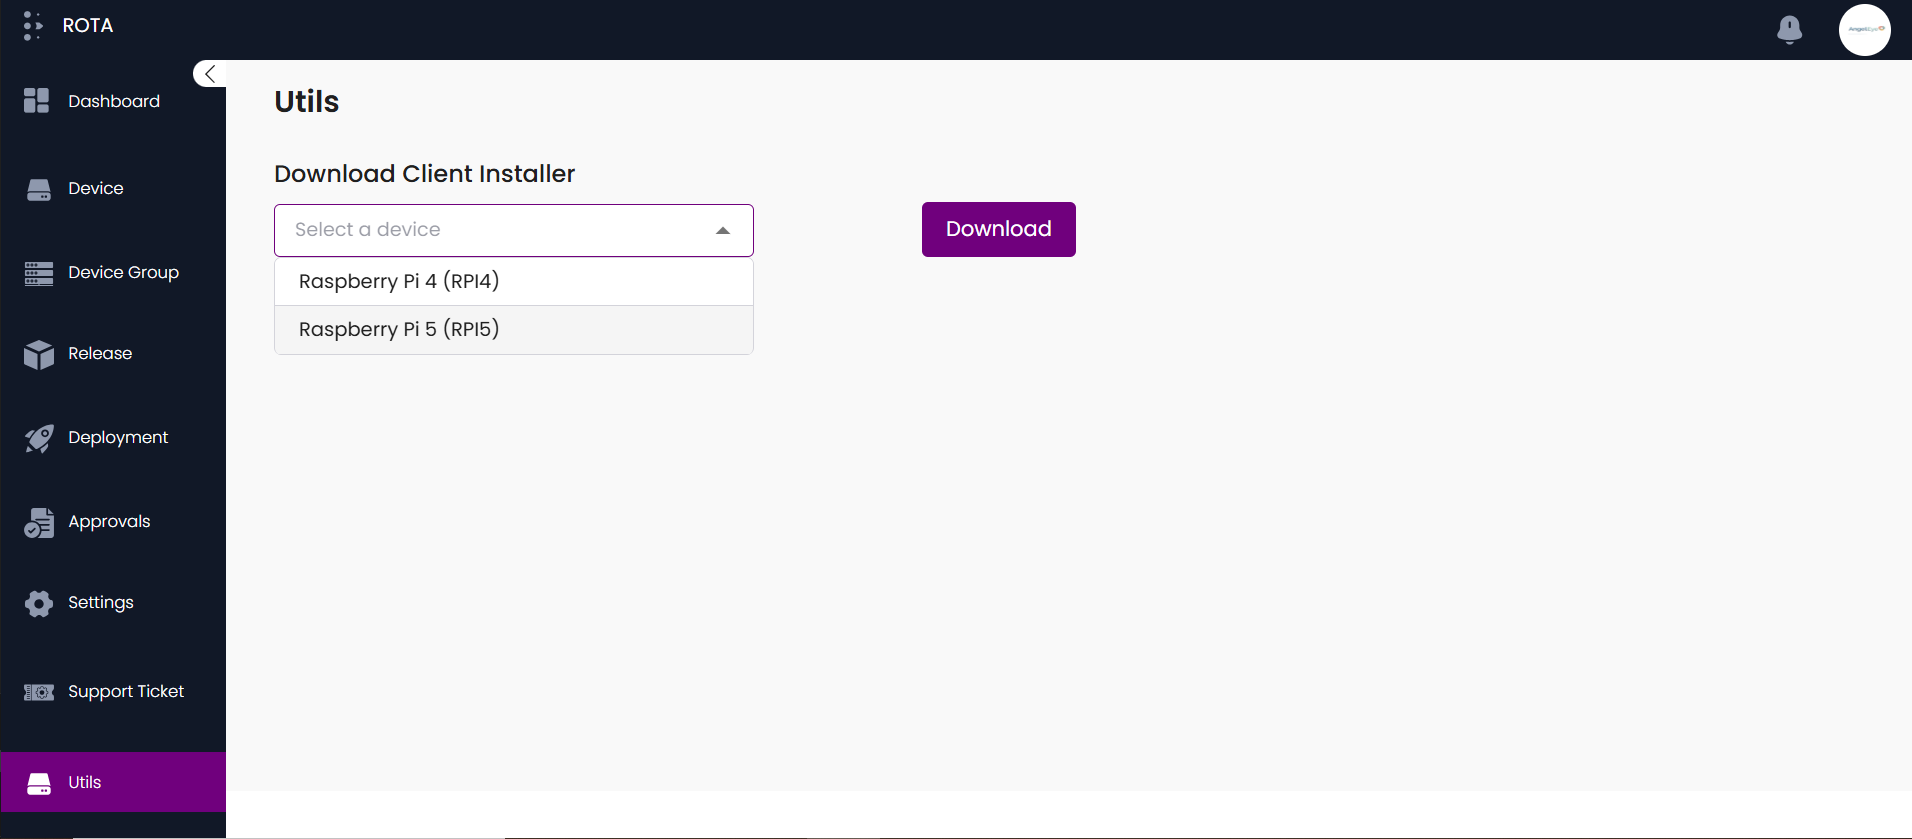
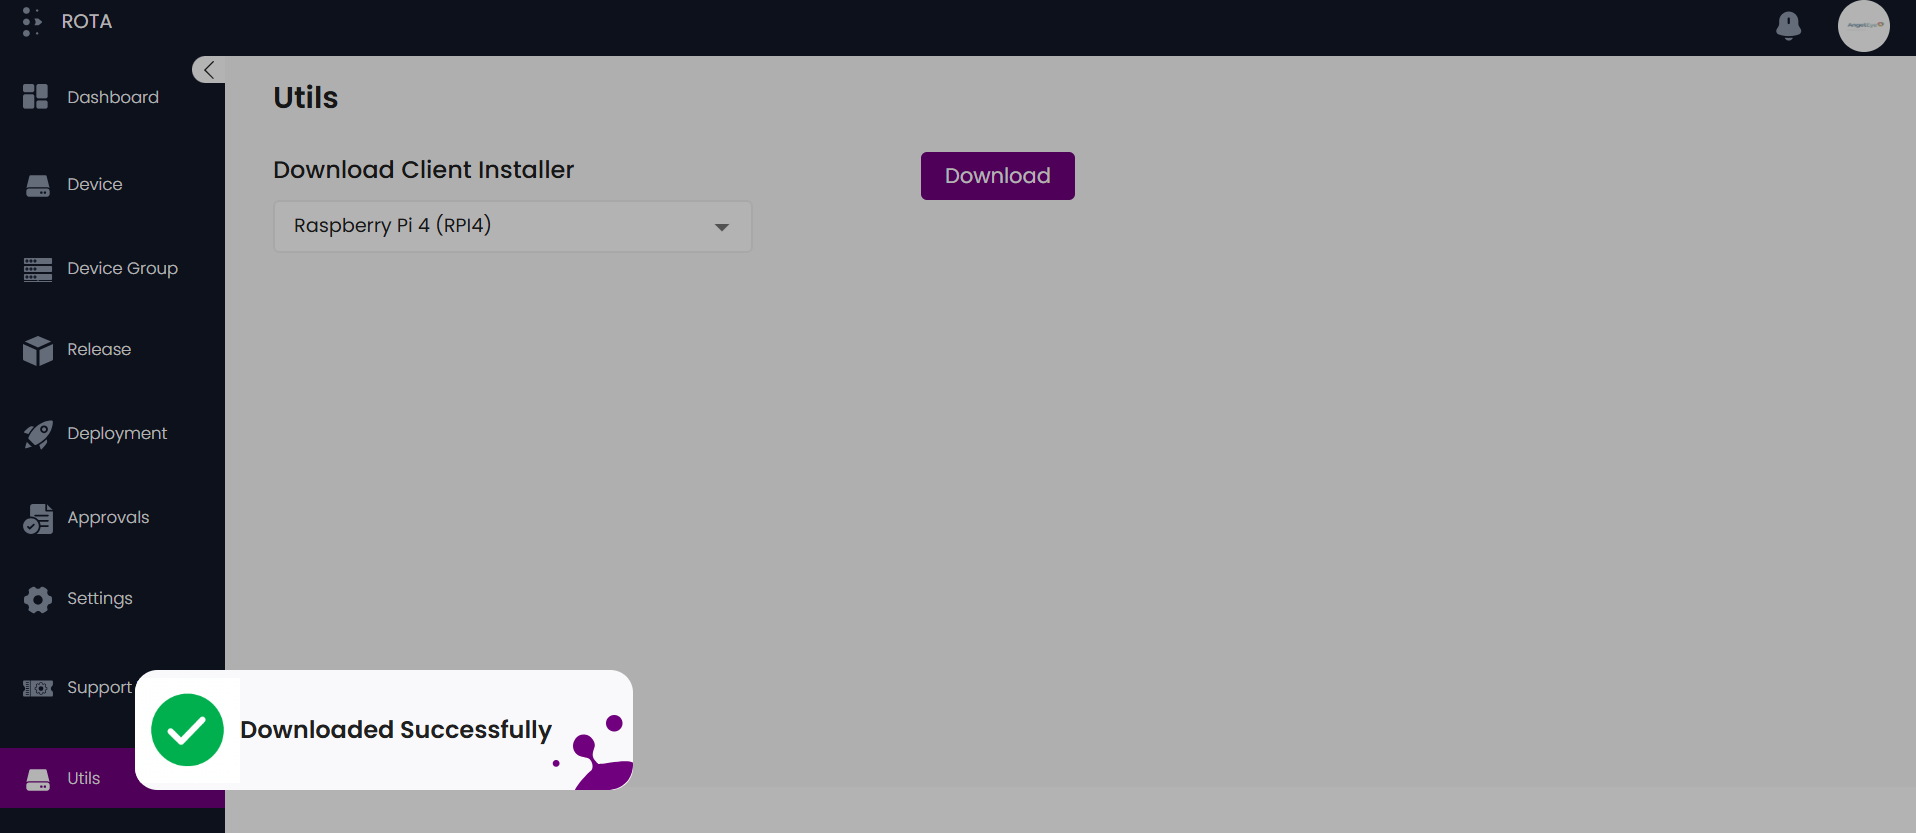
Step 7: Download the Installer
After selecting the appropriate device, click on the “Download” button.
Step 8: Confirmation of Successful Download
Once the download is complete, a notification will appear confirming that the device has been successfully downloaded. You can now proceed with installing the Client Installer.
How to Install the Client Installer
A Step-by-Step Guide for Installing the Client Installer:
- 1. Introduction:
The ROTA-Converter Tool is a powerful utility designed to help users seamlessly convert their Raspberry Pi 4 or Raspberry Pi 5 devices from a standard Debian based operating system to a ROTA-compatible OS. This document provides comprehensive, step-by-step instructions for setting up SD card for ROTA.
- 2. Requirements:
SD card (32GB)
Ubuntu version 22.04
Card Reader
RPI-4&5 Board
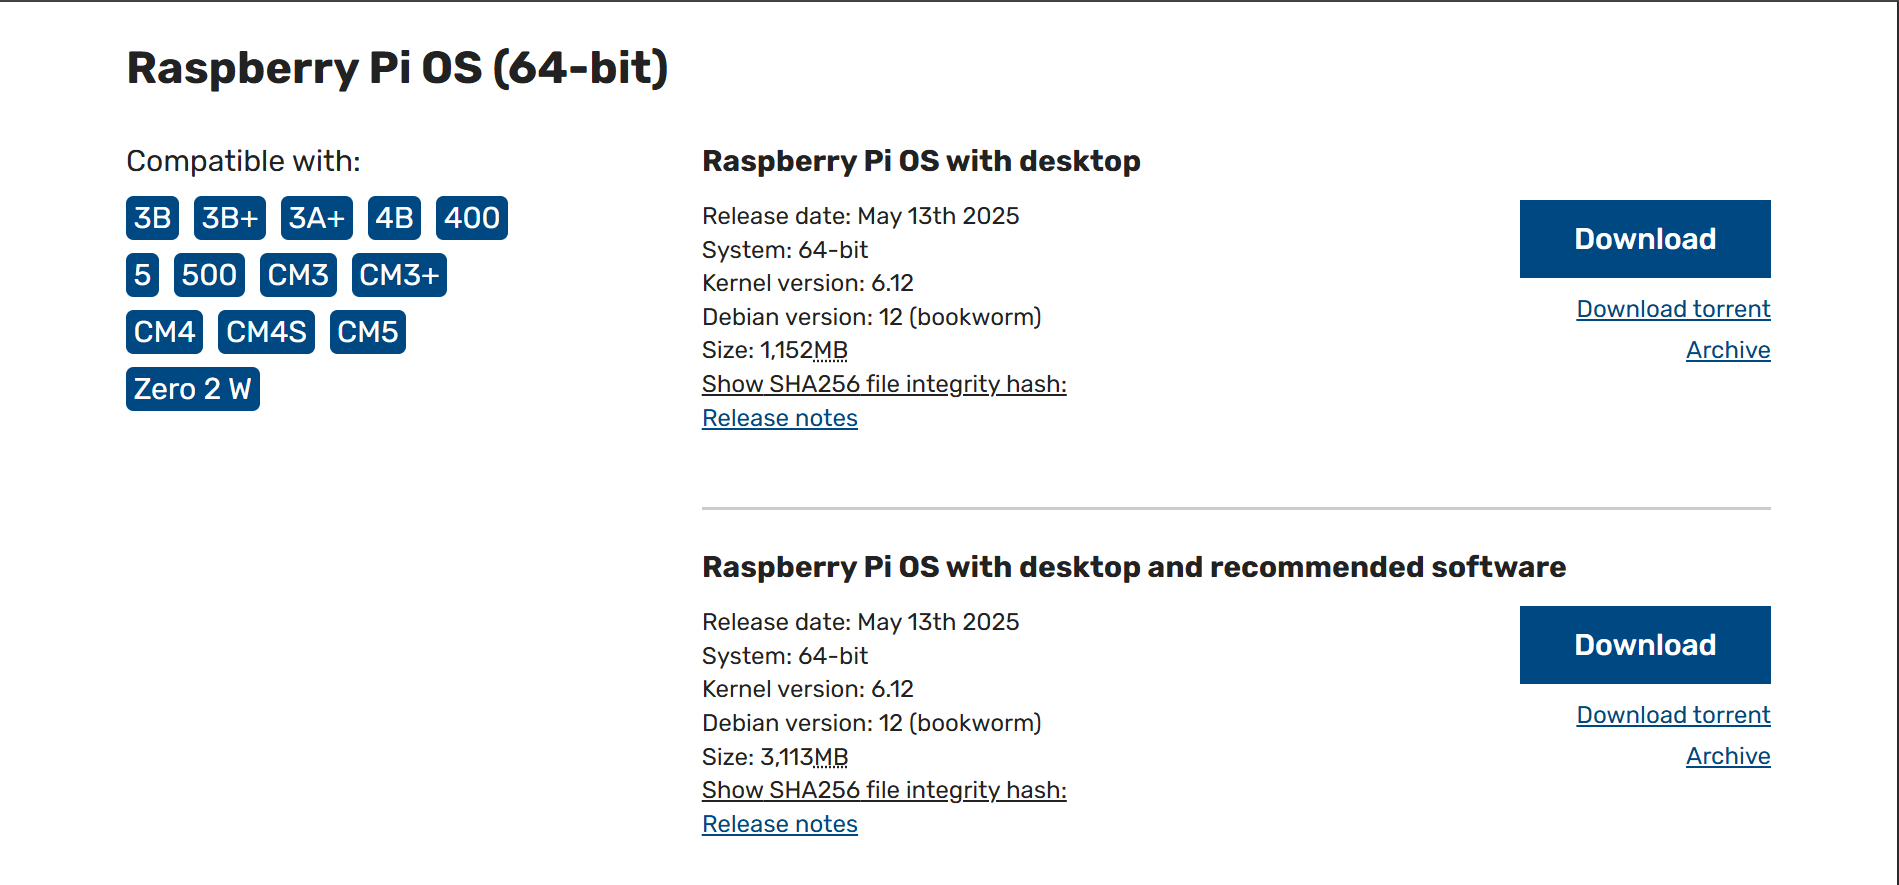
- 3. Download the Raspberry Pi OS:
Visit the official Raspberry Pi website to download the OS: Operating system images - Raspberry Pi
Note
Use the Above link and download the Raspberry Pi OS with desktop under Raspberry Pi OS (64-bit) in the “.img.xz” format.
- 4. Extract the OS into .img Format:
Once the file is downloaded in the .img.xz format, we need to convert it to the .img format. Use the following command to extract the downloaded OS file which should be having extension “.img.xz”
Note
Replace <OS-name> with the name of your downloaded OS file.
xz -d <OS-name>
Example: RPIOS.img.xz
xz -d RPIOS.img.xz
Output: RPIOS.img
5. Download the Converter Tool Directory:
Download the Converter tool. Check on the previous section on how to download the Client Installer.
After downloading, extract the file and move it to the home directory.
Open terminal and Navigate to the home directory of the Converter Tool and set the current path.
export ROTA_PATH=$(pwd)

Open Terminal from Working Directory
6. Copy the Extracted OS Image:
Move the extracted OS image to the “input-img” directory of the Converter Tool:
Create the input-img directory inside the Converter Tool:
mkdir -p <converter-tool>/input-img
Copy the extracted OS image to the input-img directory:
cd input-img
cp RPIOS.img <converter-tool>/input-img/
Replace <converter-tool> with the actual path of the converter tool.
Or Directly copy from File Explorer in input-img folder after creating input-img folder.
Configure the Board Type:
Verify the BOARD_NAME in common_config_rpi_deb
Navigate to the converter tool’s config directory:
cd <converter-tool>/converter/config
Open the common_config_rpi_deb file in a text editor:
nano common_config_rpi_deb
Locate the BOARD_NAME variable.
Set BOARD_NAME based on your Raspberry Pi model:
For Raspberry Pi 4:
BOARD_NAME=raspberrypi4
For Raspberry Pi 5:
BOARD_NAME=raspberrypi5
Save the file and exit (in Nano, press CTRL + X, then Y, and hit Enter).
Note
To choose the board,
Set the BOARD_NAME in common_config_rpi_deb.
Supported board names are raspberrypi4 & raspberrypi5.
7. Run the Converter Tool:
Navigate to the home directory of the Converter Tool,execute the following command:
./setup_tool <os-img>
Note
Replace <os-img> with the name of the extracted OS image file.
After running above command converter-image will be generate in this below path.
output/downloads
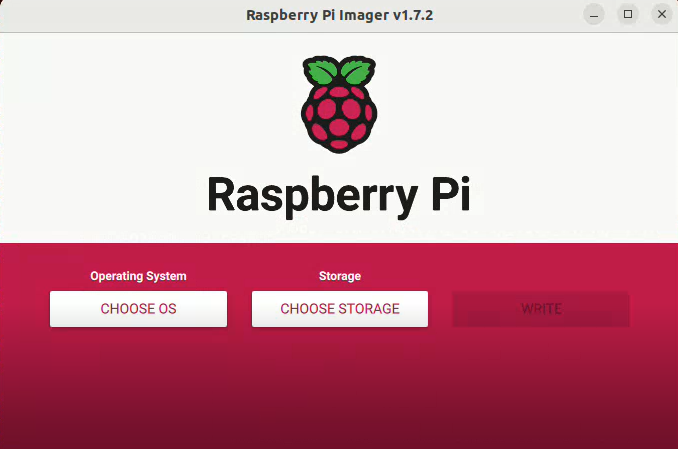
Download the Raspberry Pi Imager:
Visit the official Raspberry Pi website to download the Imager: Raspberry Pi - Imager
Note
Click on Download for Ubuntu for x86.
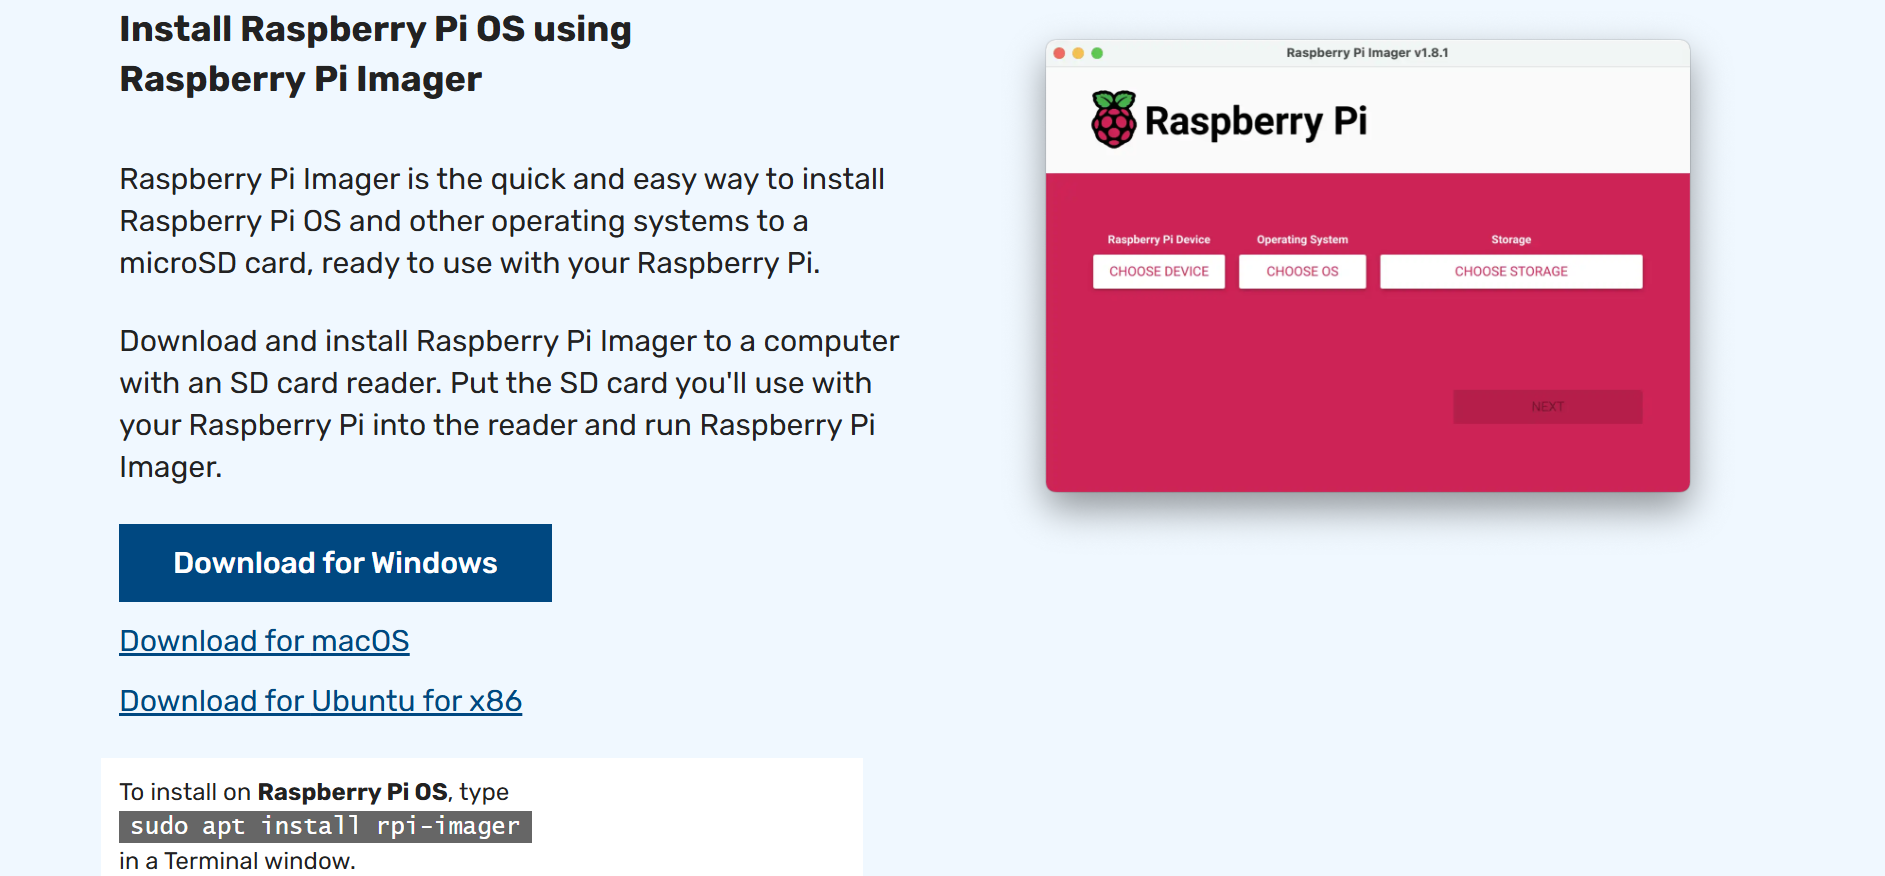
To install on Raspberry Pi OS, type the following code in the Terminal window.
sudo apt install rpi-imager
Now, Insert the SD card into your computer. Open Raspberry Pi Imager and follow the below steps:
Step 1: Click “Choose OS”
Step 2: Select “Use Custom”
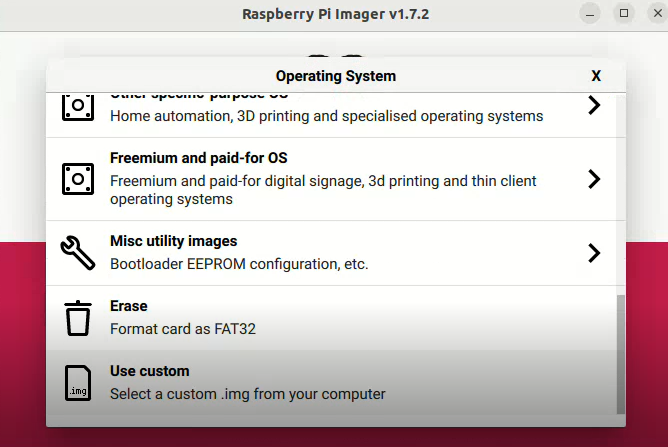
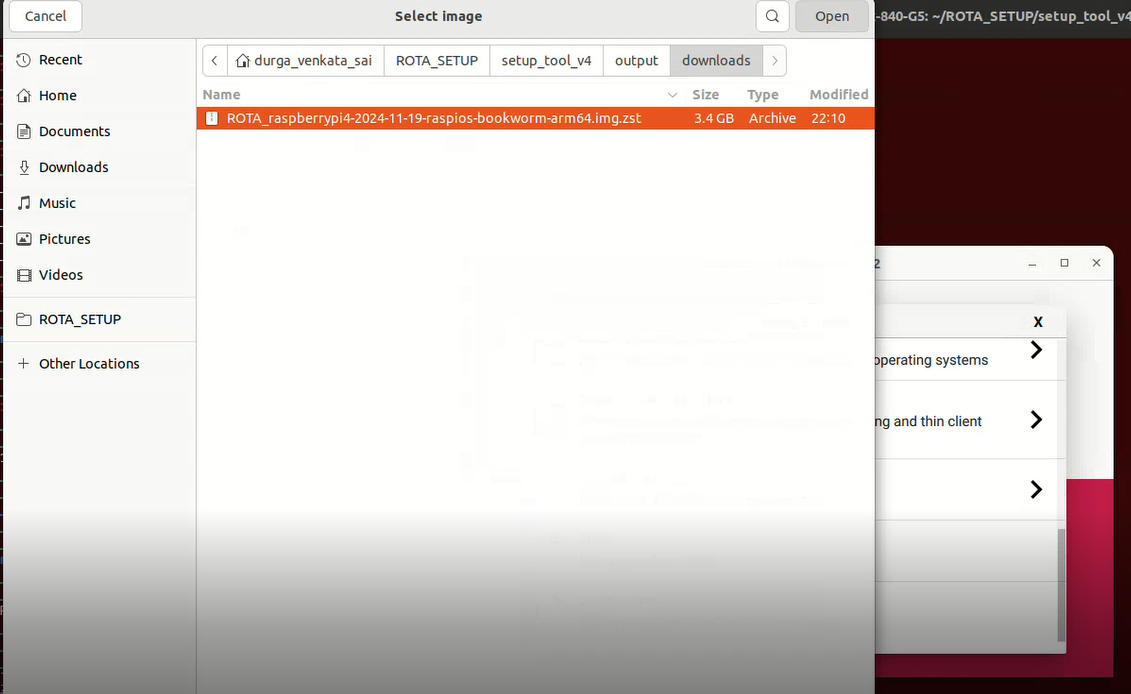
Step 3: Choose the converted .img file.
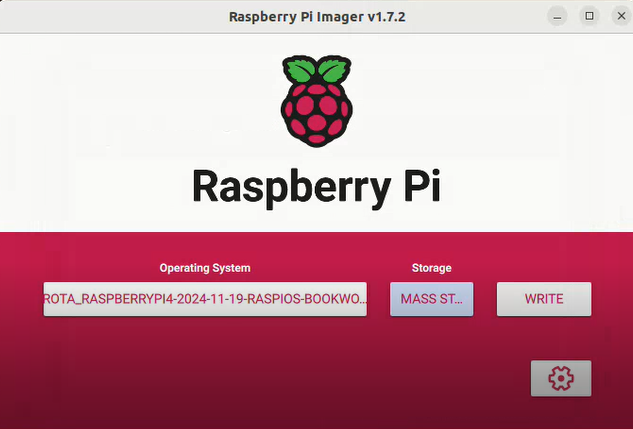
Step 4: The selected file will be displayed under the Operating system field. And Click on “Choose Storage” button.

Step 5: Select the inserted SD card.

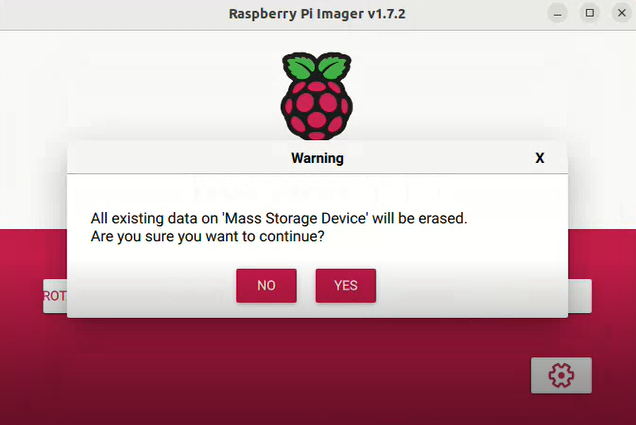
Step 6: The selected SD card will be displayed under the Storage. And Click “Write” to flash the OS onto the SD card.
Step 7: The popup alert for erasing the existing data will appear. Click on “Yes” to continue.
Step 8: Flashing get started. If you want to cancel the process, Click on “Cancel write” or else wait until the flashing gets complete.

Step 9: Once flashing is complete, remove the SD card from your computer.
Step 10: Insert the SD card into the Raspberry Pi board.
Step 11: Power on the Raspberry Pi and let it boot up.
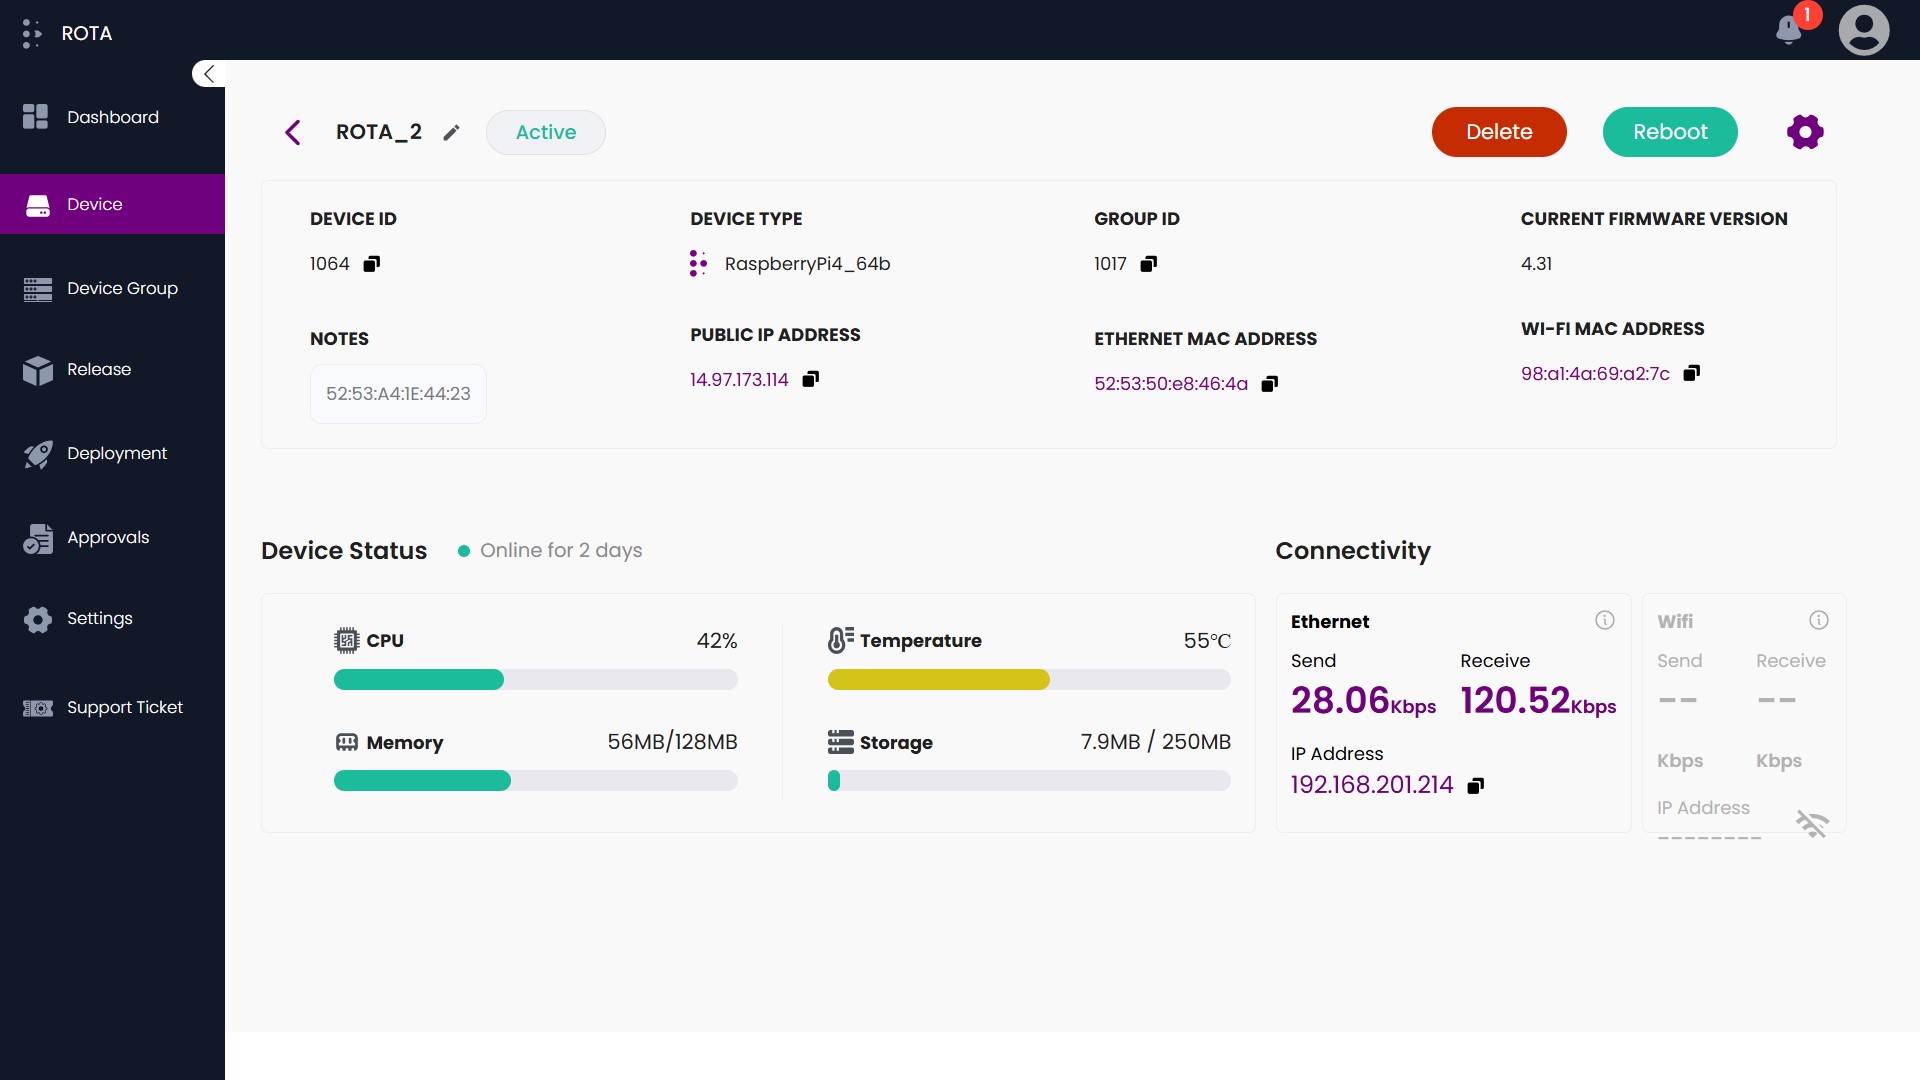
Step 12: Connect to the ROTA Portal:
Open the ROTA Portal and Log in using the credentials.
For Adding new device, Click on the “New Device” and add the “Device type” and choose your Raspberrypi device.
Connect the device.
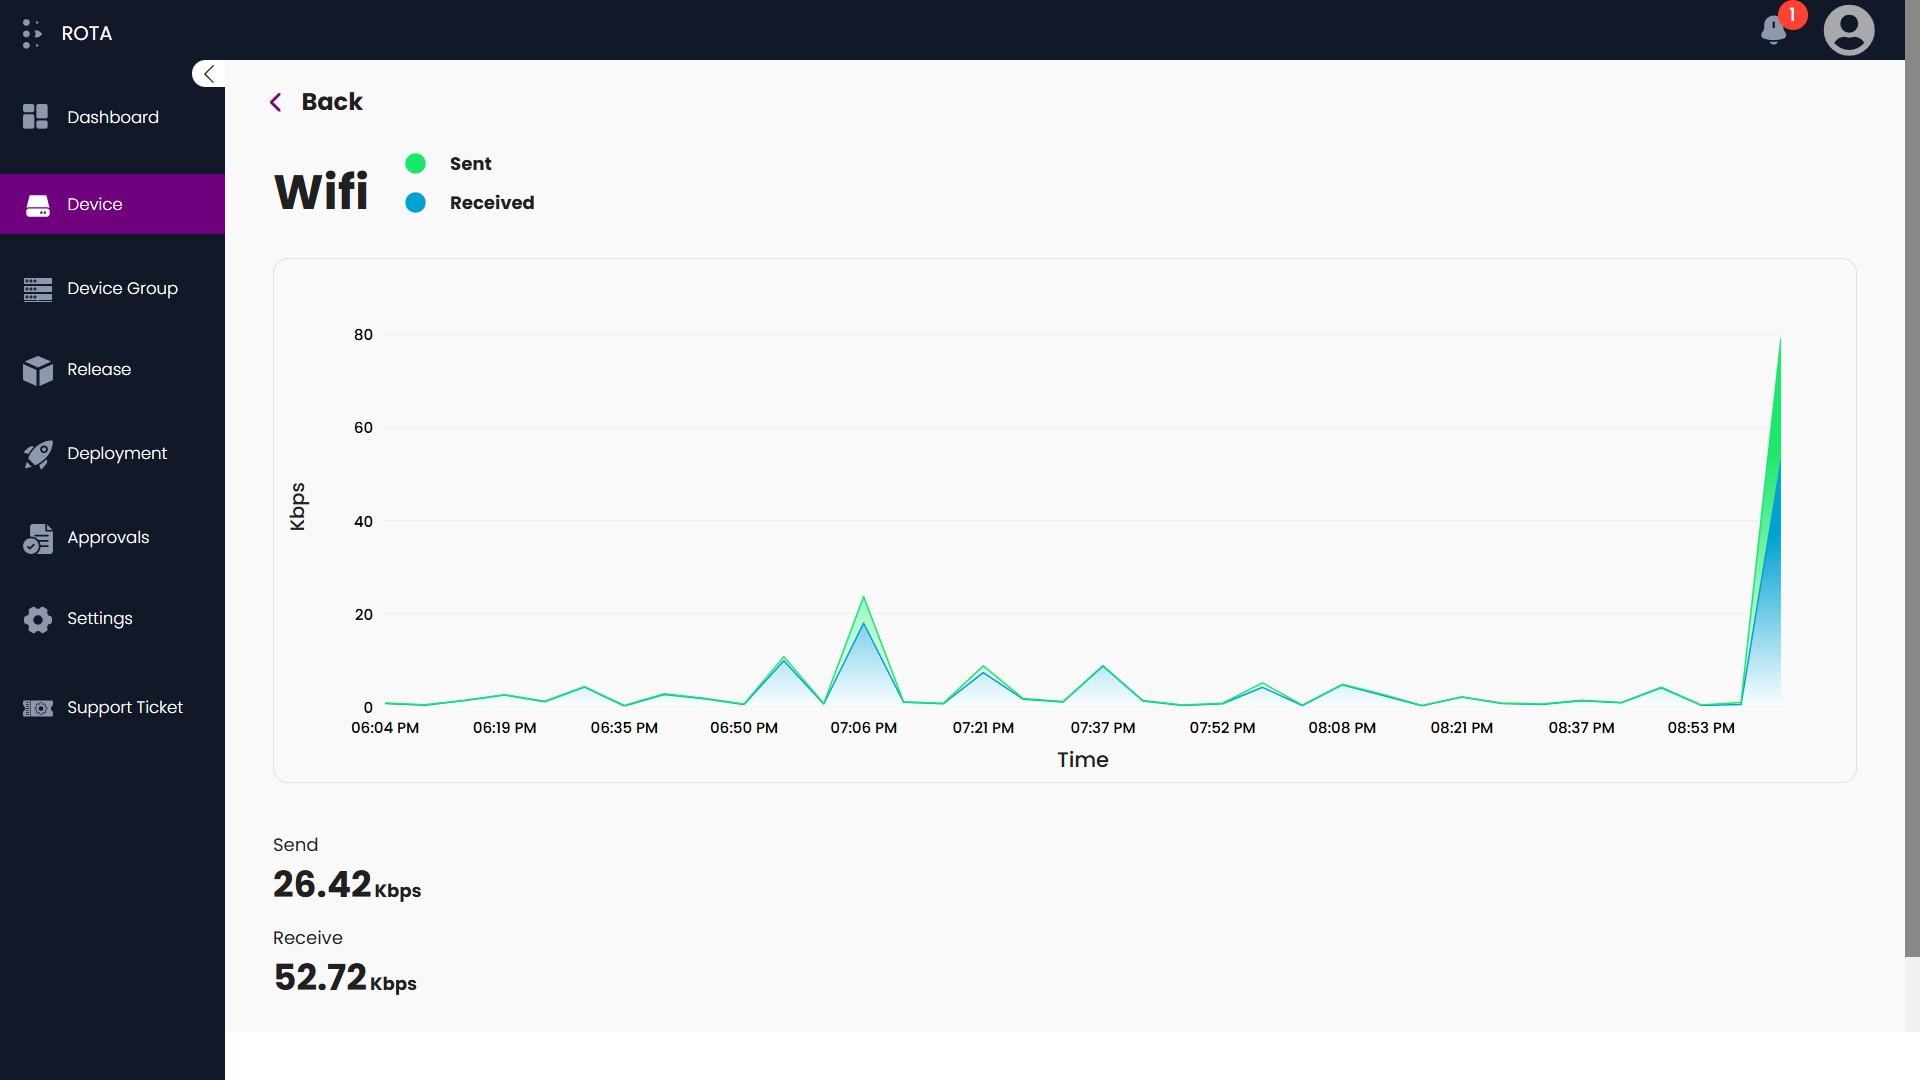
After adding the device, check the device details and wifi status of RPI.
How Client Installer works
A Step-by-Step Guide for How Client Installer works :
Step 1: Download the OS Image you want to convert. Copy the OS image file to the following path in your ROTA setup.
$ROTA_Setup/input/img/<OS_file_name_which_need_to_be_converted>.img
Ensure that the file name is correctly typed and includes the .img extension.
Step 2: The setup tool will parse the file.
$ROTA_Setup/converter/config/common_config_rpi_deb
This file contains the Board name needed for the conversion process. The tool will extract the relevant board information from this configuration file.
Step 3: Then, It will create the following mount directories and will mount the OS image which is downloaded
/mnt/os-boot
/mnt/os-root
Step 4: The tool will create a new empty image file. The size of the new image will be calculated as,
(Size of the Input OS Image) + (Root filesystem size of the input image) + 200MB
This image will serve as the destination for the OS data during the conversion.
Step 5: The tool will split the new image into multiple partitions based on the data from the original image.
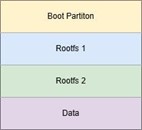
Step 6: Copy file of OS input image in those partitions, Files Related. Please find the below Partition table below for reference.
Step 7: It will download the Installer files from the ROTA portal and install those files in both Rootfs partitions.
Step 8: Once all the files are installed and the system is set up, the tool will compress the image. The image will be compressed in the .img.zst format.
The compressed image will be placed in the following output folder:
$ROTA_Setup/output/downloads