Organization Approvals
A Step-by-Step Guide for navigating to Approvals on Settings Module
Step 1: Select Settings from the Sidebar.Under the Organization section, click on the Approvals module.
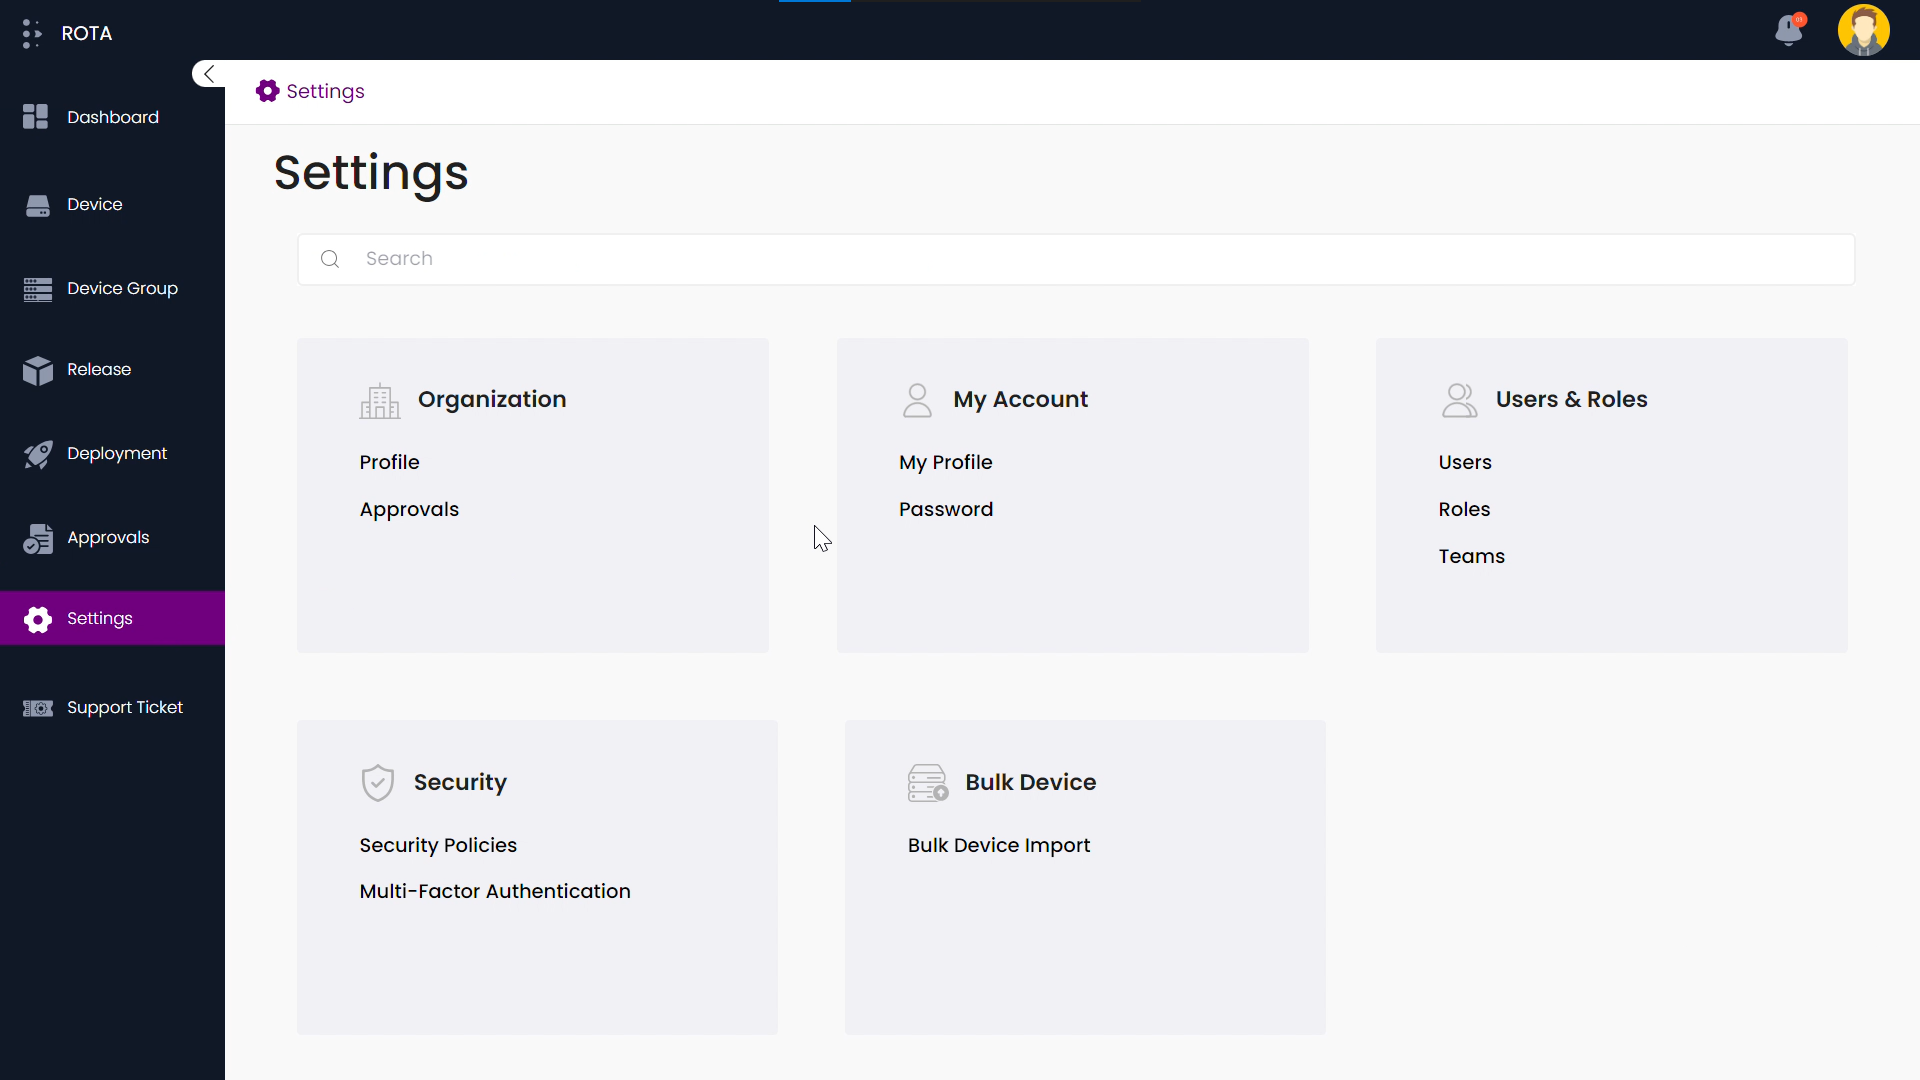
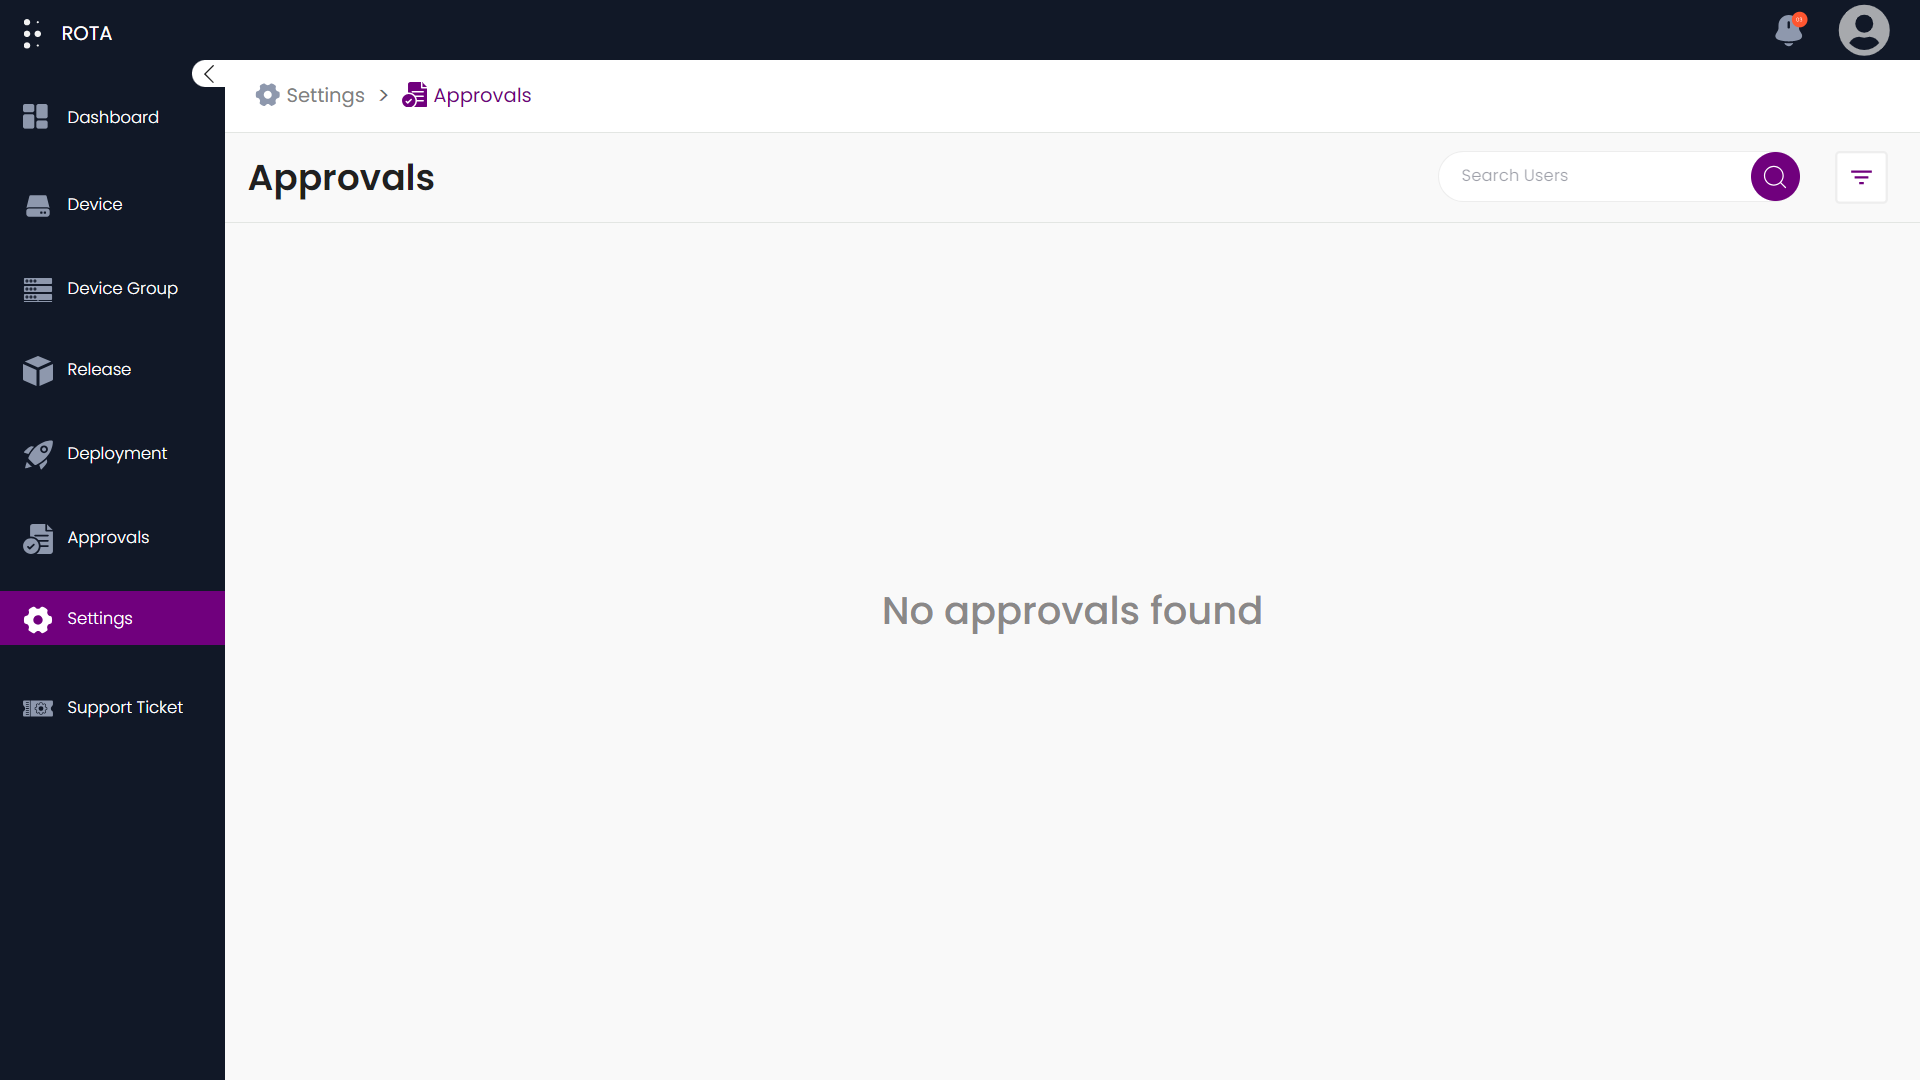
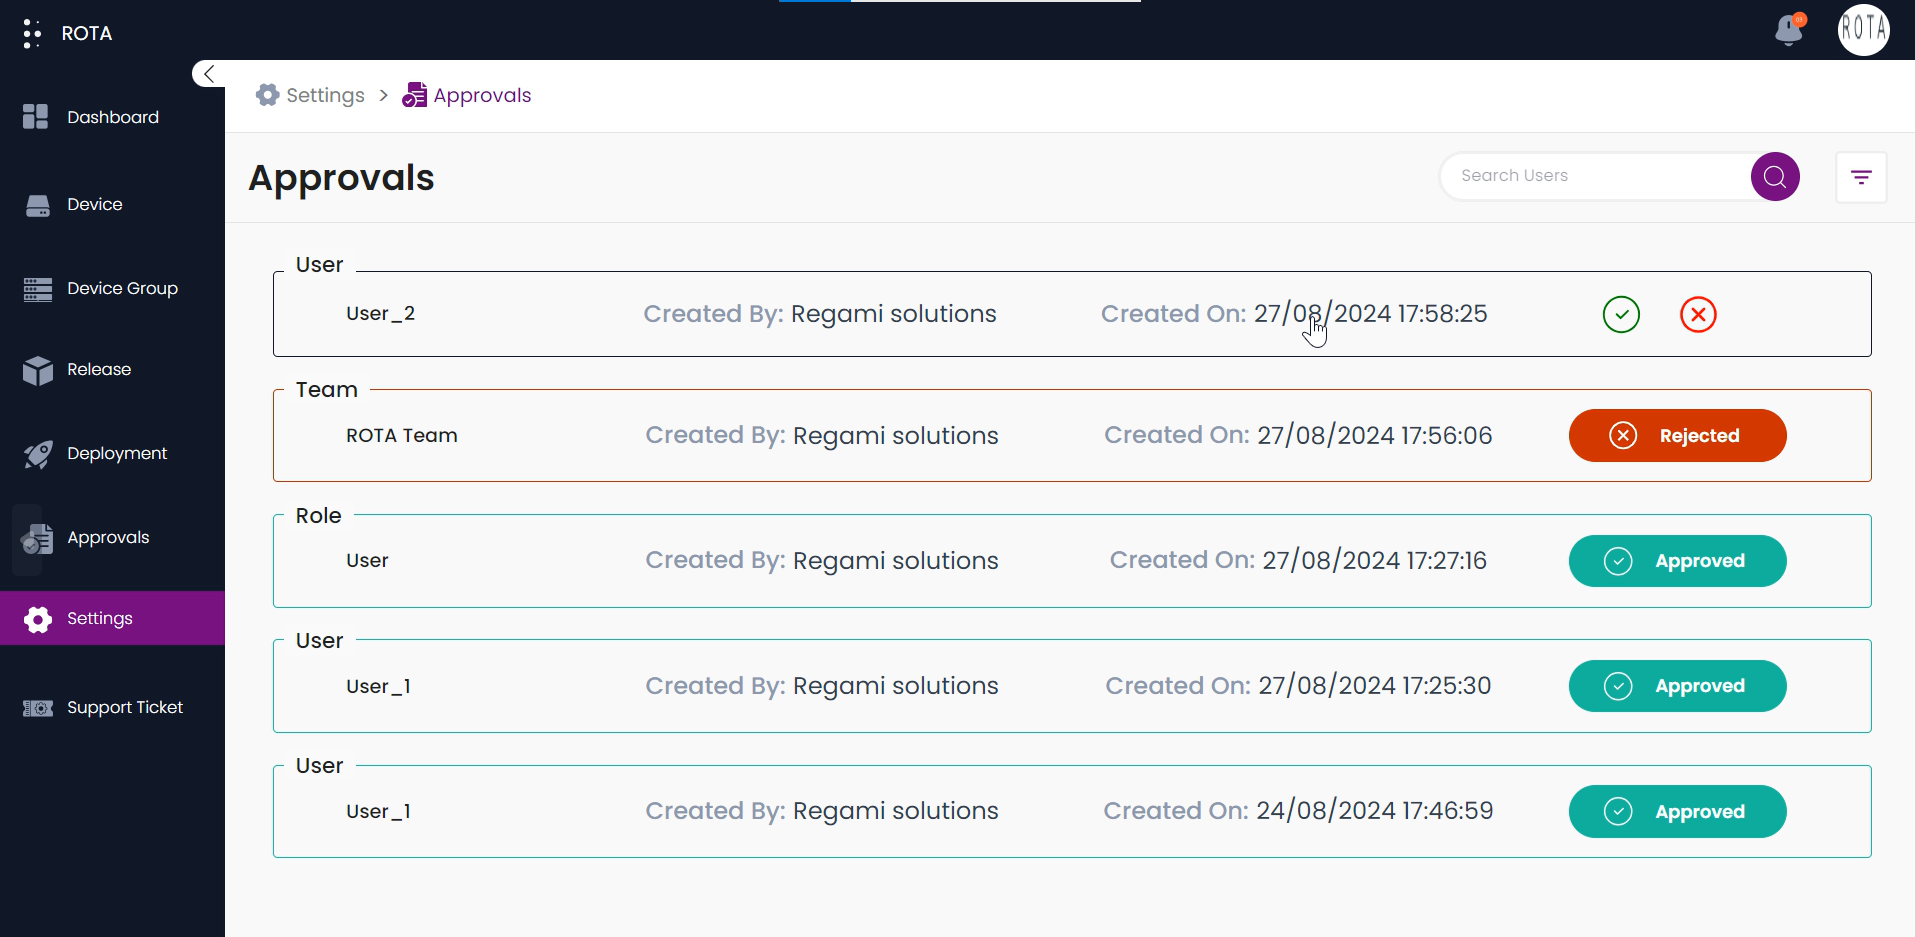
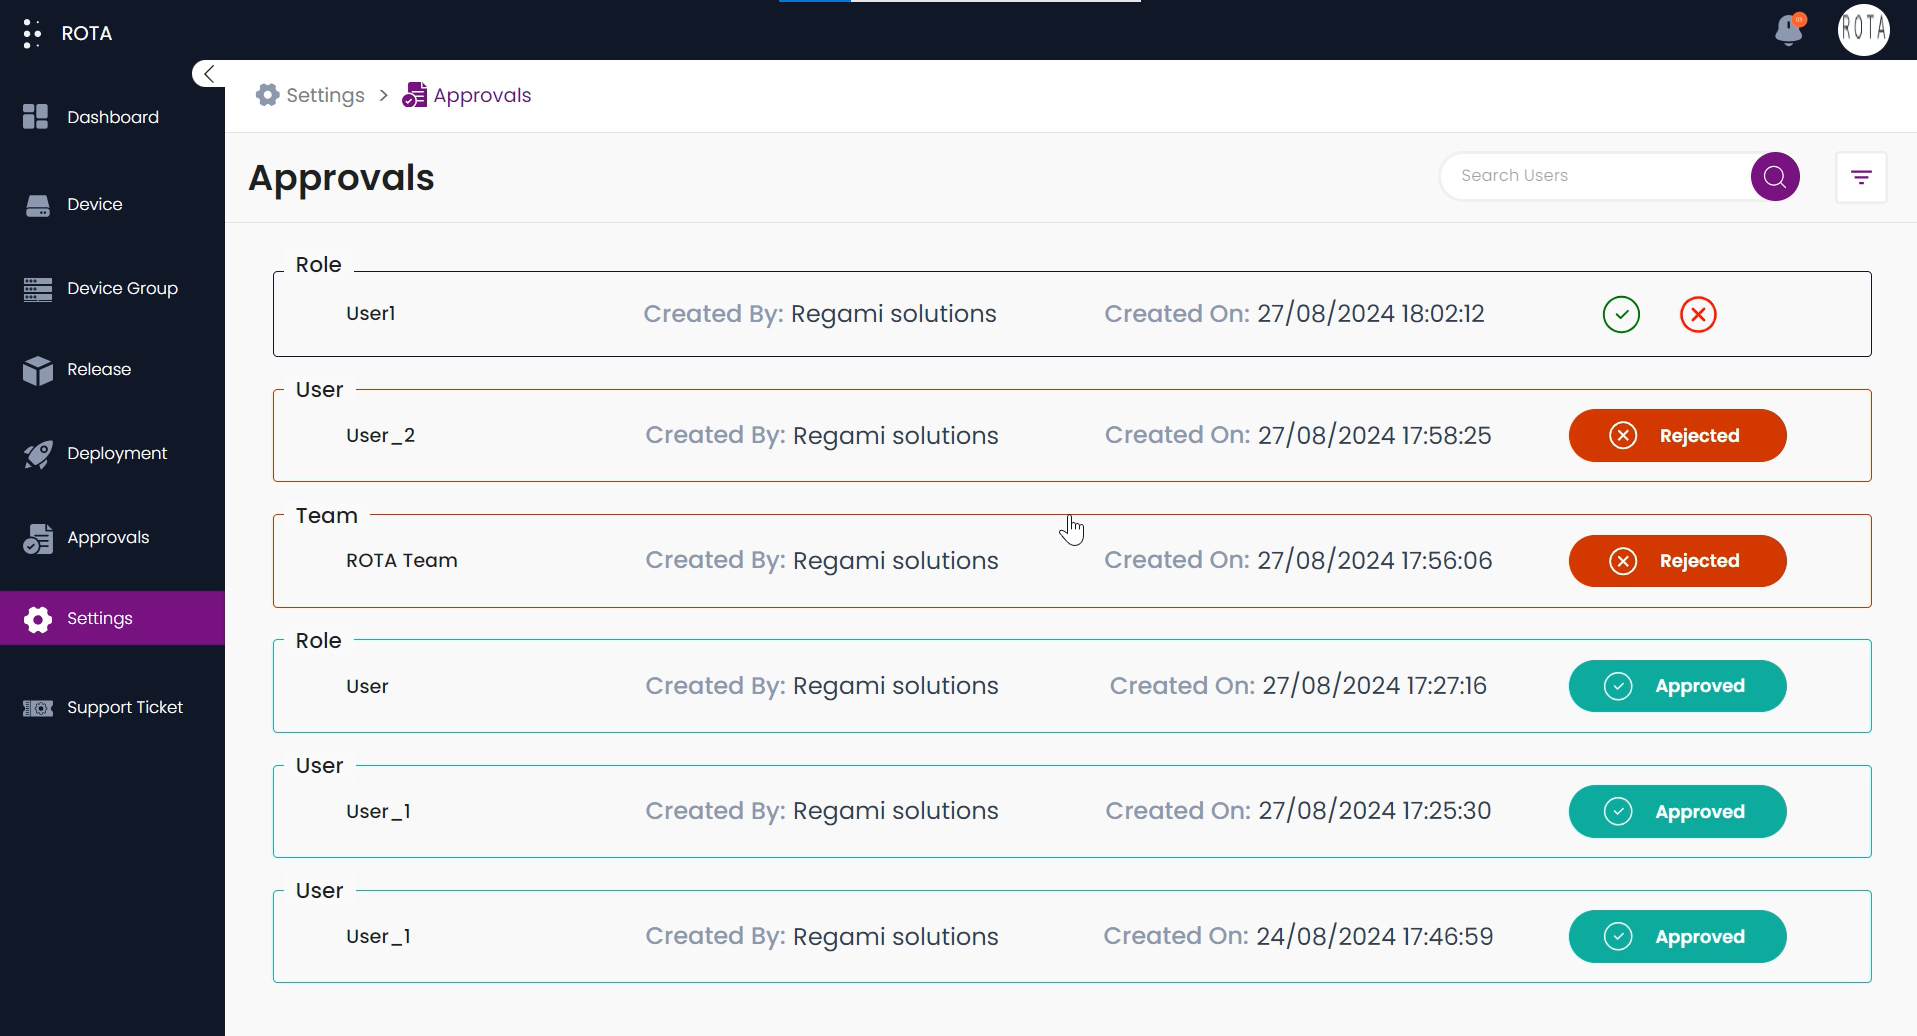
Step 2: The list of approvals available in the admin portal will be displayed.
Approve/Reject Users
A Step-by-Step Guide for approving a new user in Approvals under Settings module
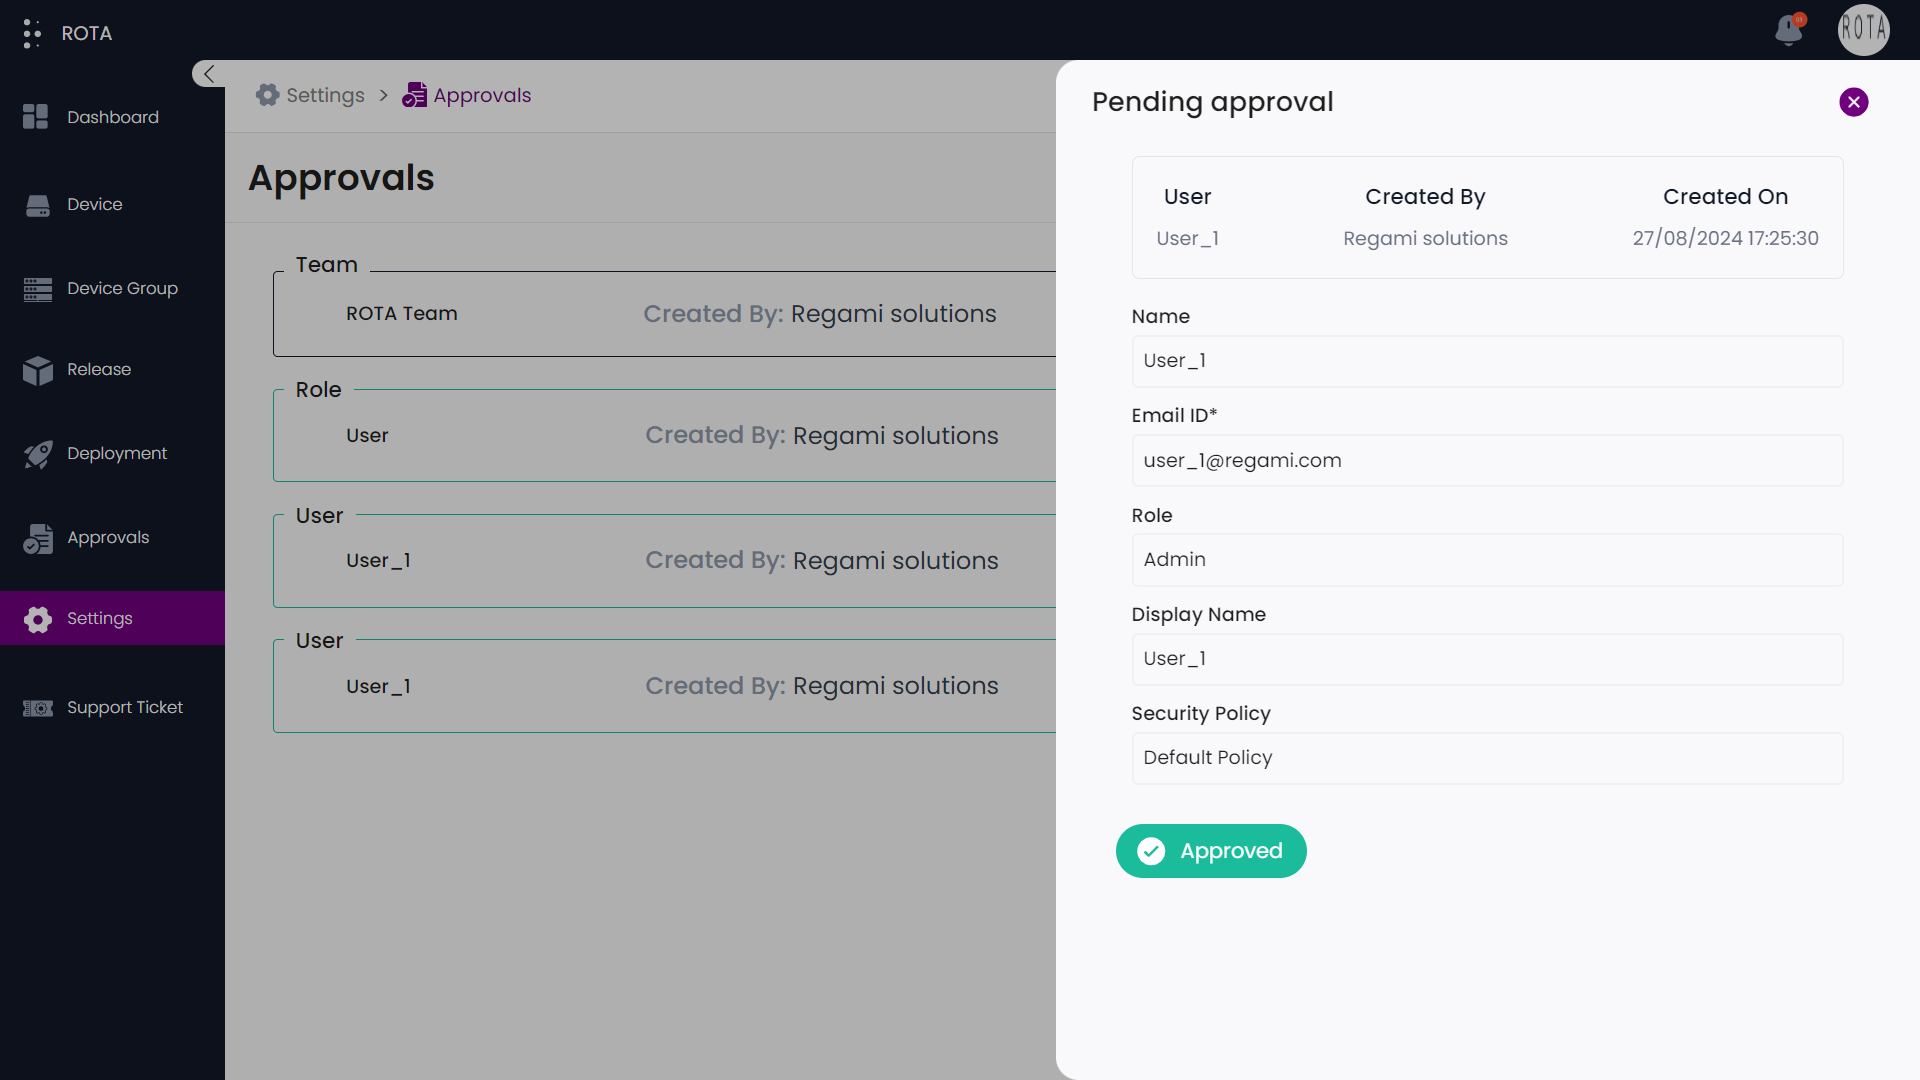
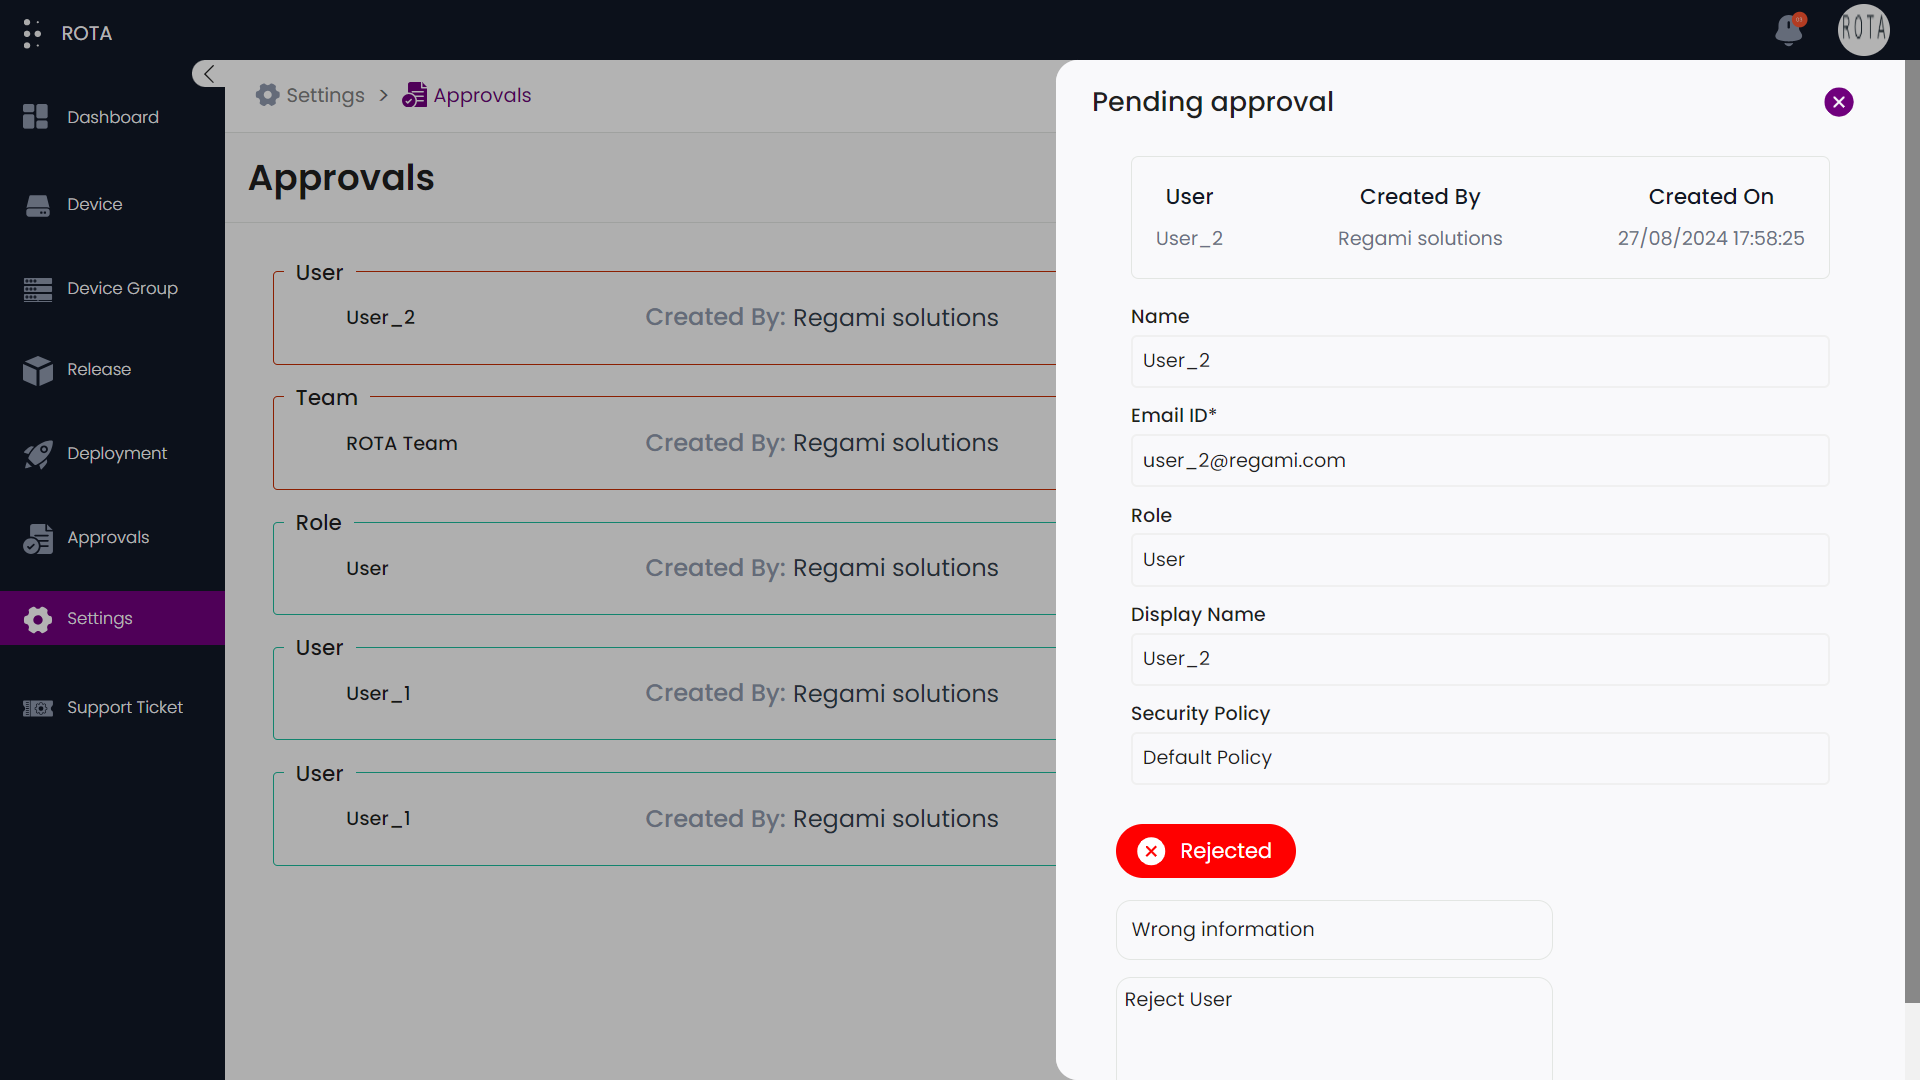
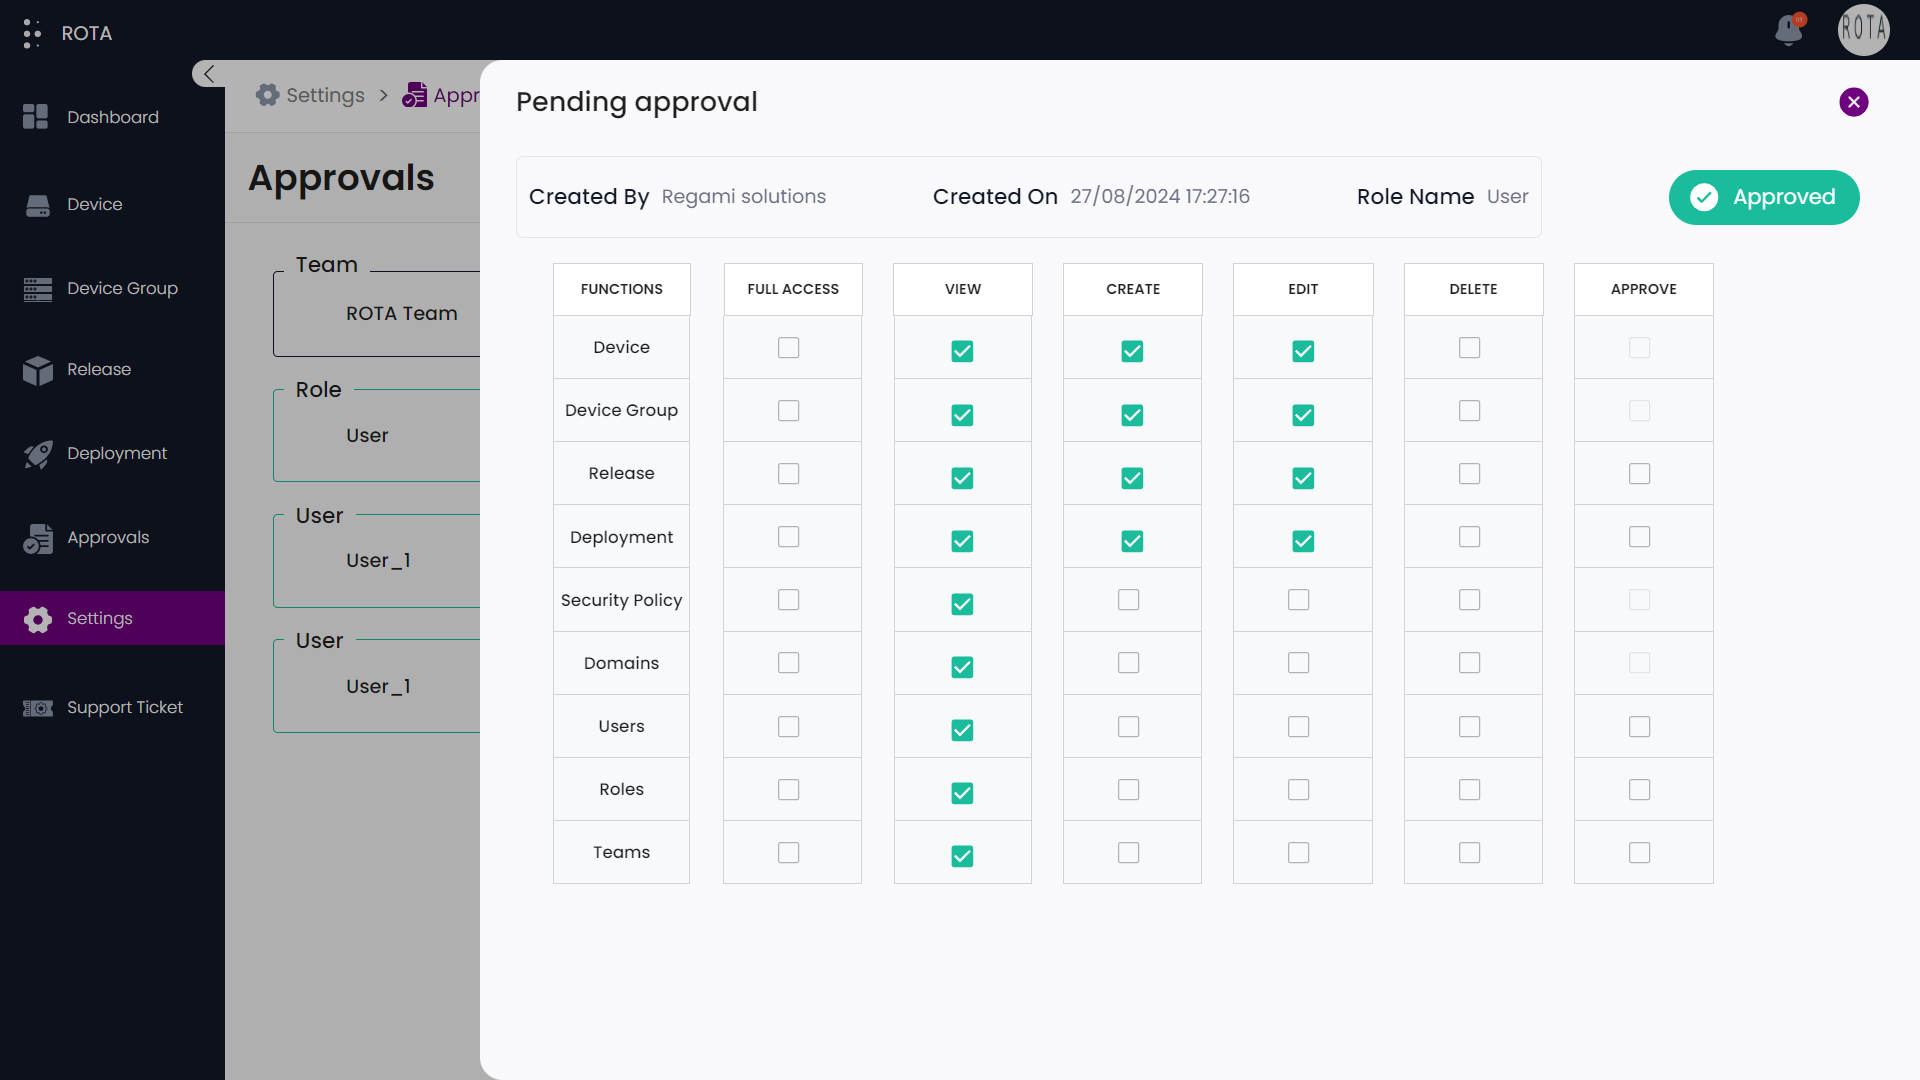
Step 1: Click on the newly created user, which will be displayed in the Approvals section.
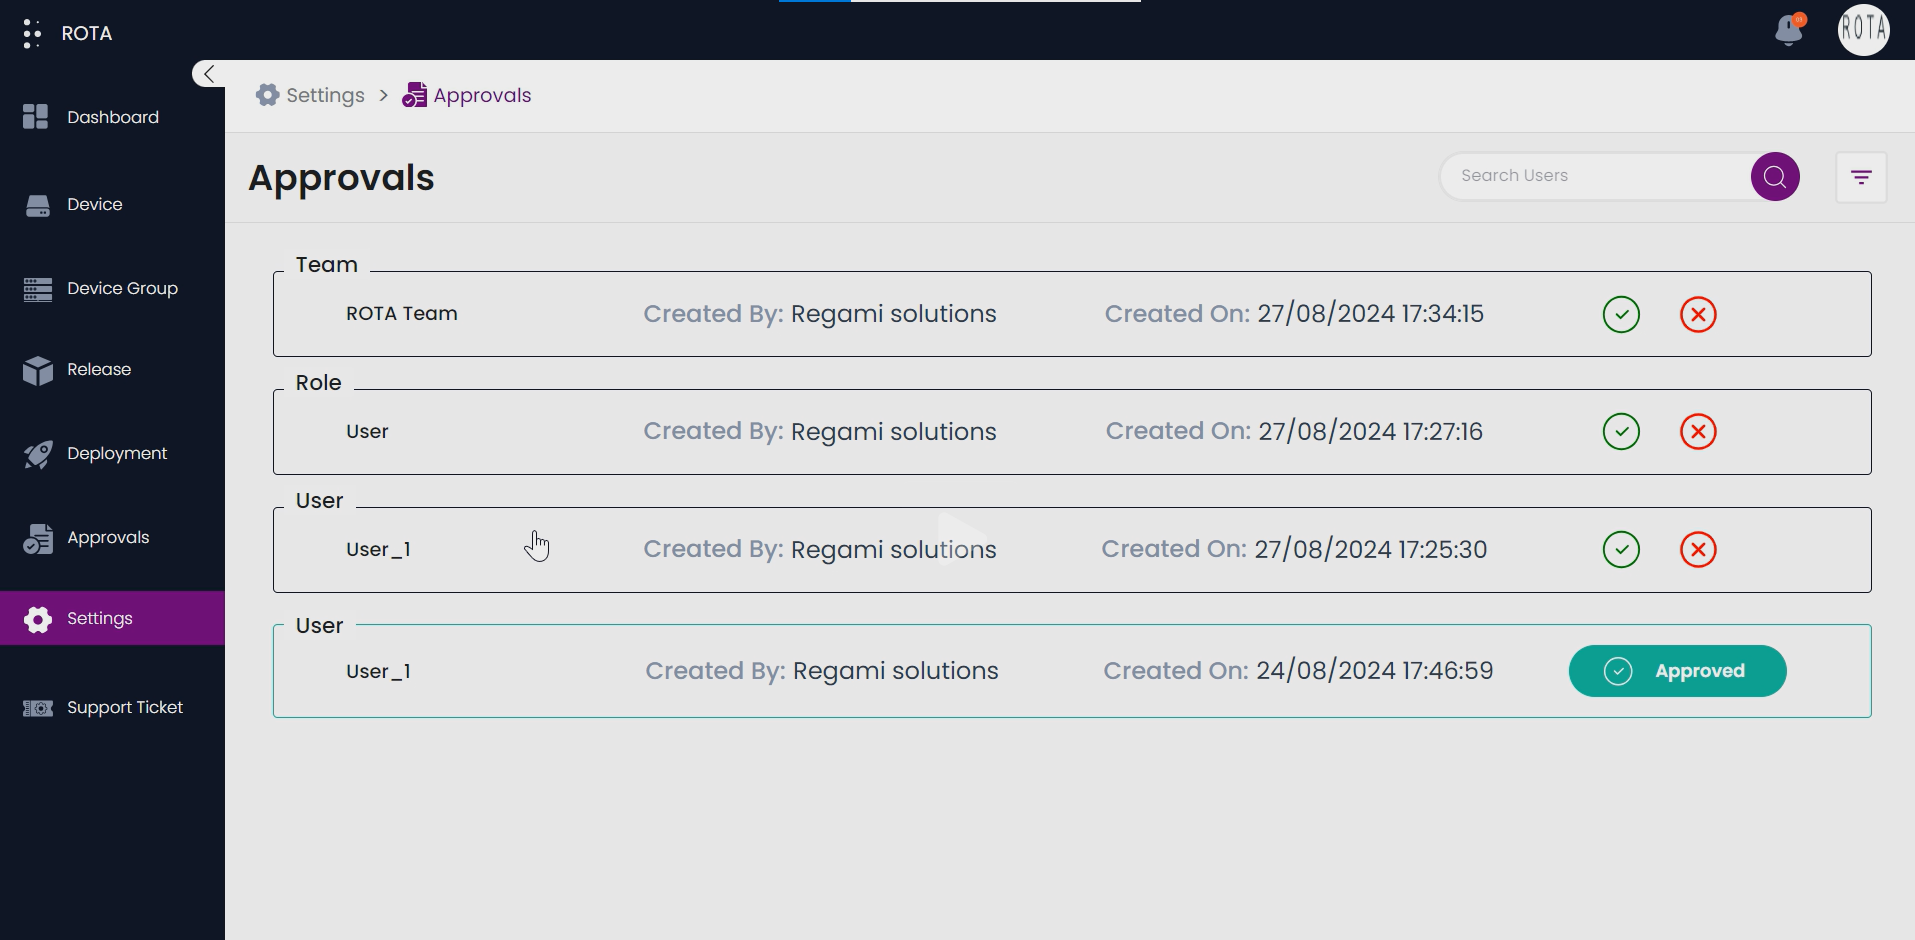
Step 2: Click on “Approve” Button.
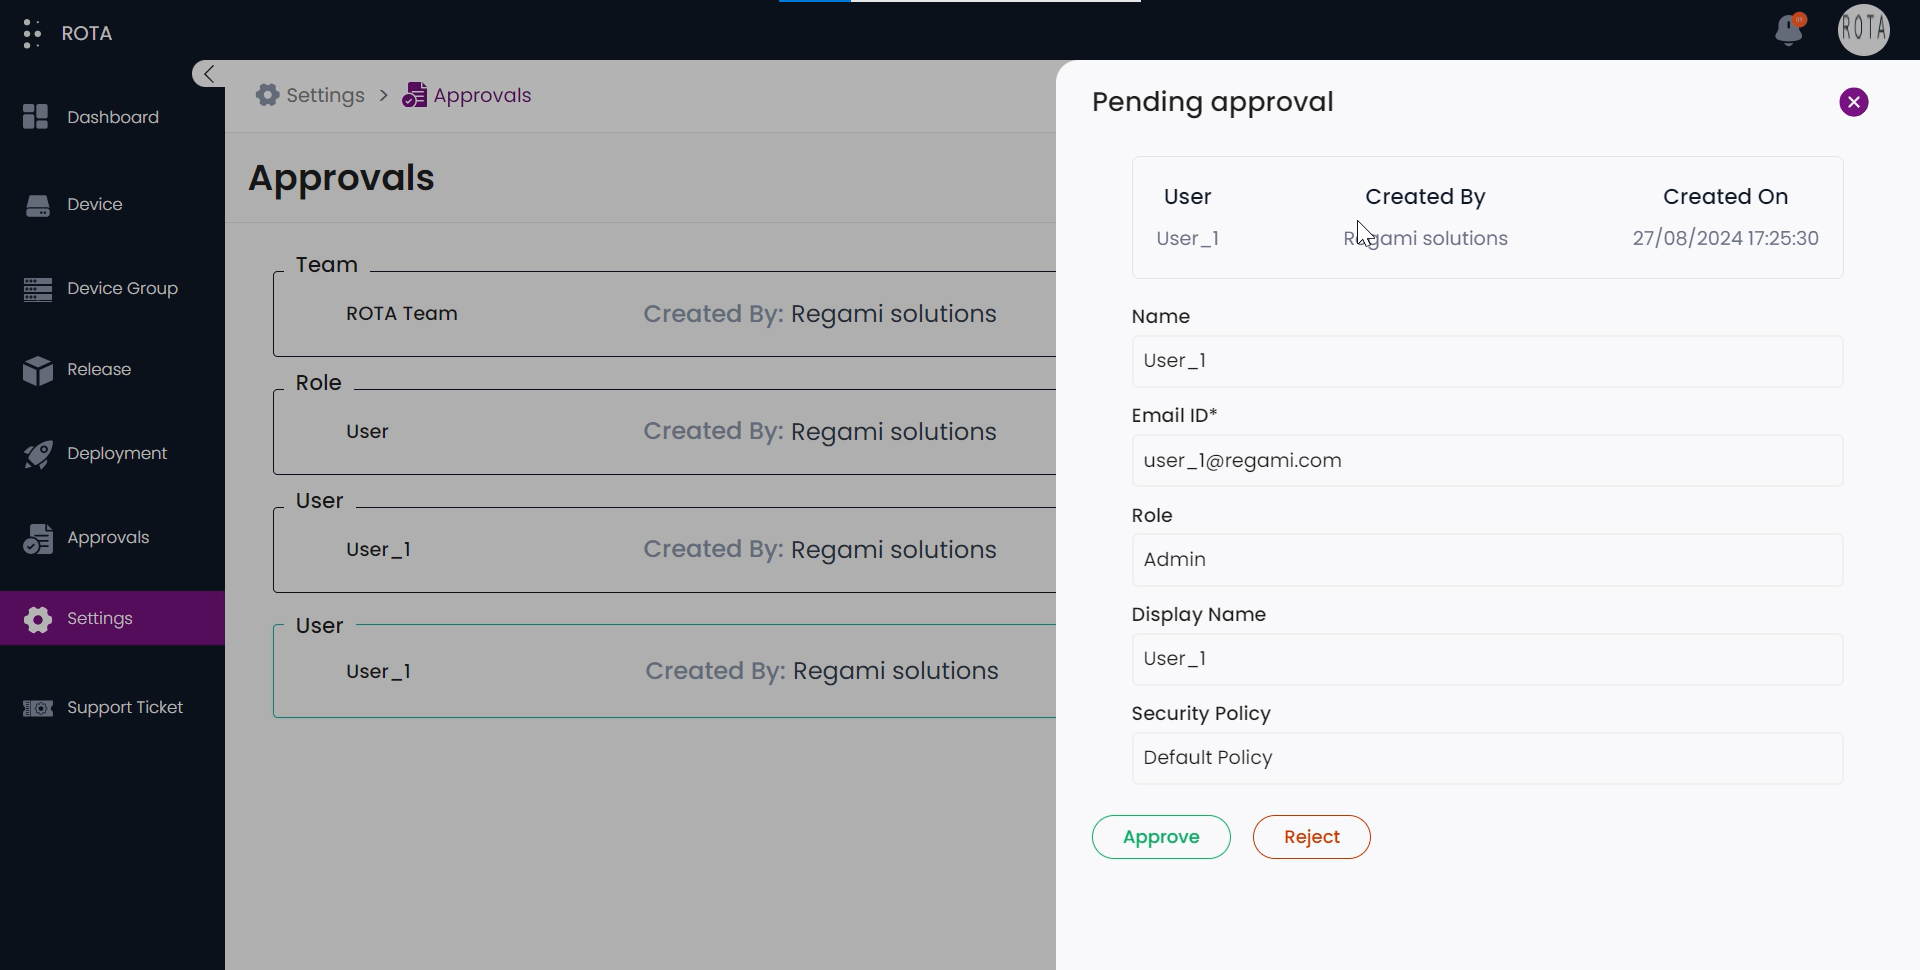
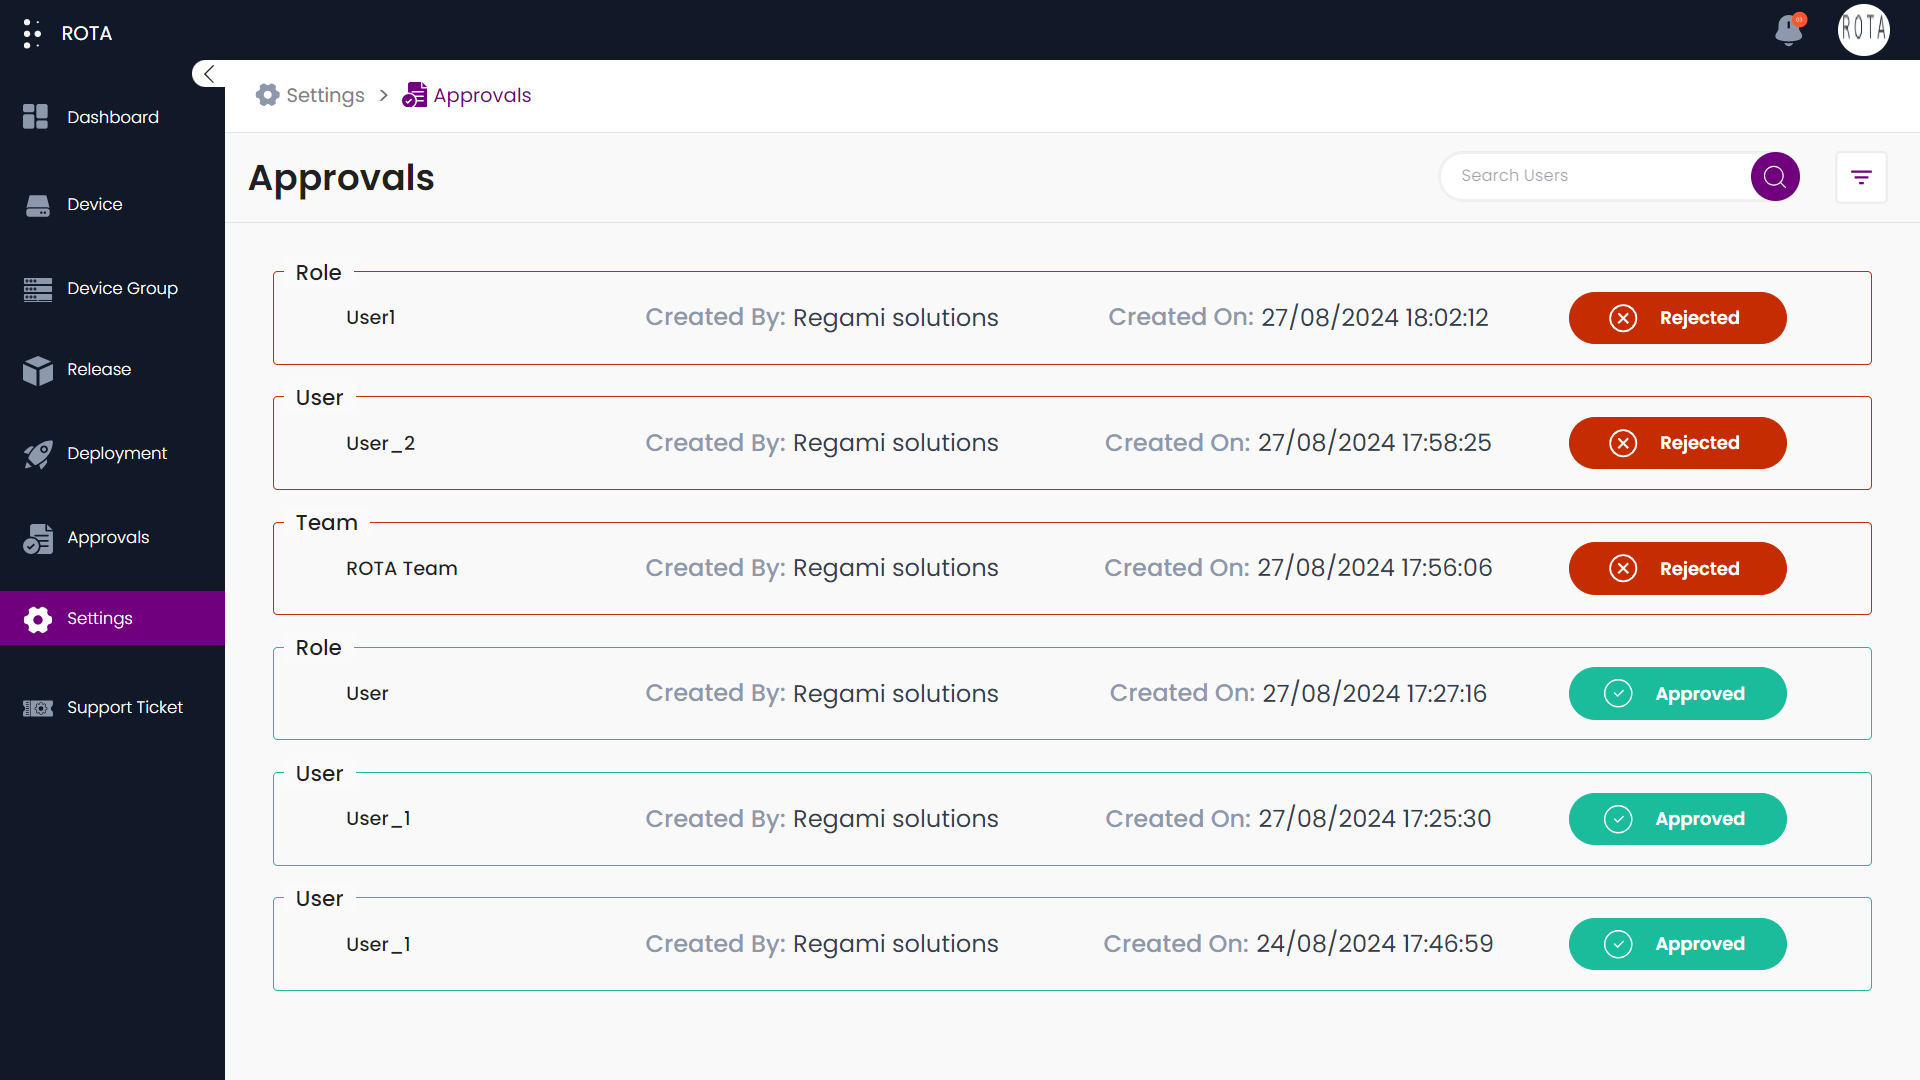
Step 3: The newly created user will be approved and displayed accordingly.
A Step-by-Step Guide for rejecting a new user in Approvals under Settings module
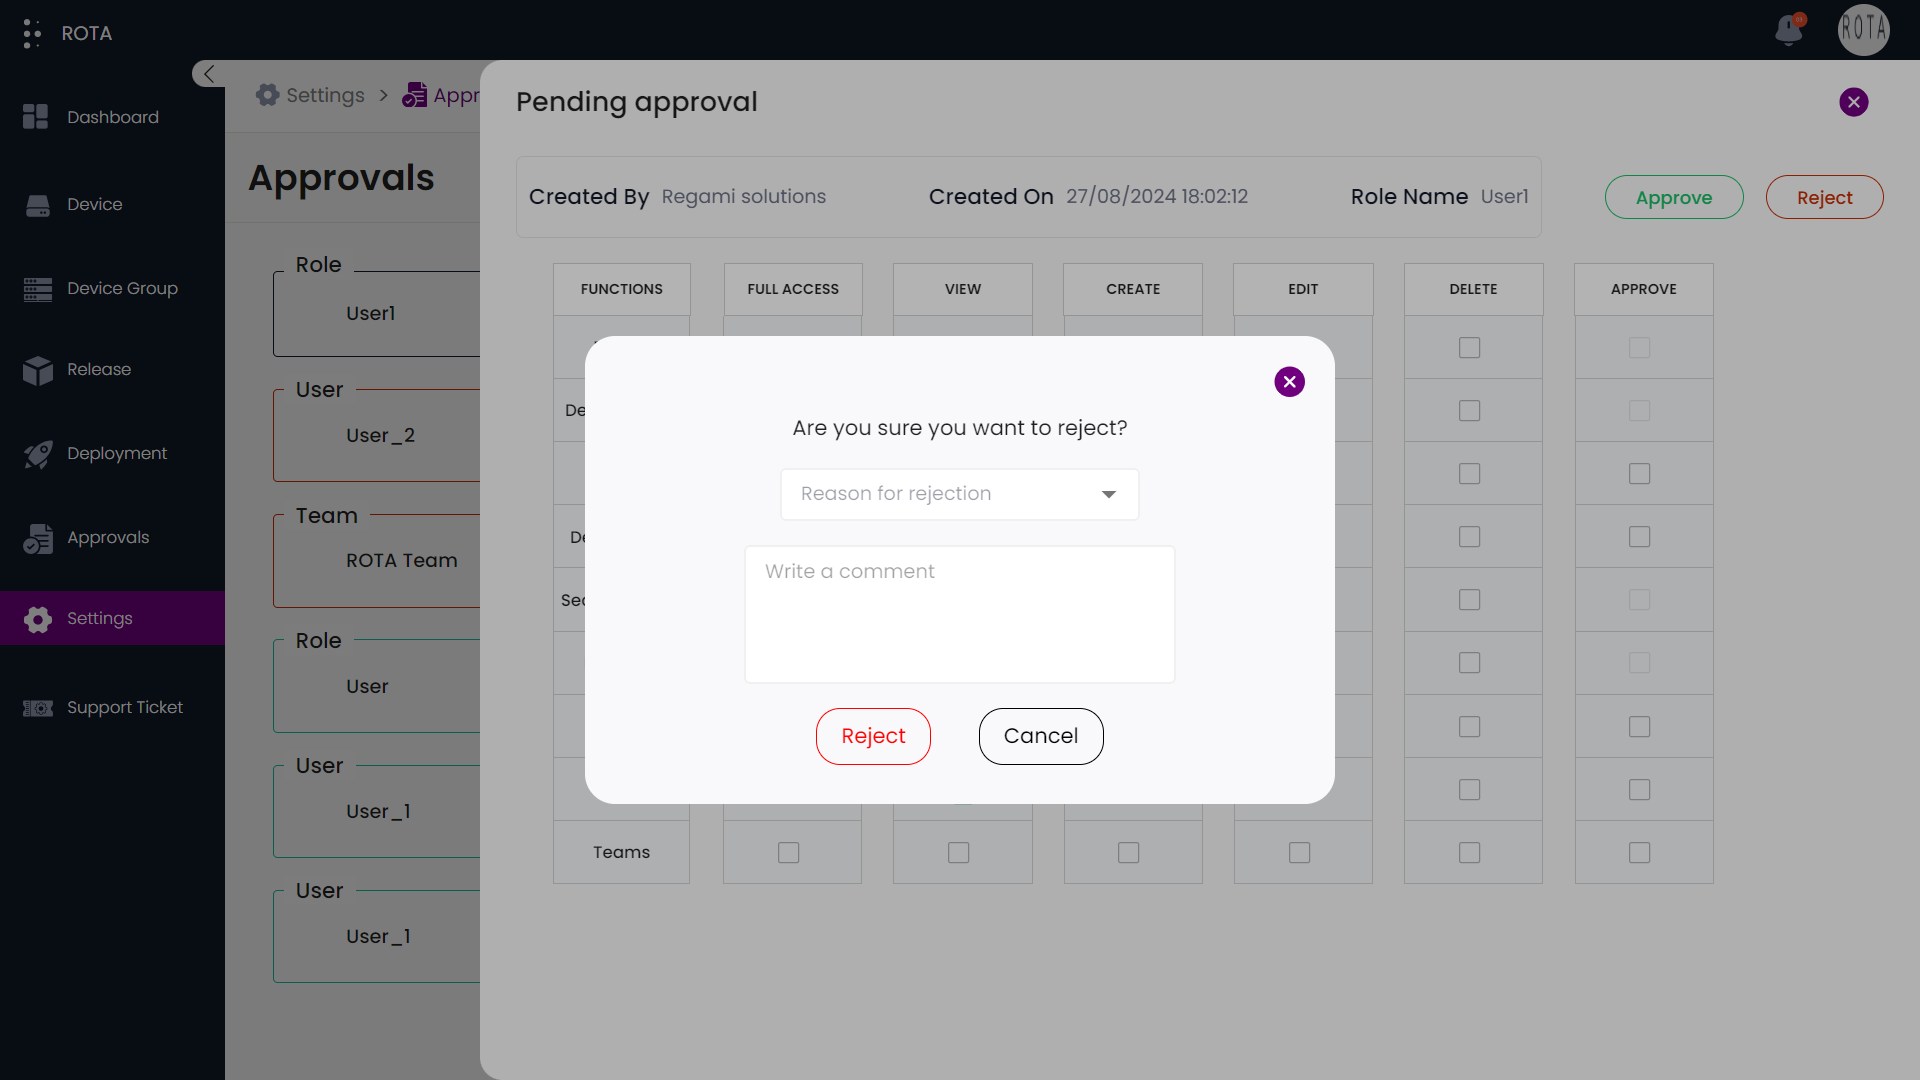
Step 1: Click on the newly created user, which will be displayed in the Approvals section.
Step 2: Click on “Reject” Button.
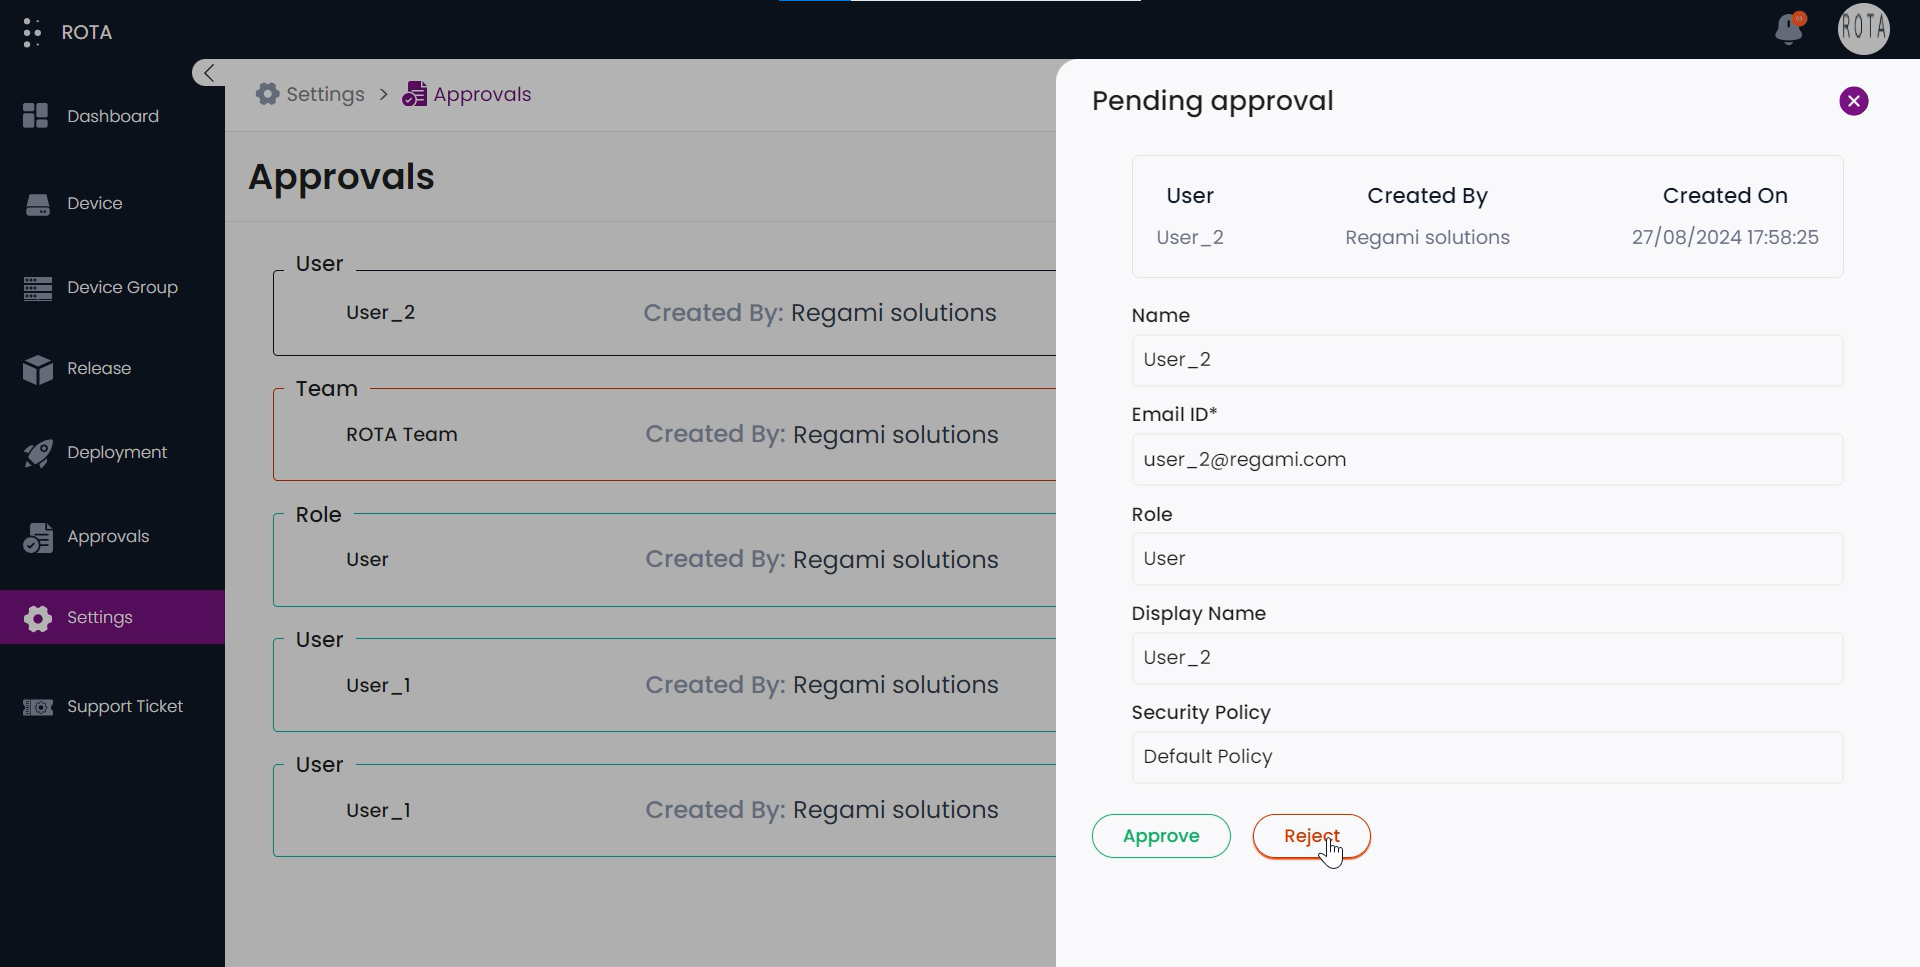
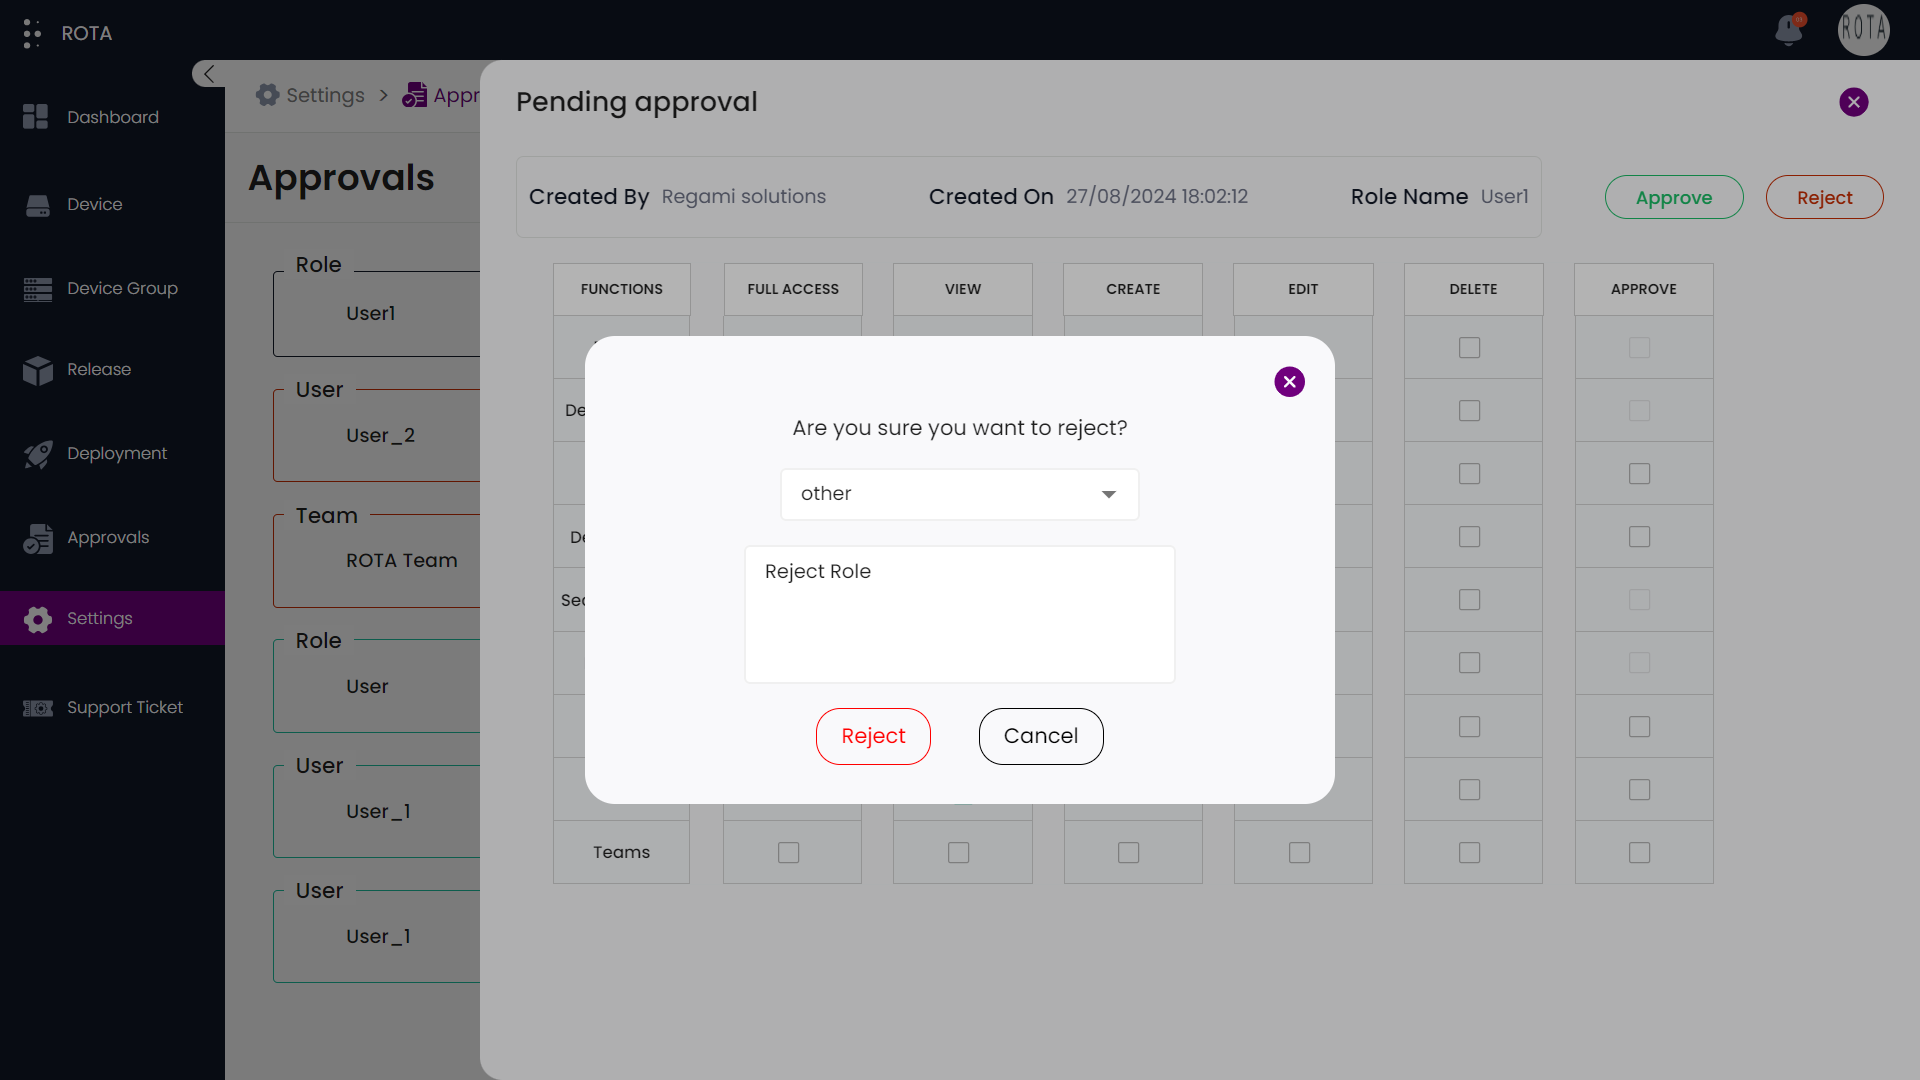
Step 3: A popup for adding a rejection reason will appear. Select an option from the dropdown menu for rejection and provide a description of the rejection reason.
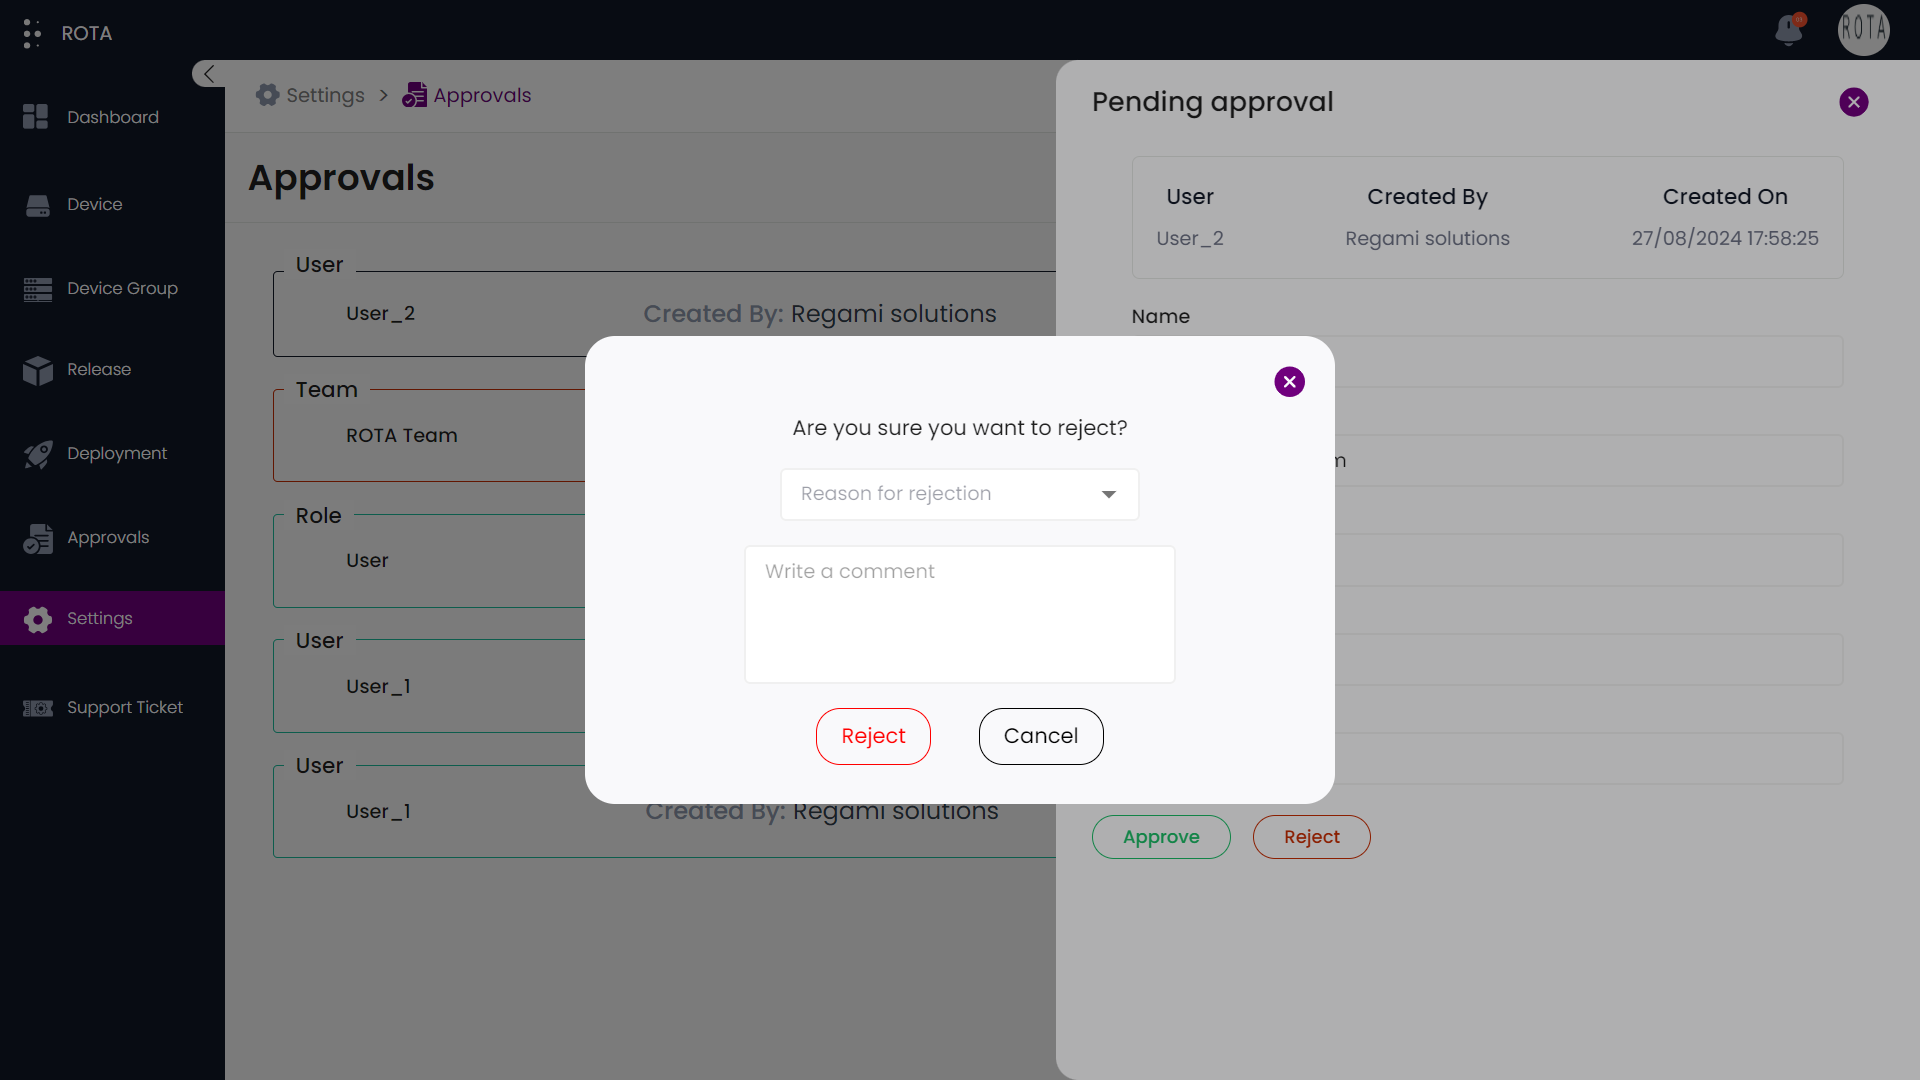
Step 4: After entering details, Click on “Reject” button.

Step 5: The newly created user will be rejected and displayed accordingly.
Approve/Reject Roles
A Step-by-Step Guide for approving a new role in Approvals under Settings module
Step 1: Click on the newly created role, which will be displayed in the Approvals section.
Step 2: Click on “Approve” Button.
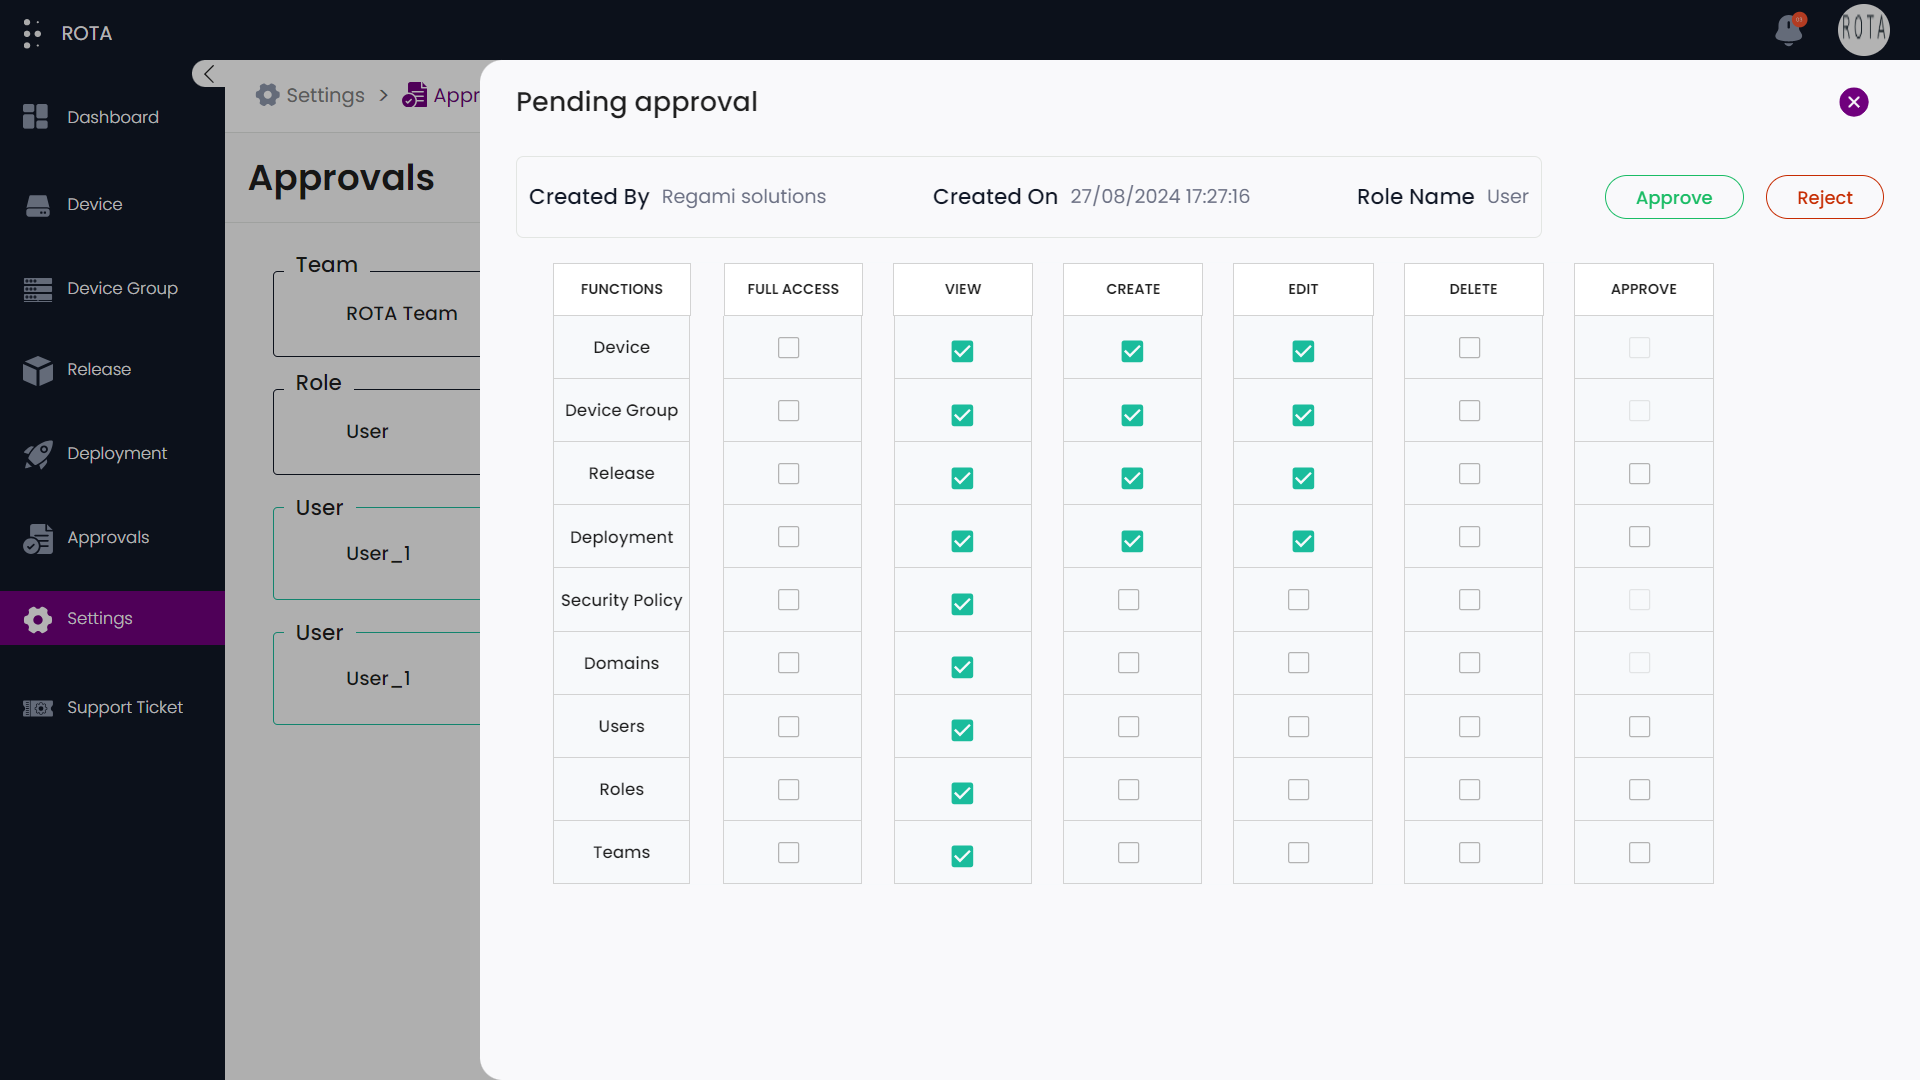
Step 3: The newly created role will be approved and displayed accordingly.
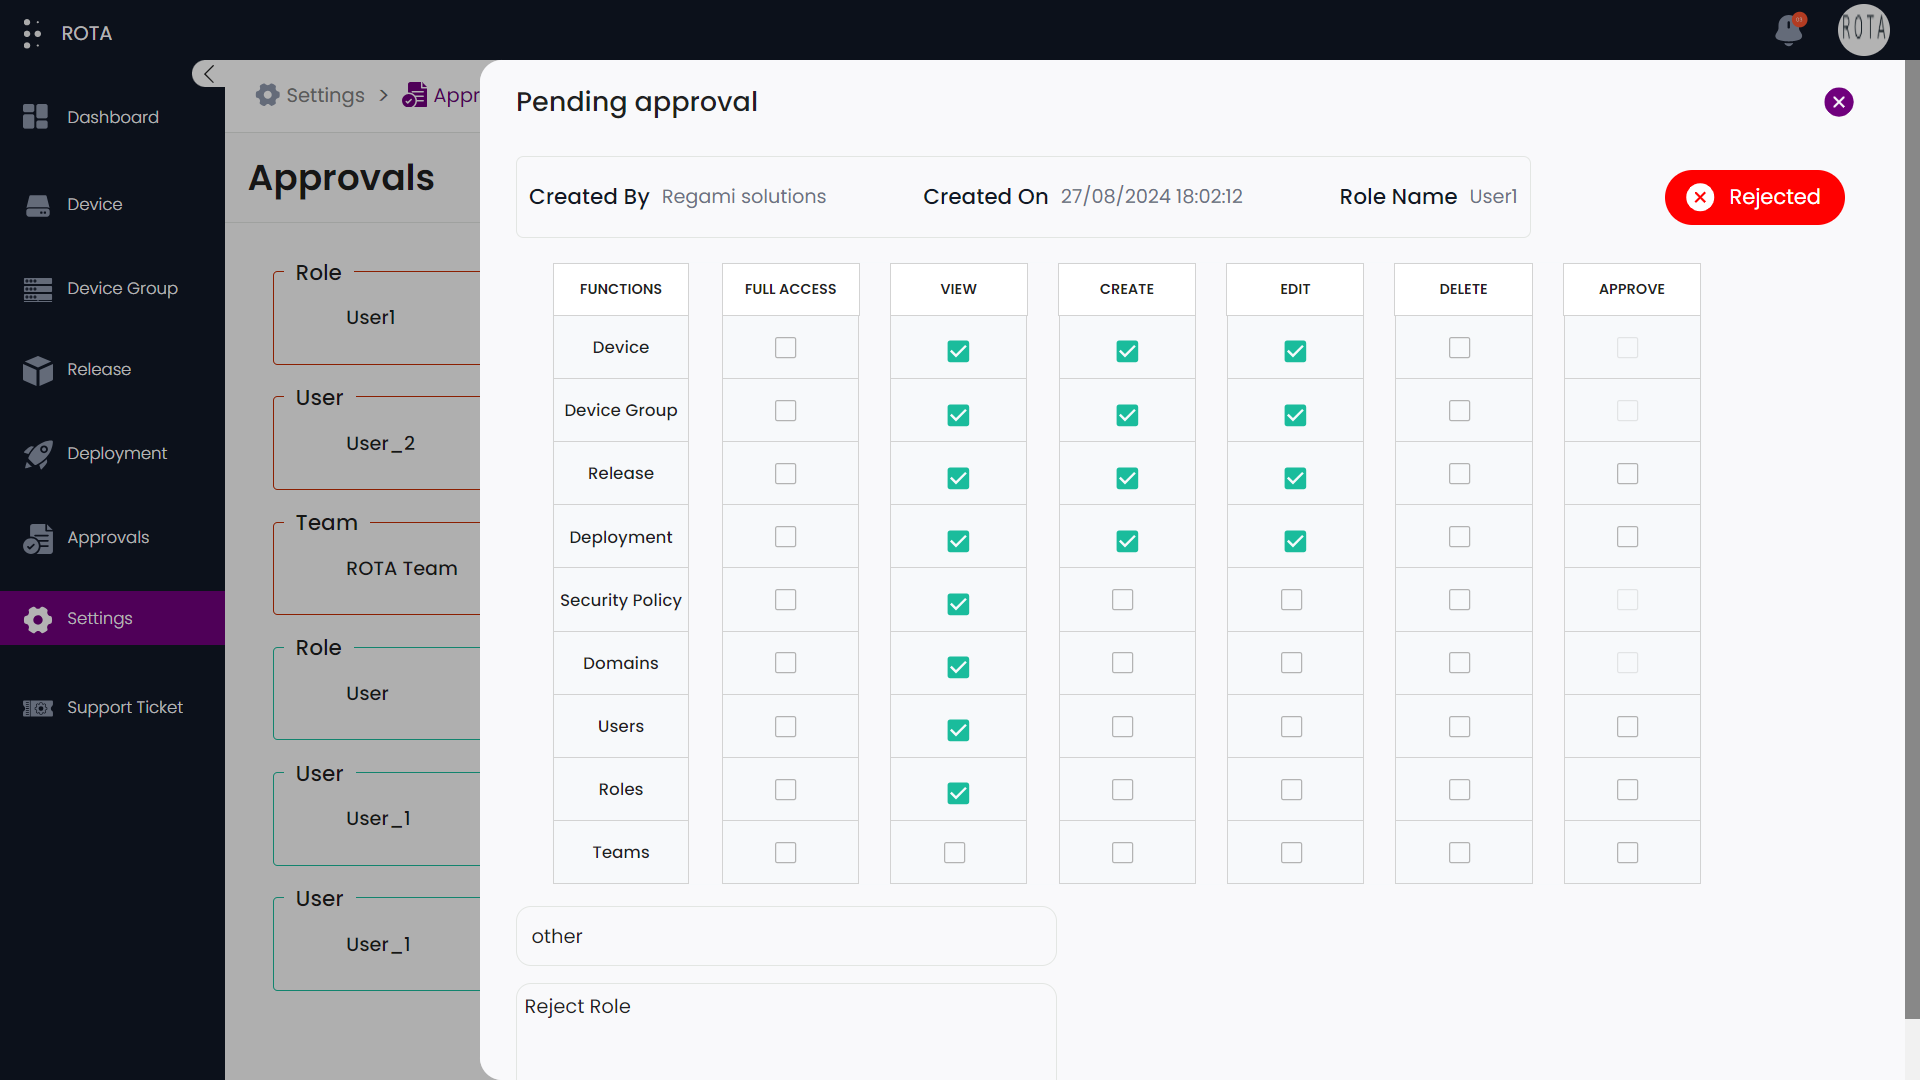
A Step-by-Step Guide for rejecting a new role in Approvals under Settings module
Step 1: Click on the newly created role, which will be displayed in the Approvals section.
Step 2: Click on “Reject” Button.
Step 3: A popup for adding a rejection reason will appear. Select an option from the dropdown menu for rejection and provide a description of the rejection reason.
Step 4: After entering details, Click on “Reject” button.
Step 5: The newly created role will be rejected and displayed accordingly.
Approve/Reject Teams
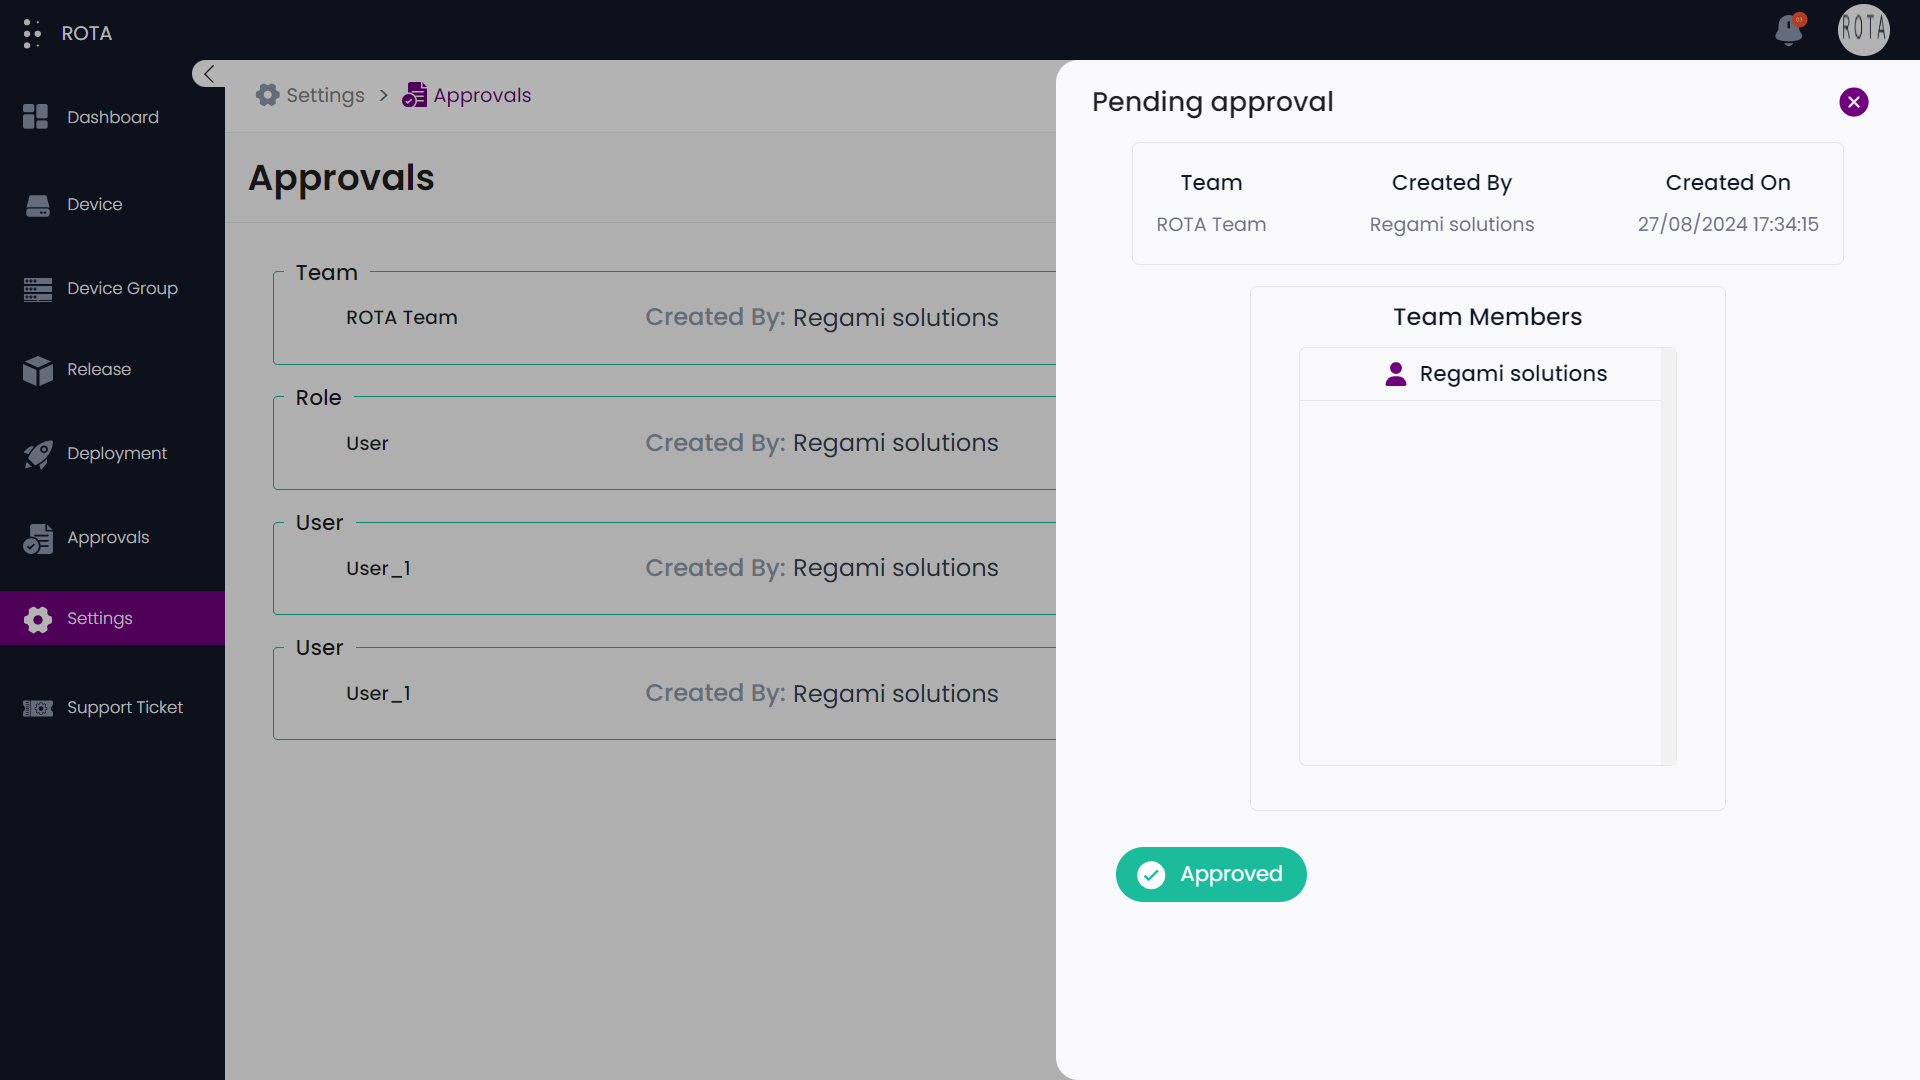
A Step-by-Step Guide for approving a new Team in Approvals under Settings module
Step 1: Click on the newly created team, which will be displayed in the Approvals section.
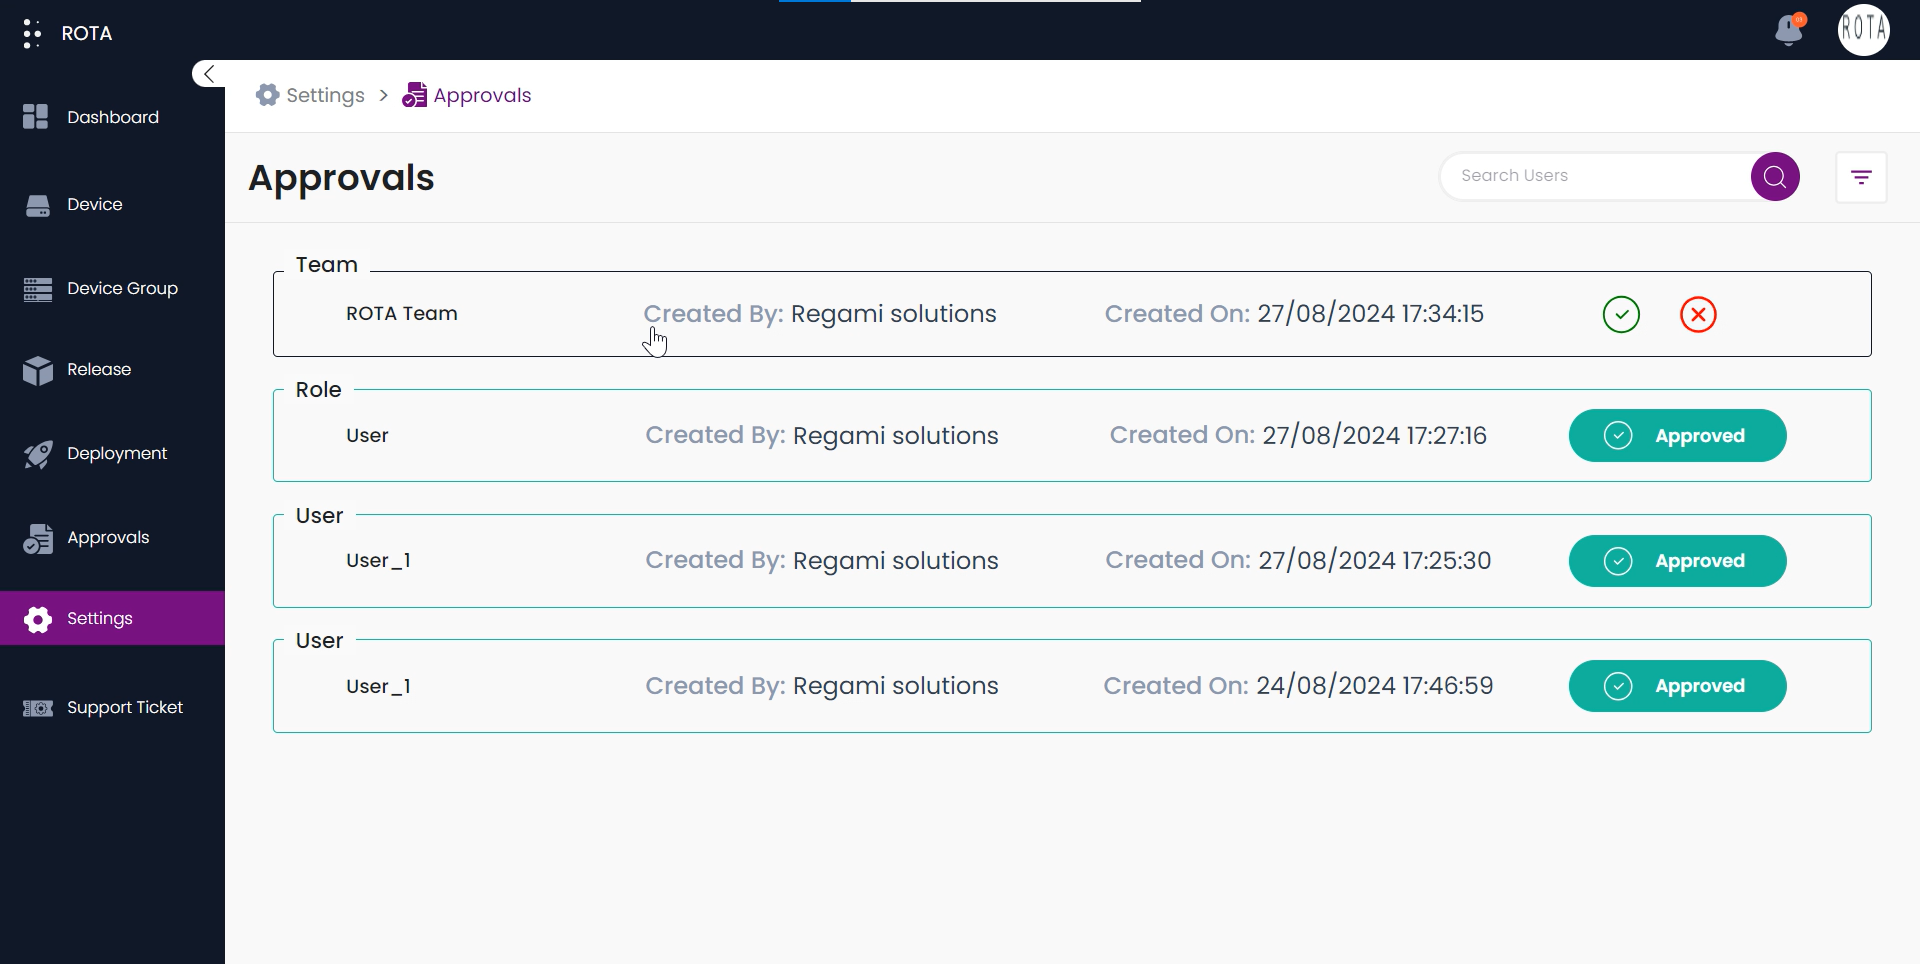
Step 2: Click on “Approve” Button.
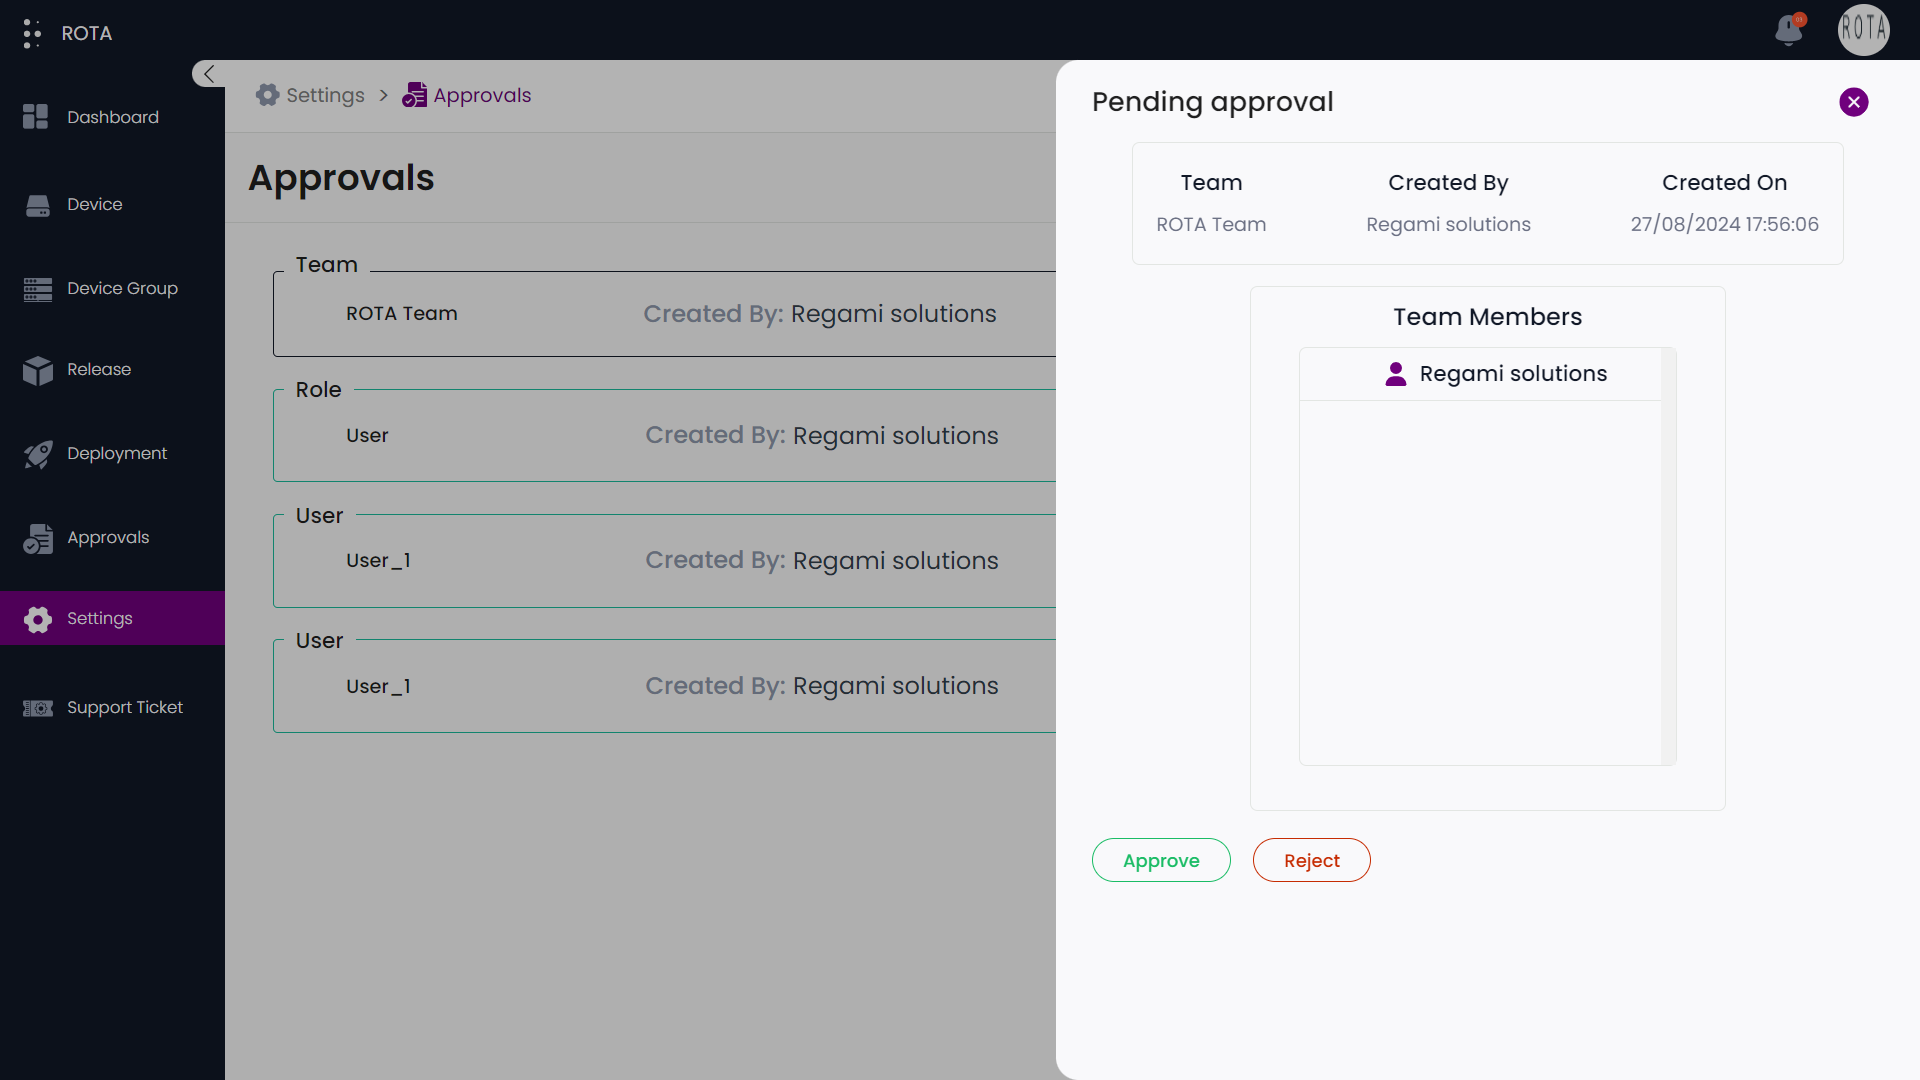
Step 3: The newly created team will be approved and displayed accordingly.
A Step-by-Step Guide for rejecting a new Team in Approvals under Settings module
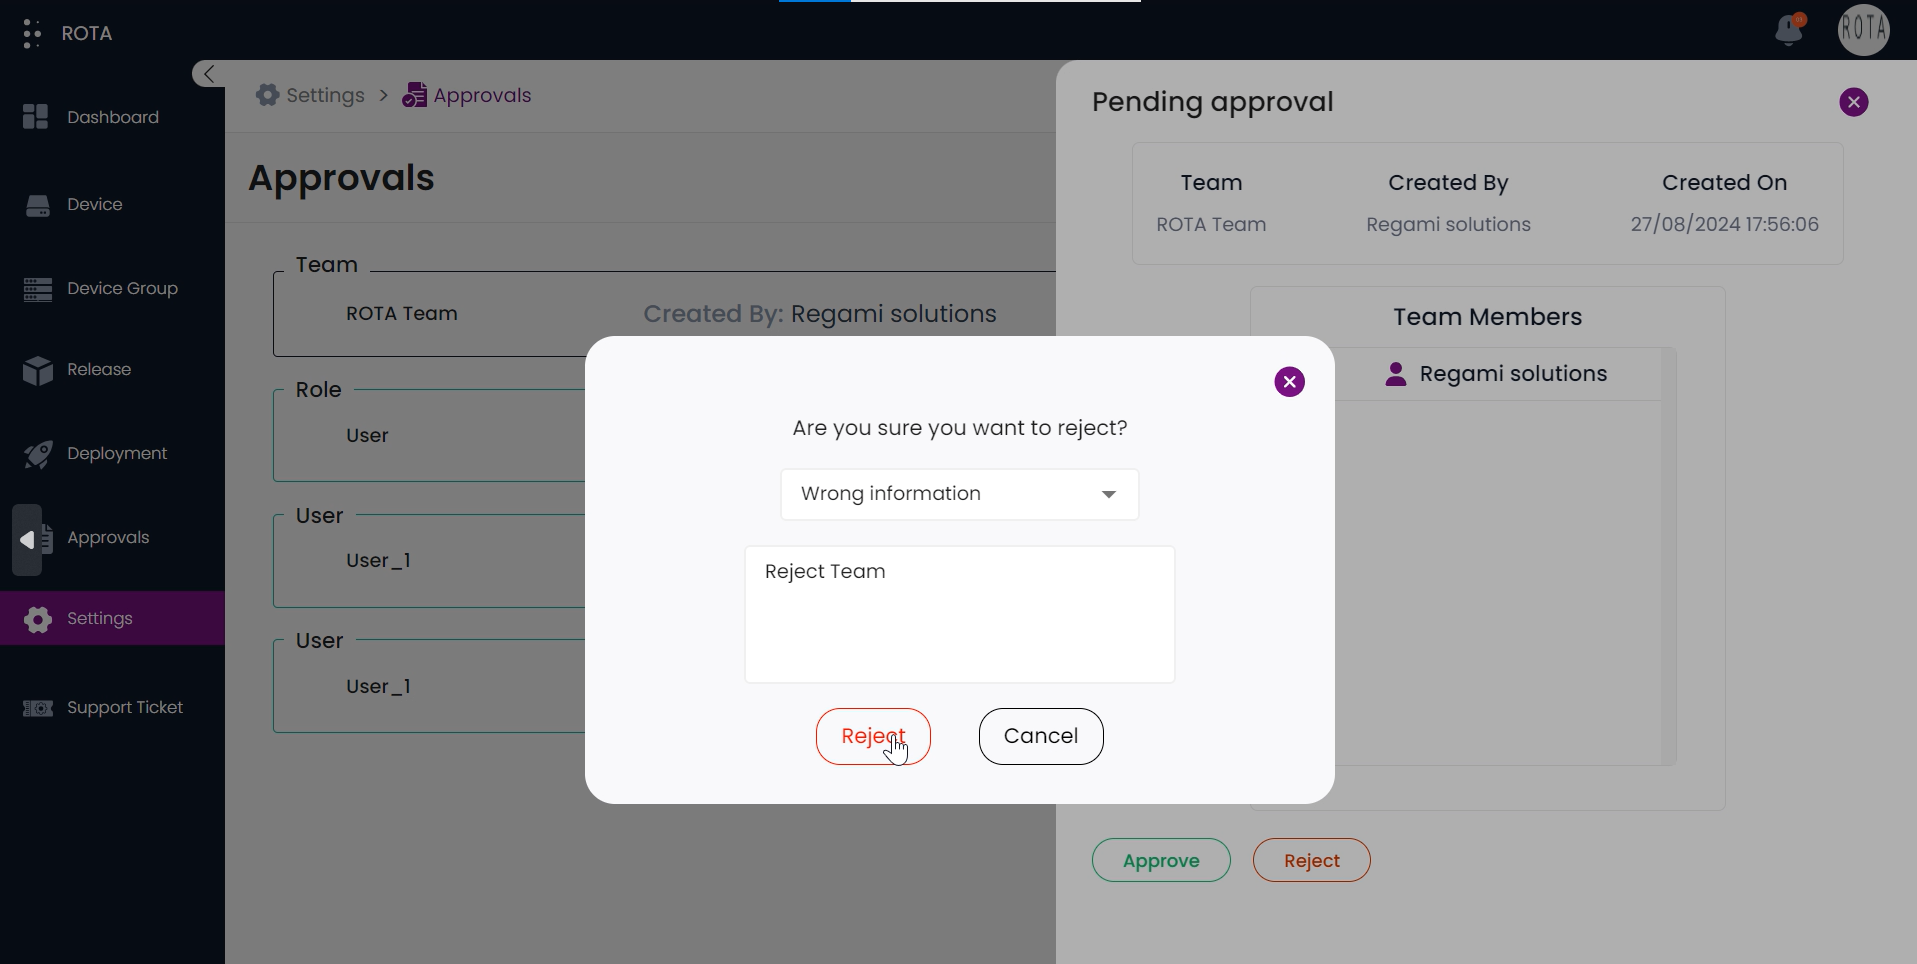
Step 1: Click on the newly created team, which will be displayed in the Approvals section.
Step 2: Click on “Reject” Button.
Step 3: A popup for adding a rejection reason will appear. Select an option from the dropdown menu for rejection and provide a description of the rejection reason.

Step 4: After entering details, Click on “Reject” button.
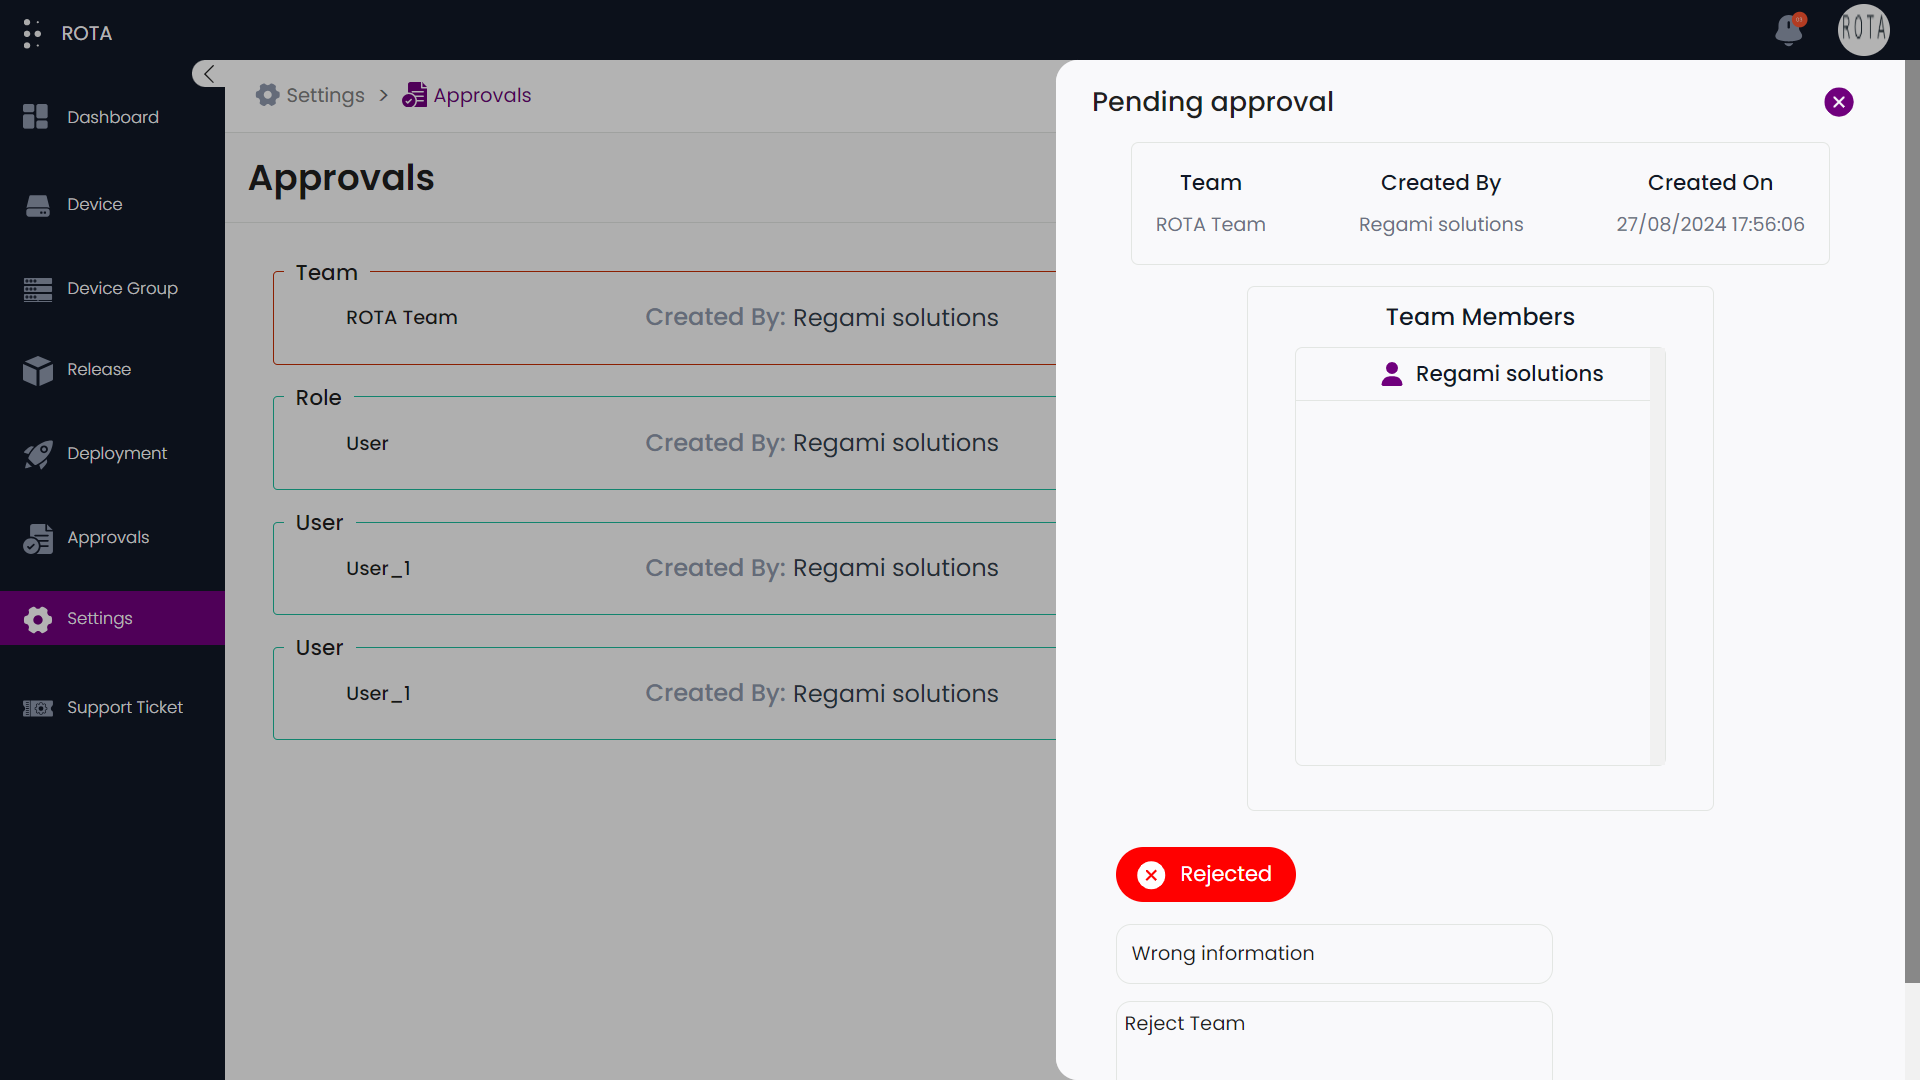
Step 5: The newly created team will be rejected and displayed accordingly.
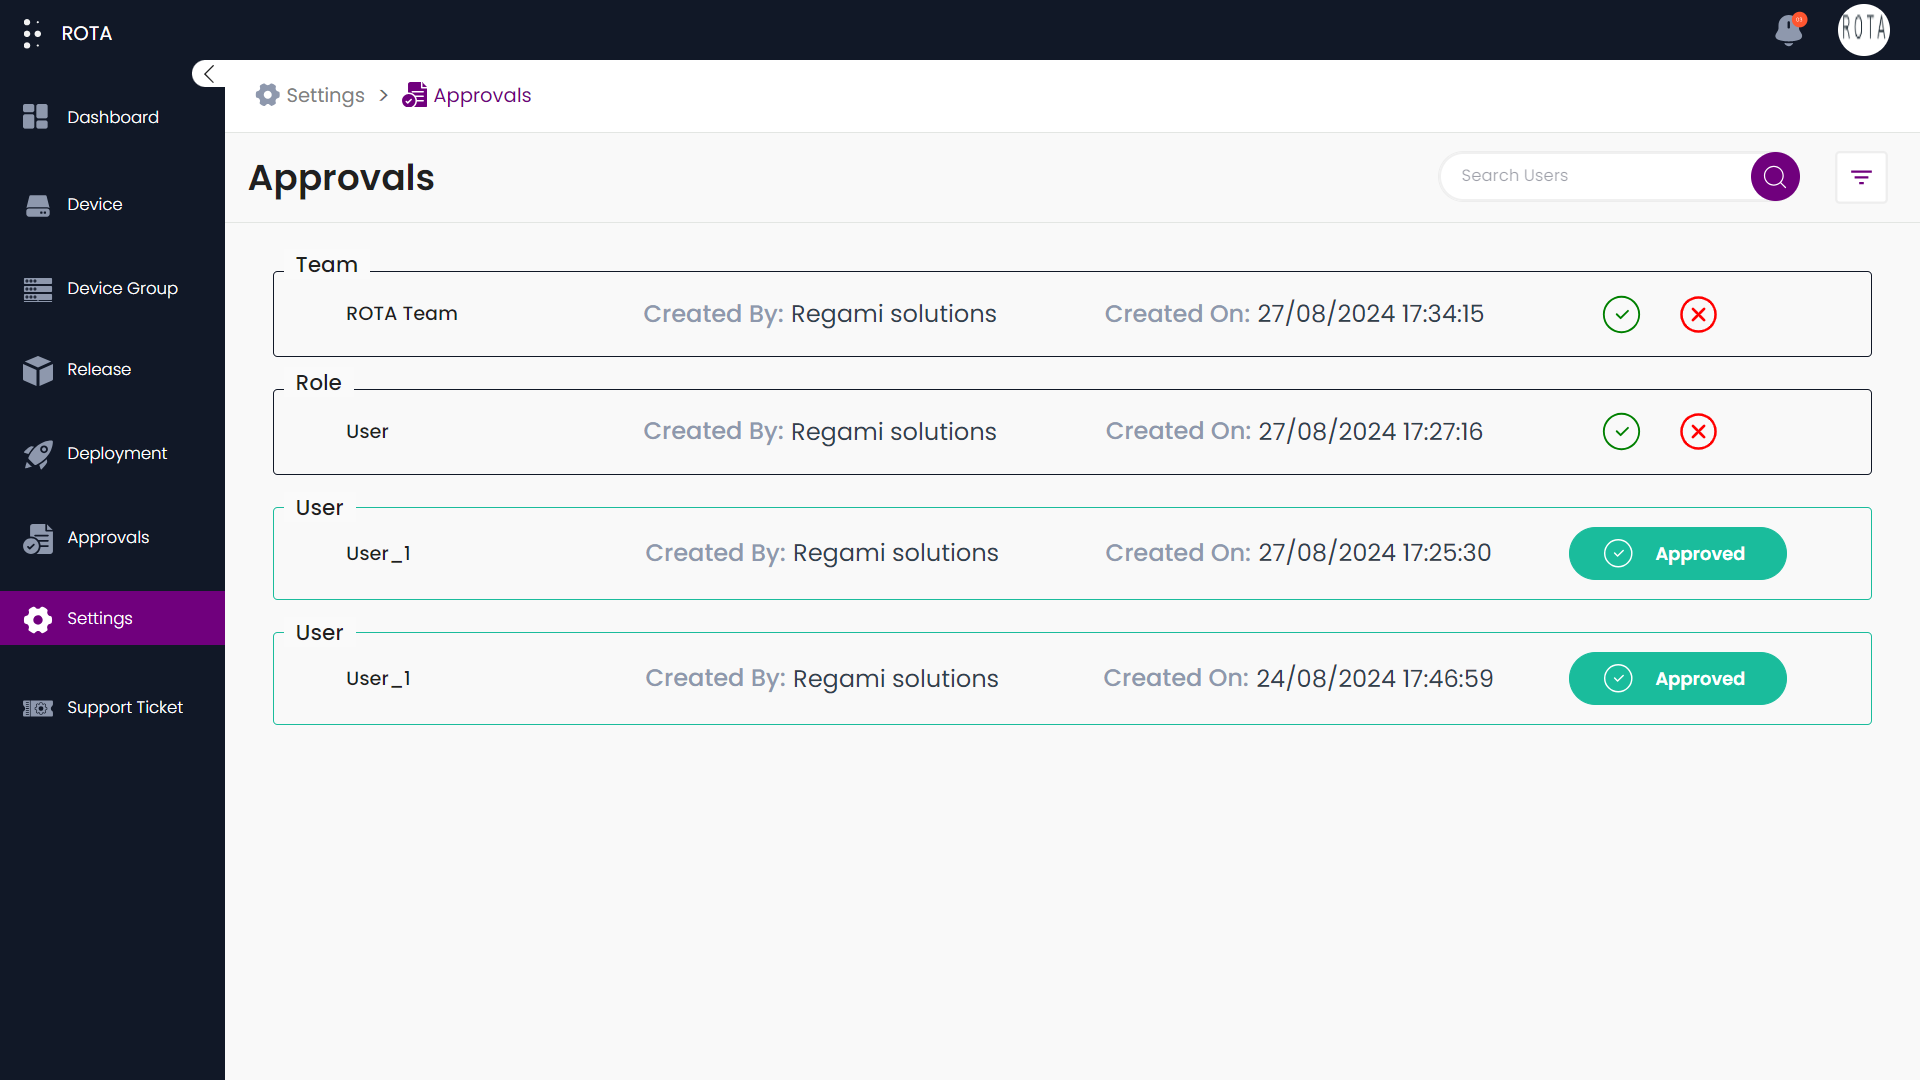
After approving and rejecting the respective roles, teams, and users, the Approvals page under the Settings module will be displayed as follows.