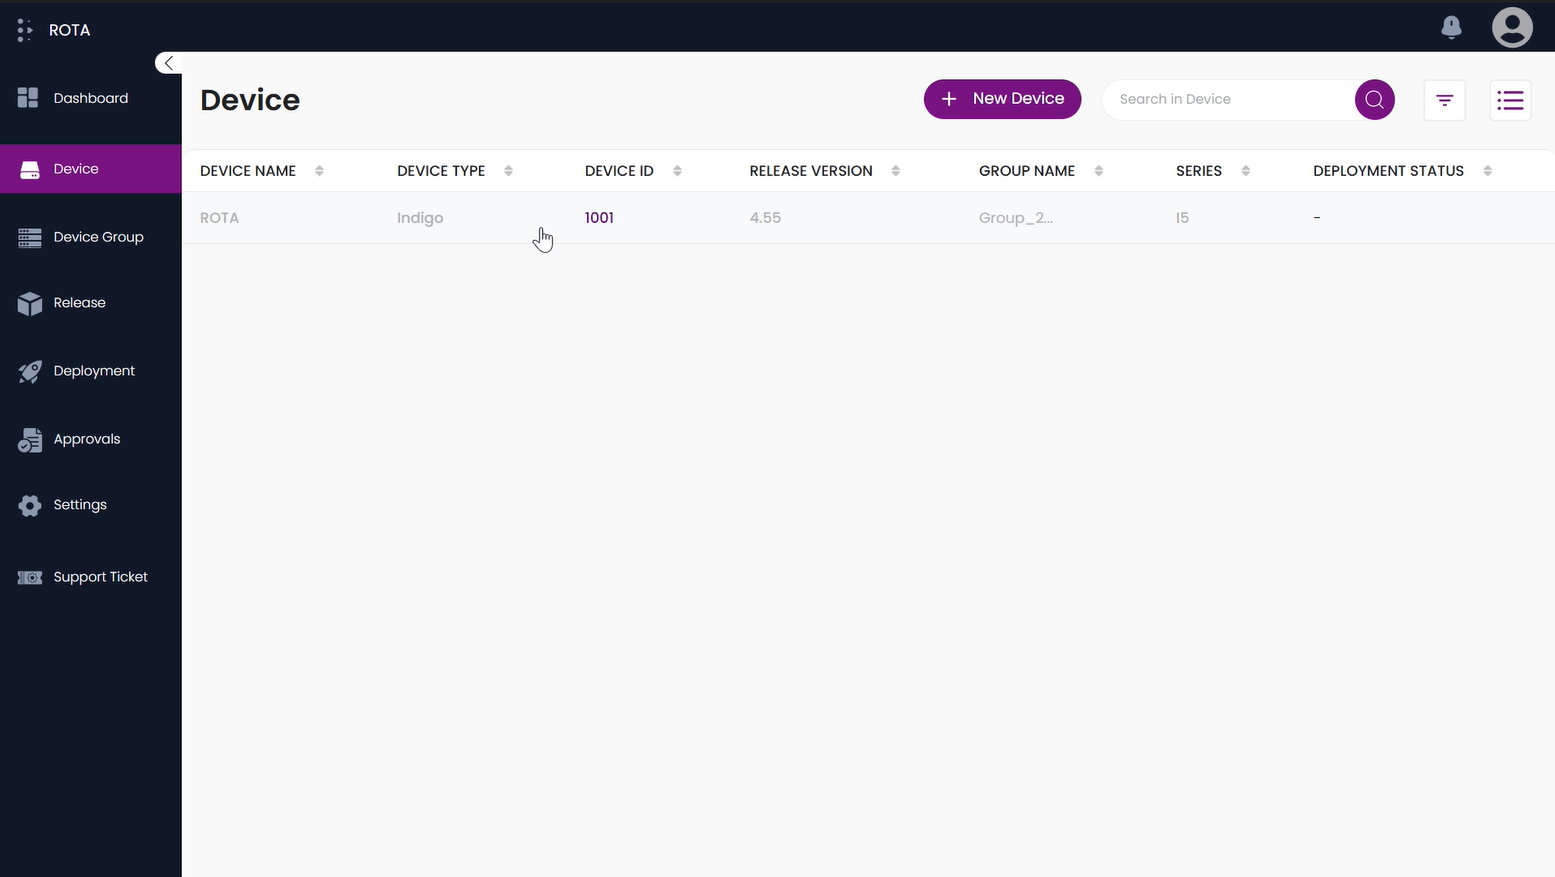
Device
Introduction
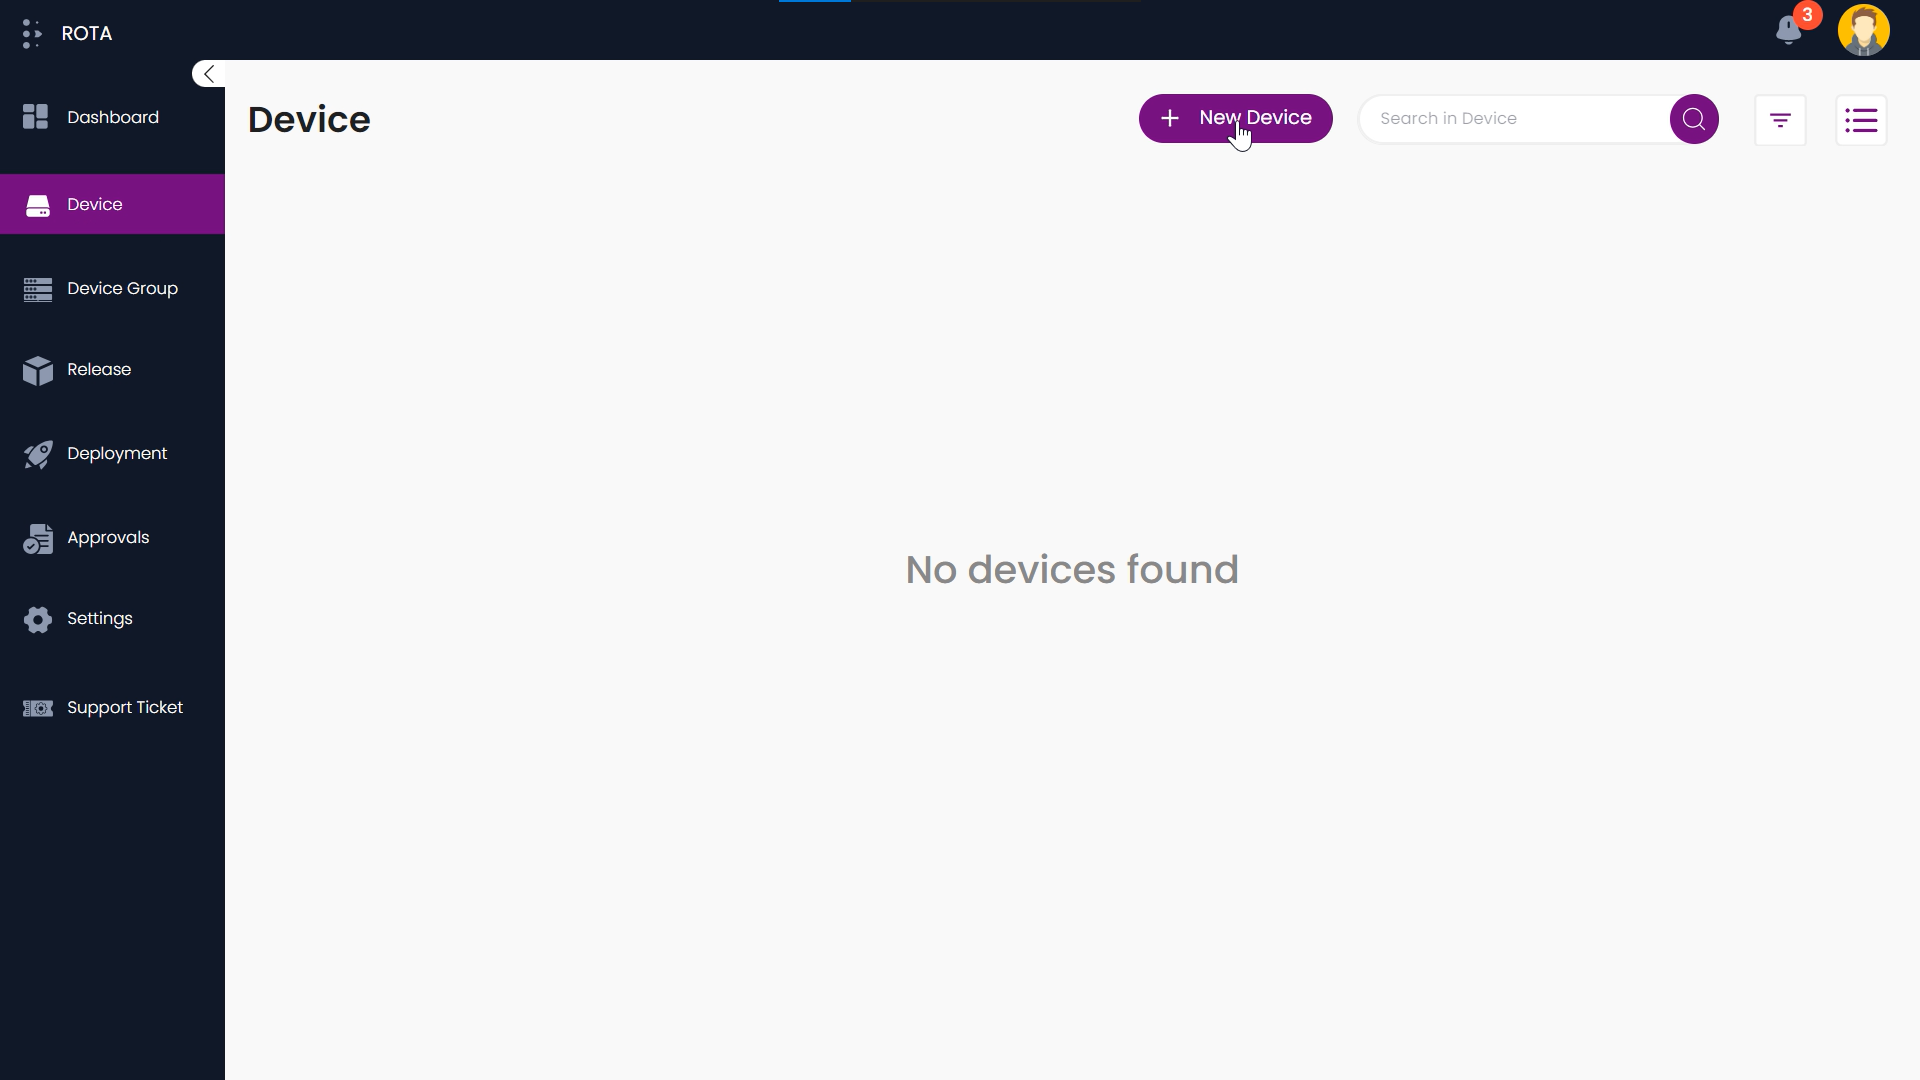
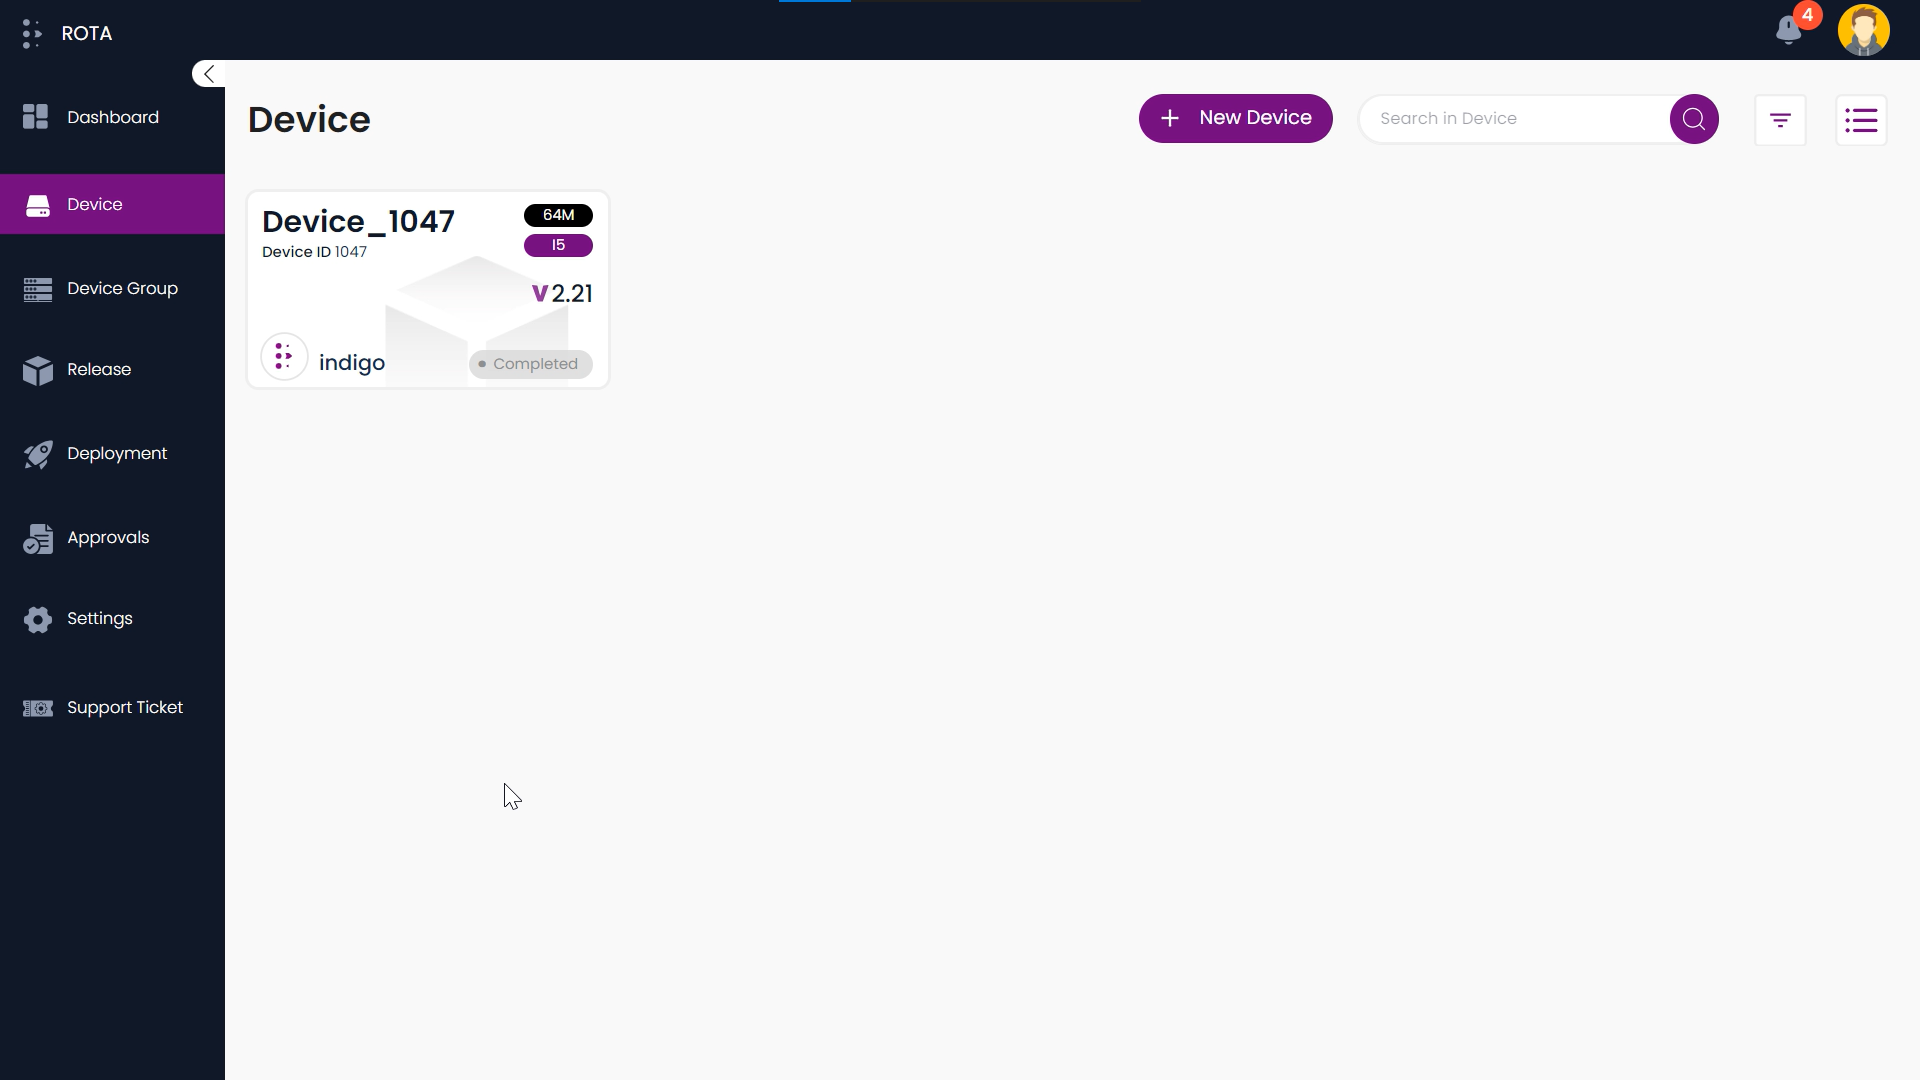
This document provides an overview of the handling of devices like adding device, editing device details, getting device details, and removing devices. Users can search and filter devices easily and also can change the view type to list view or card(grid) view by clicking on the list icon present at the top right corner.
Add Device
Steps to Add Device:
Step 1: click on New Device
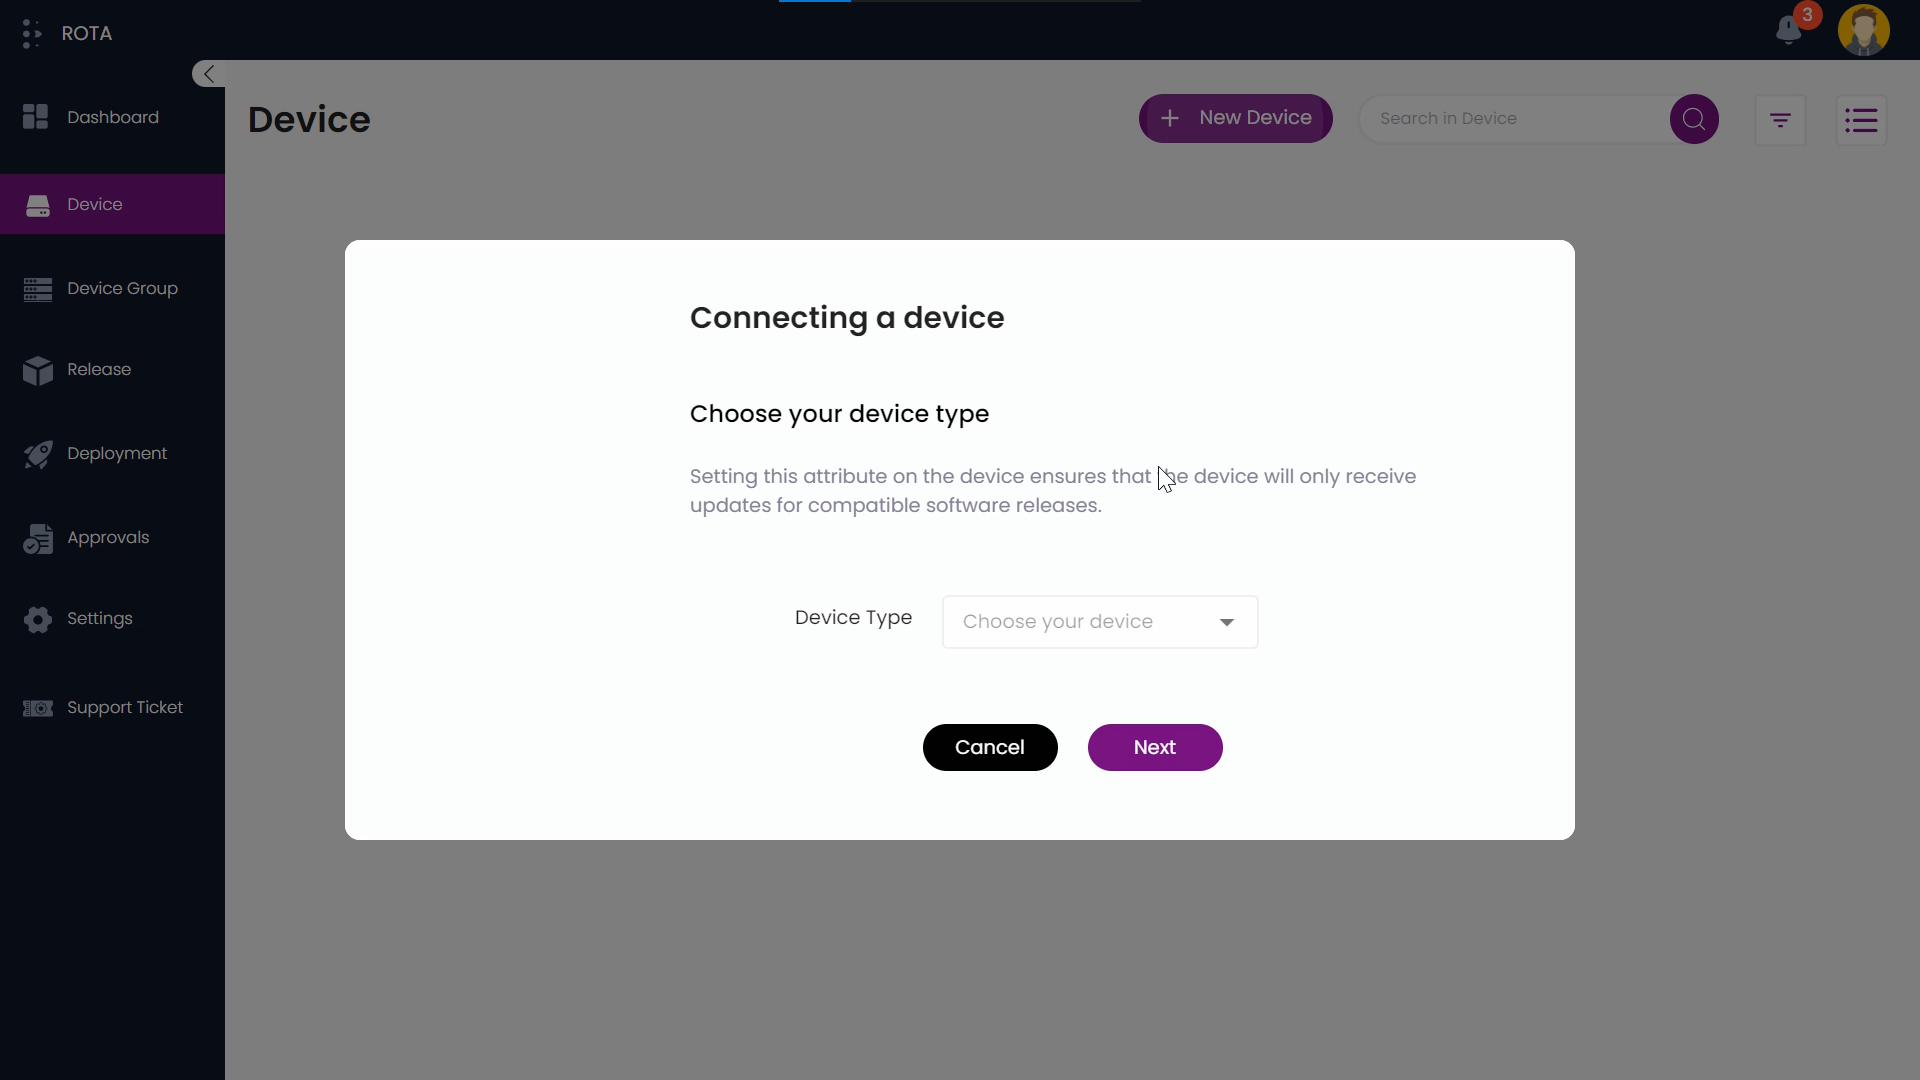
Step 2: Choose your device type from the dropdown and click on Next.
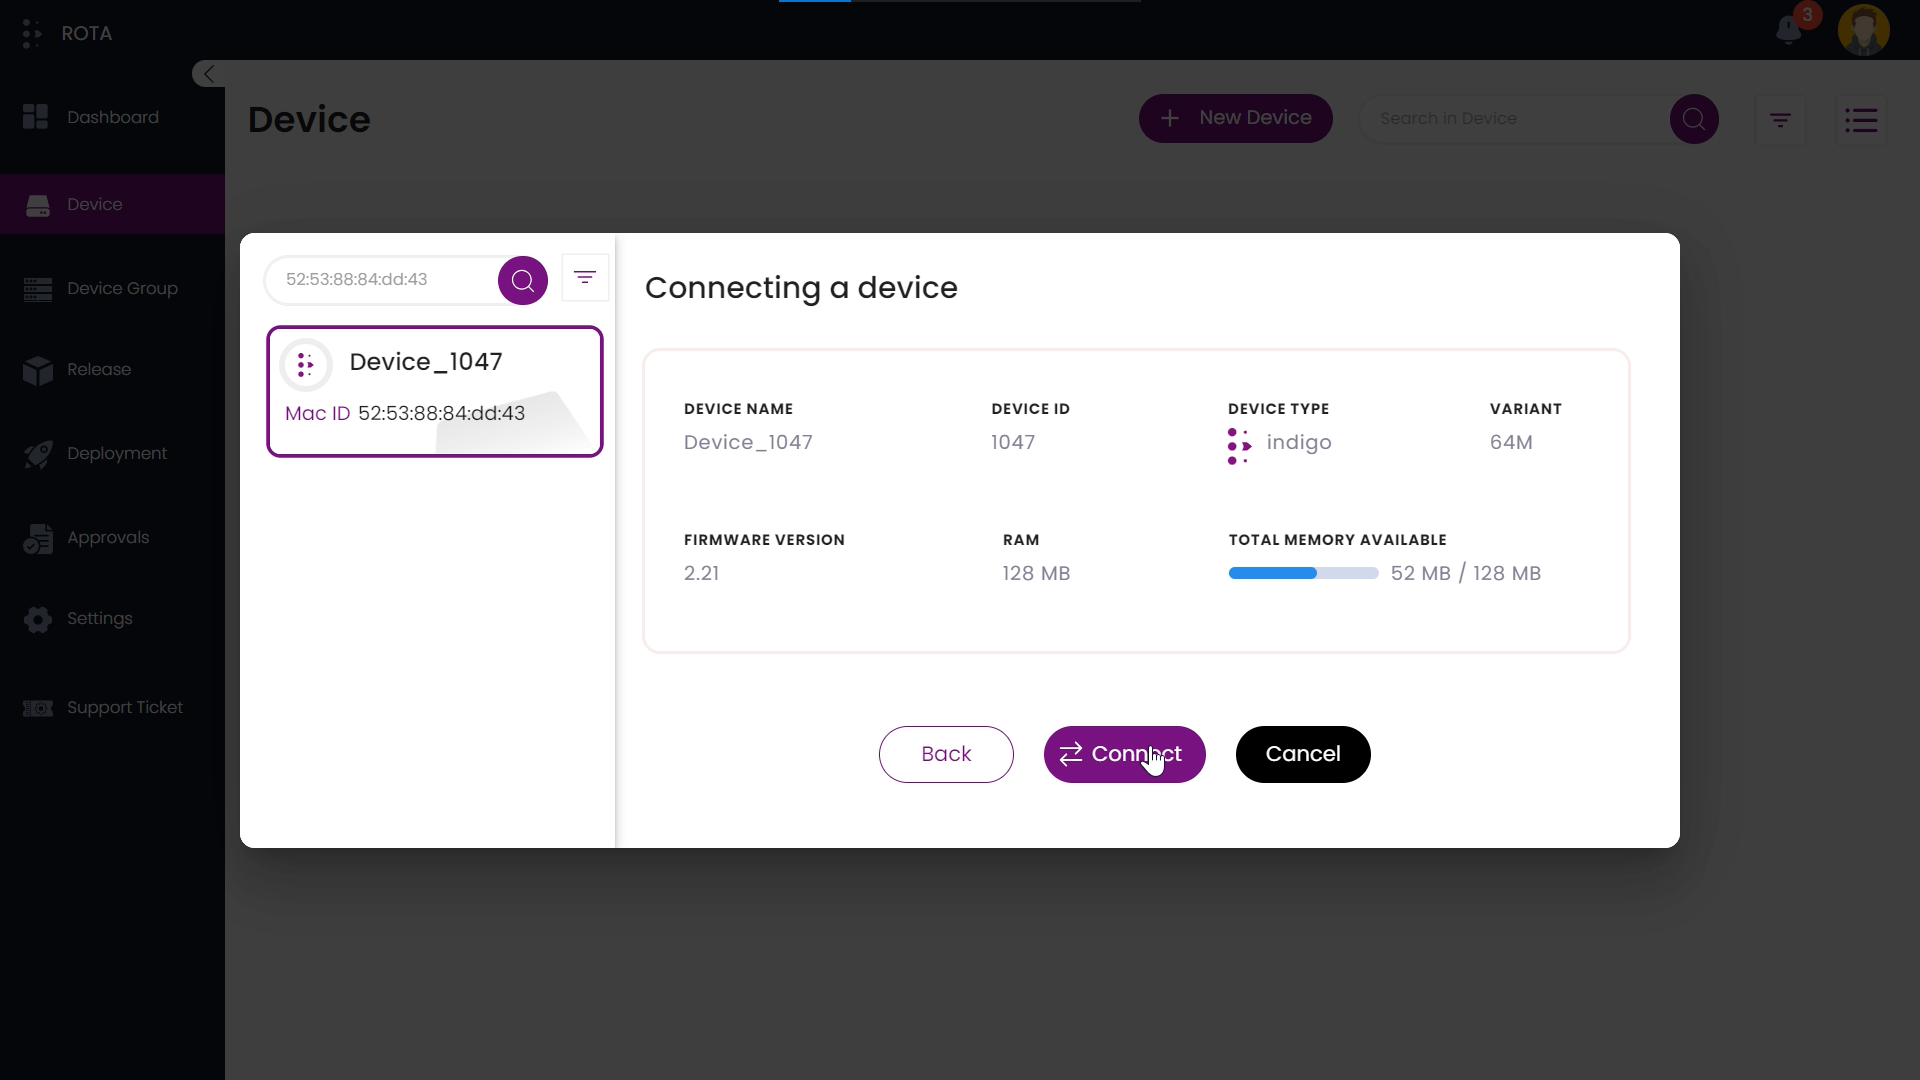
Step 3: Now choose the device want to add from the left side list, you can search or filter devices based on their name, series, or variant to access the device easily

Step 4: Click on Connect to add the device, or click on Cancel if you don’t want to add the device or click on Back to select another device.
Step 5: After clicking on connect click on New Device if you want to add more devices or else click on Done
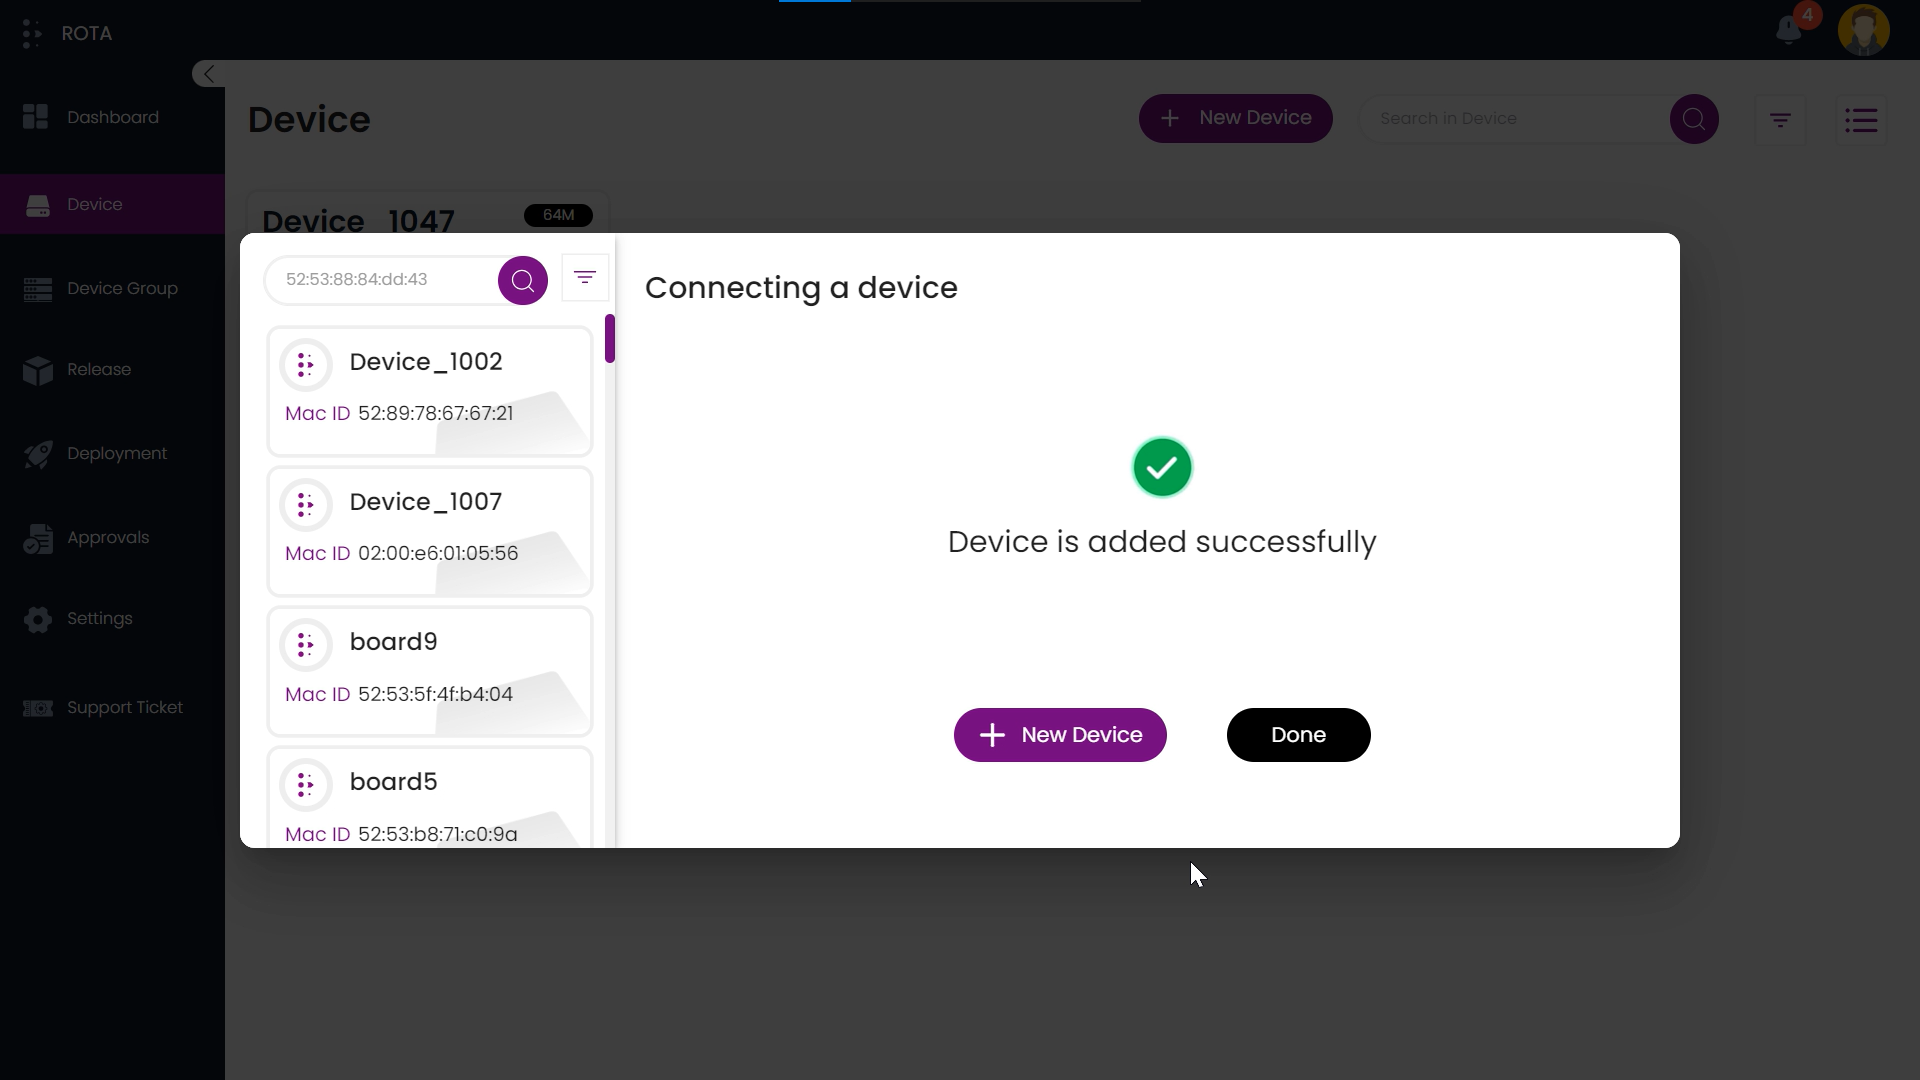
Device will be added successfully.
Step 6: If you have clicked on Cancel then start from Step 1 to add the device again.
Step 7: If you have clicked on Back then start from Step 2 to add the device again.
Edit Device Details
Steps to Edit Device Details:
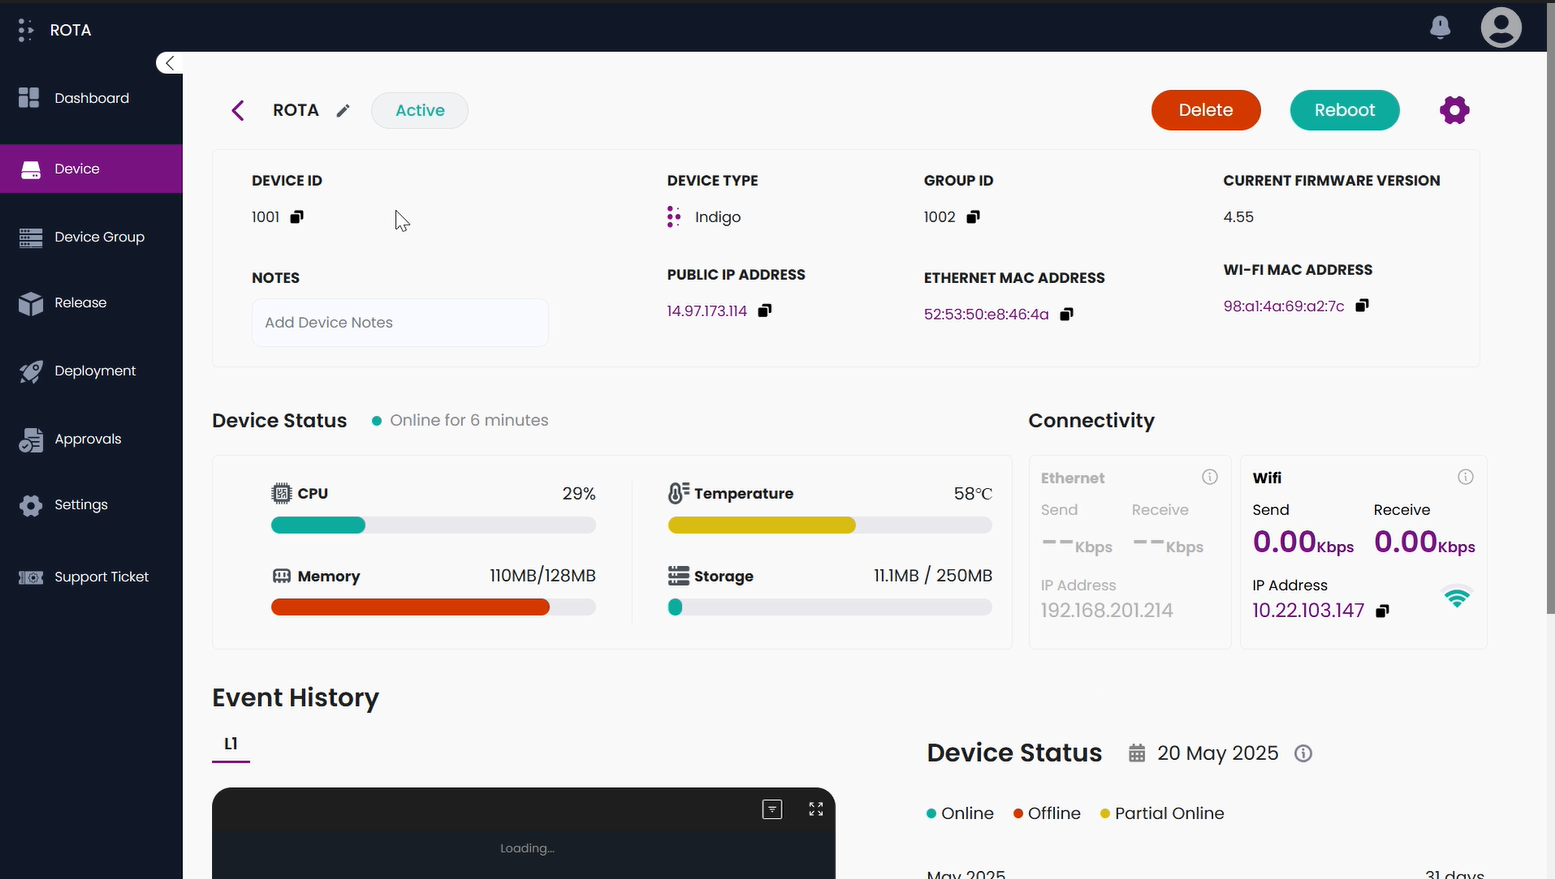
Step 1: Choose the device that you want to edit the details and click on that device.
Step 2: Now you can see the details of the device, click on the pen icon 🖍 present beside the device name at the top left corner to edit the name of the device.

Step 3: Enter the name you want and press enter key.

Step 4: Click on the input field box under the Notes to add or edit device notes.
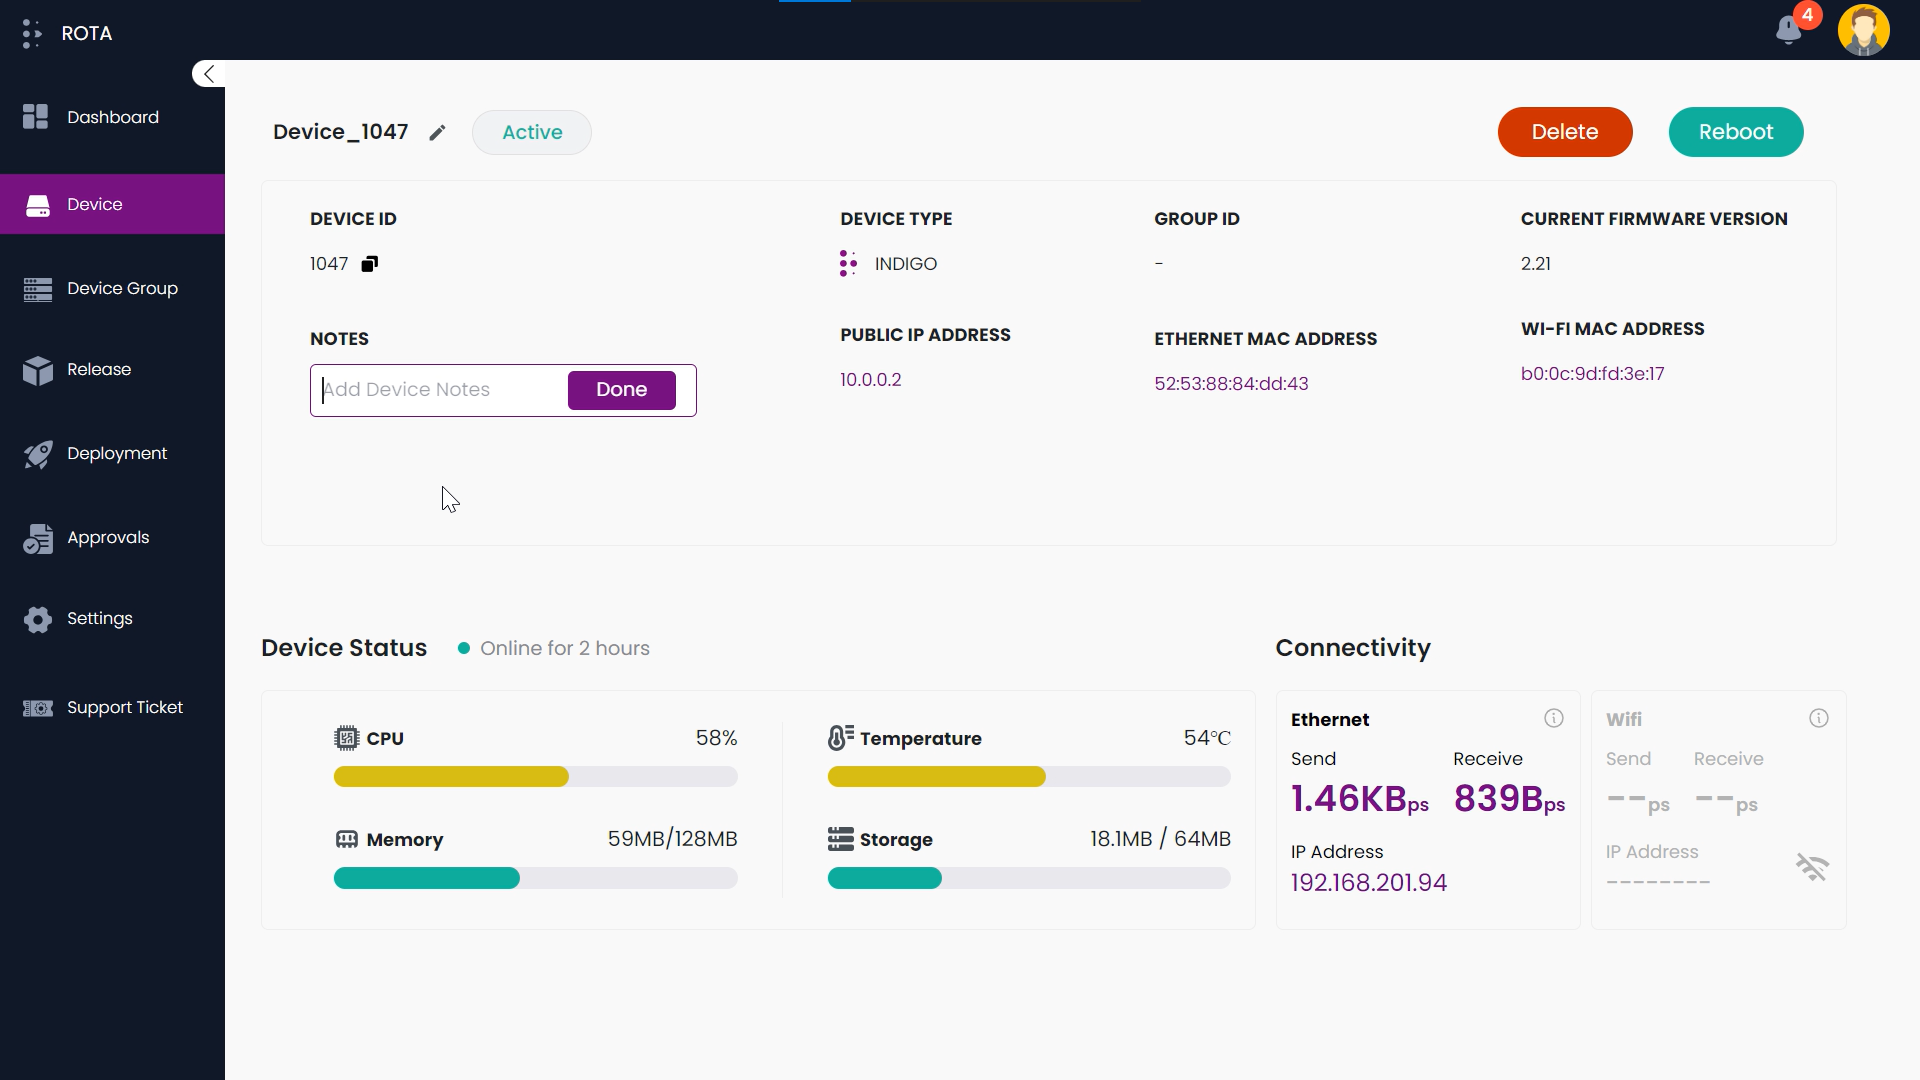
Step 5: If you want to reboot the device click on Reboot present at the top right corner.
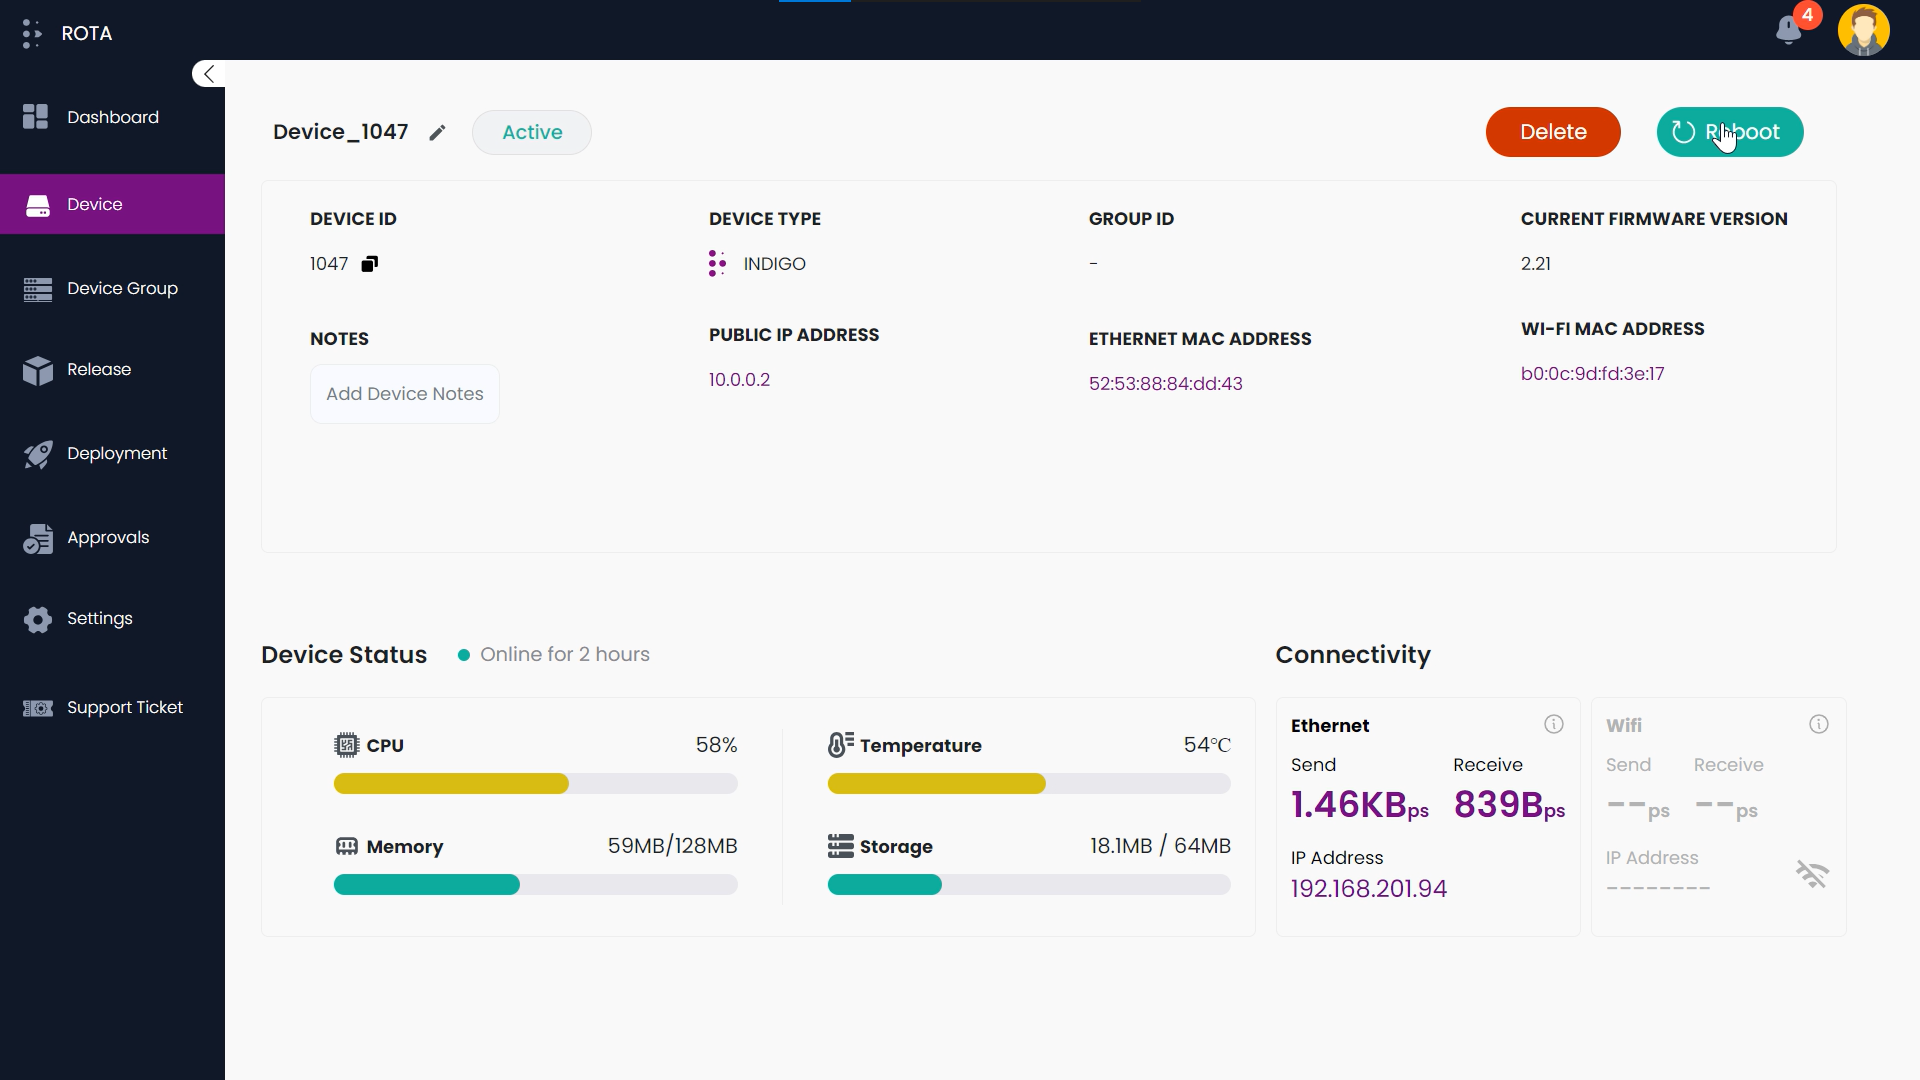
Step 6: A dialogue box will open asking for confirmation, if you want to reboot the device click on Yes or else click on No.

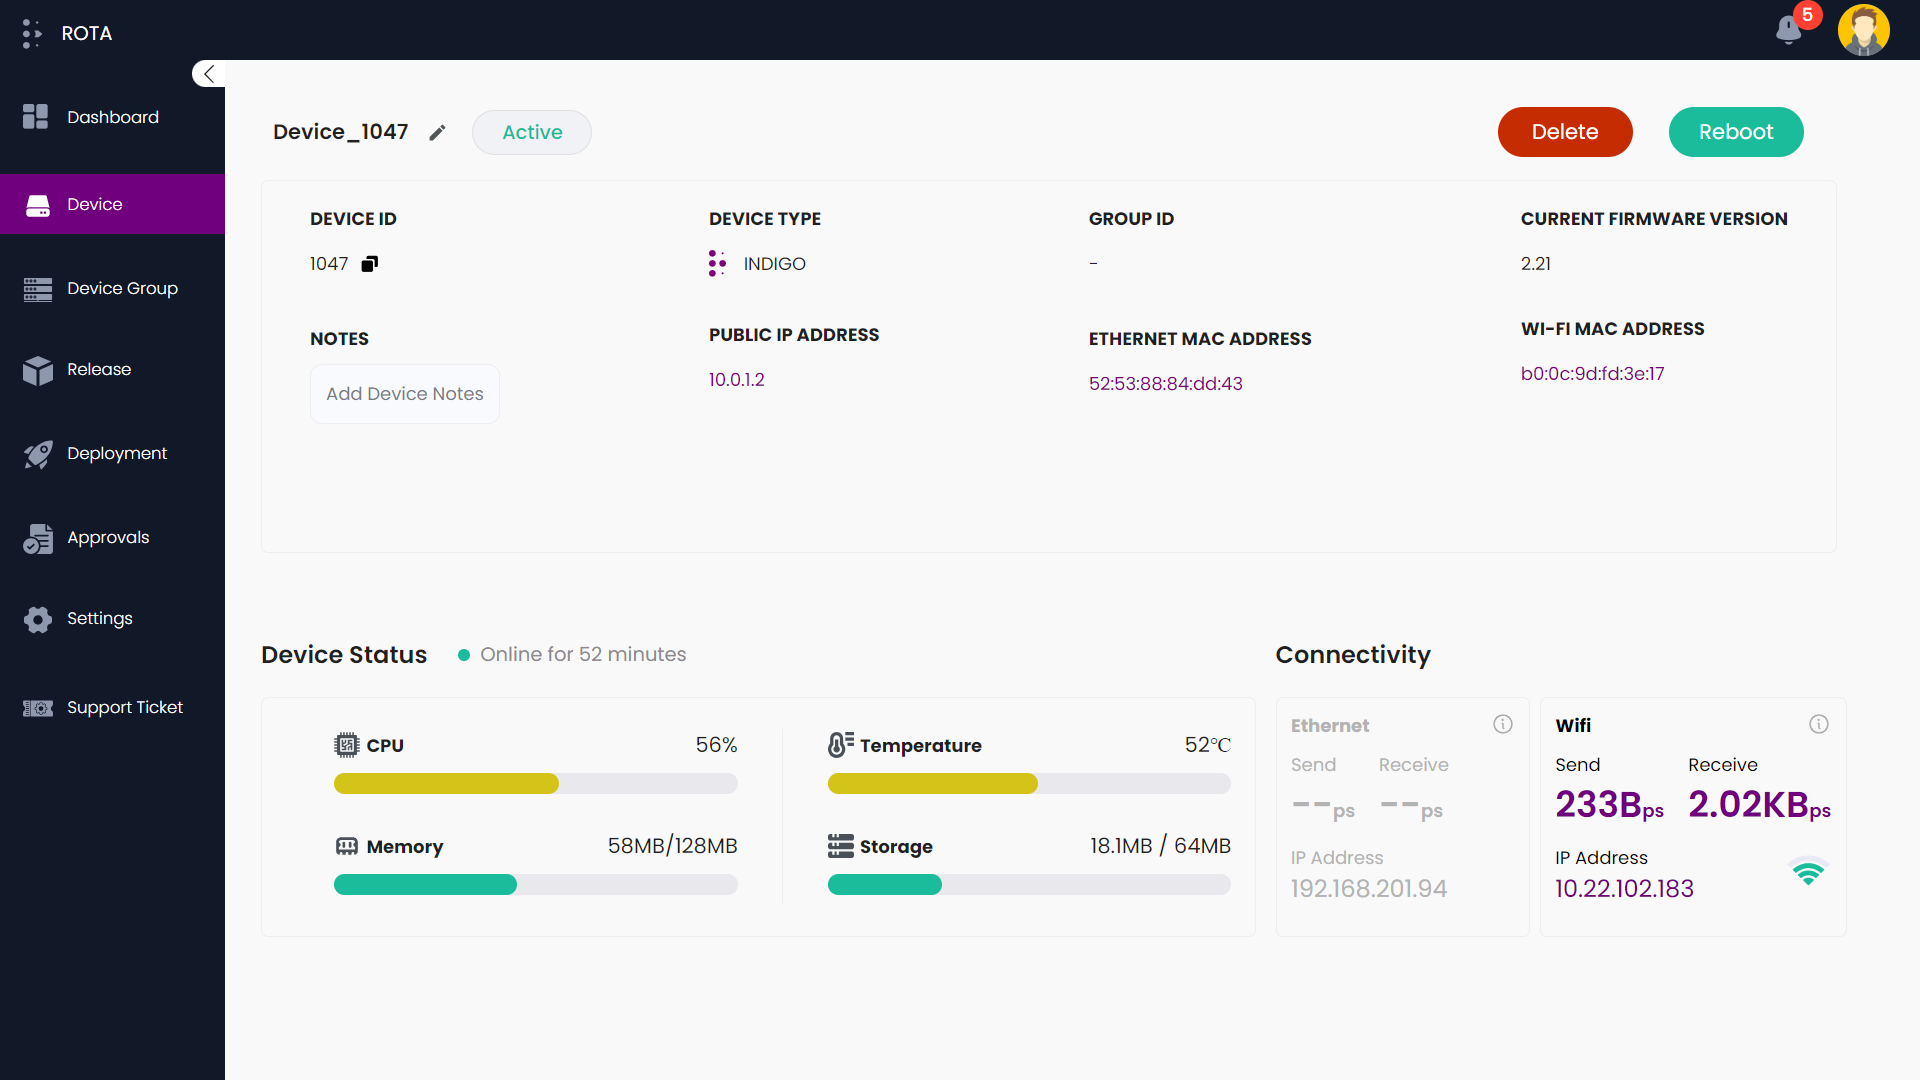
Get Device Details
Steps to Get Device Details:
Step 1: Choose the device that you want to see the details and click on that device.
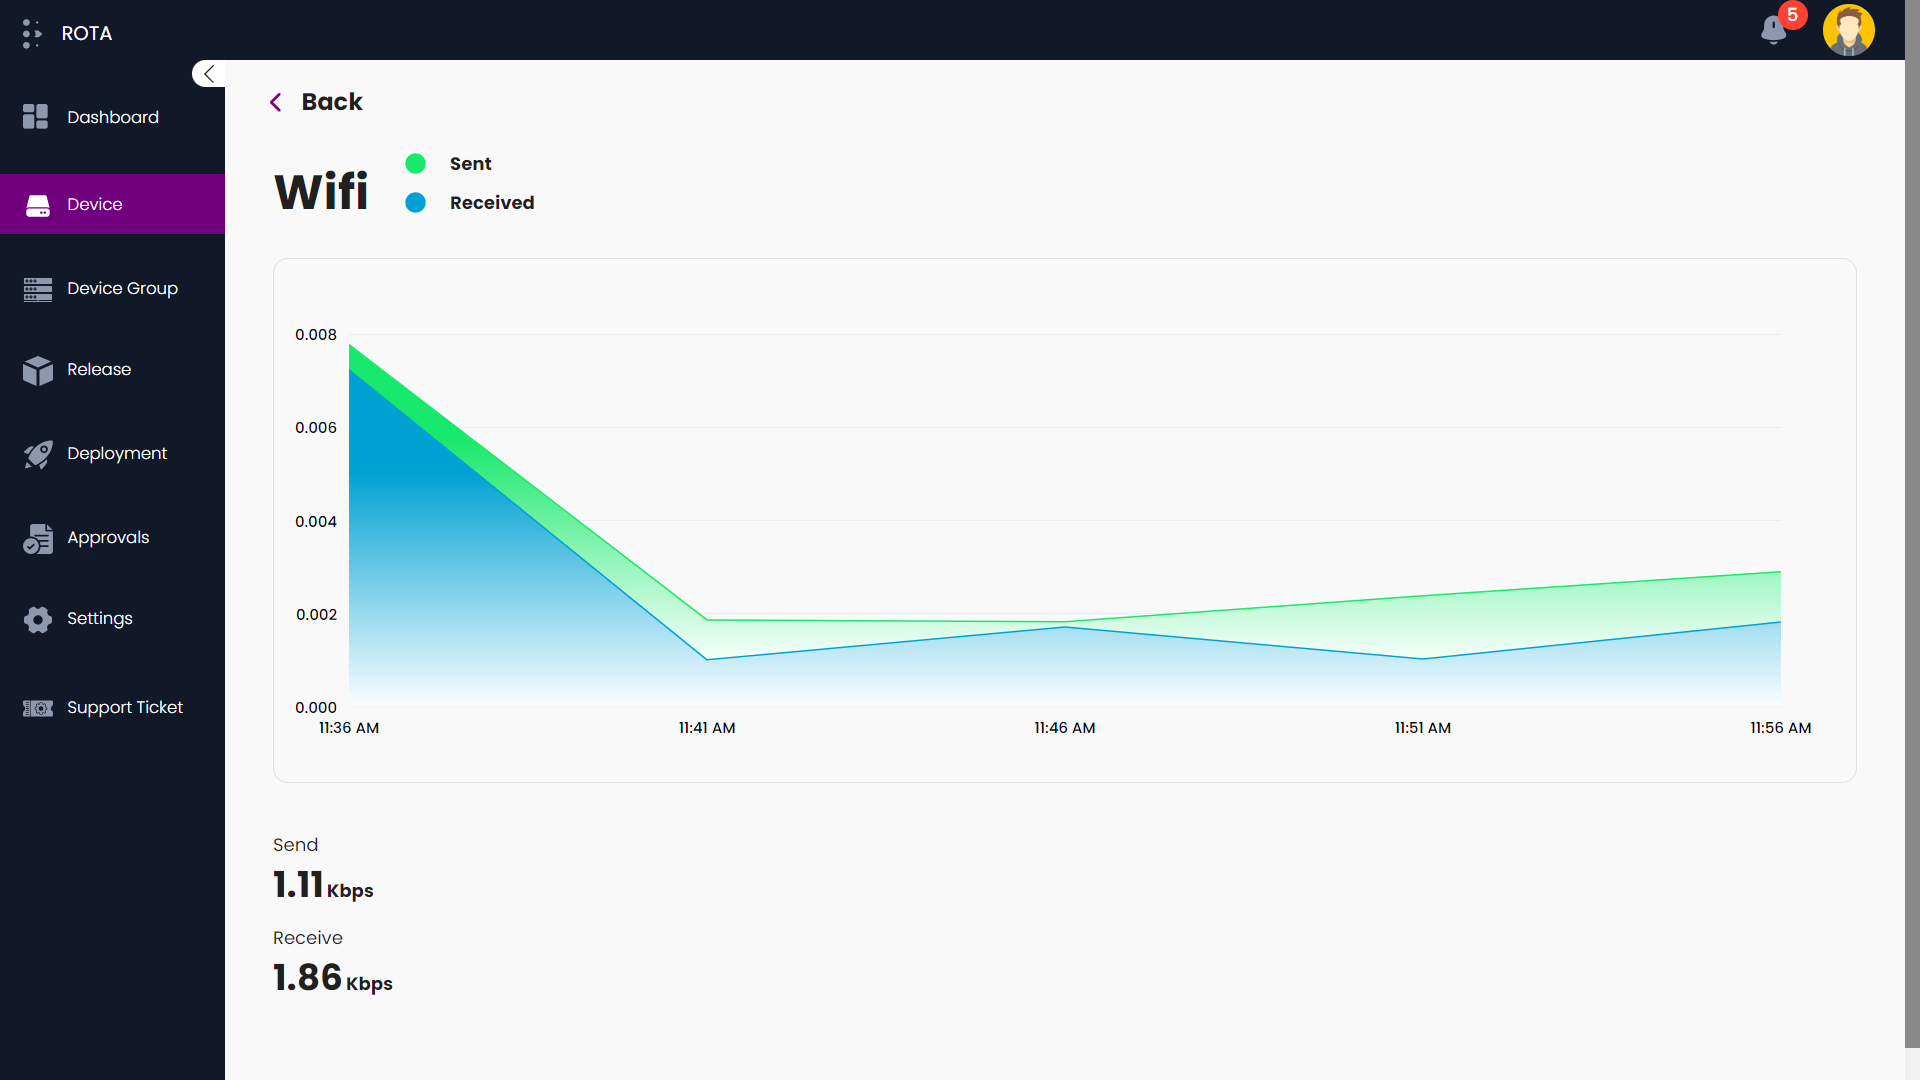
Step 2: Now you can see the details of the device. If you want to see the connectivity details of the device click on the network type (ethernet/Wi-fi) you have connected.

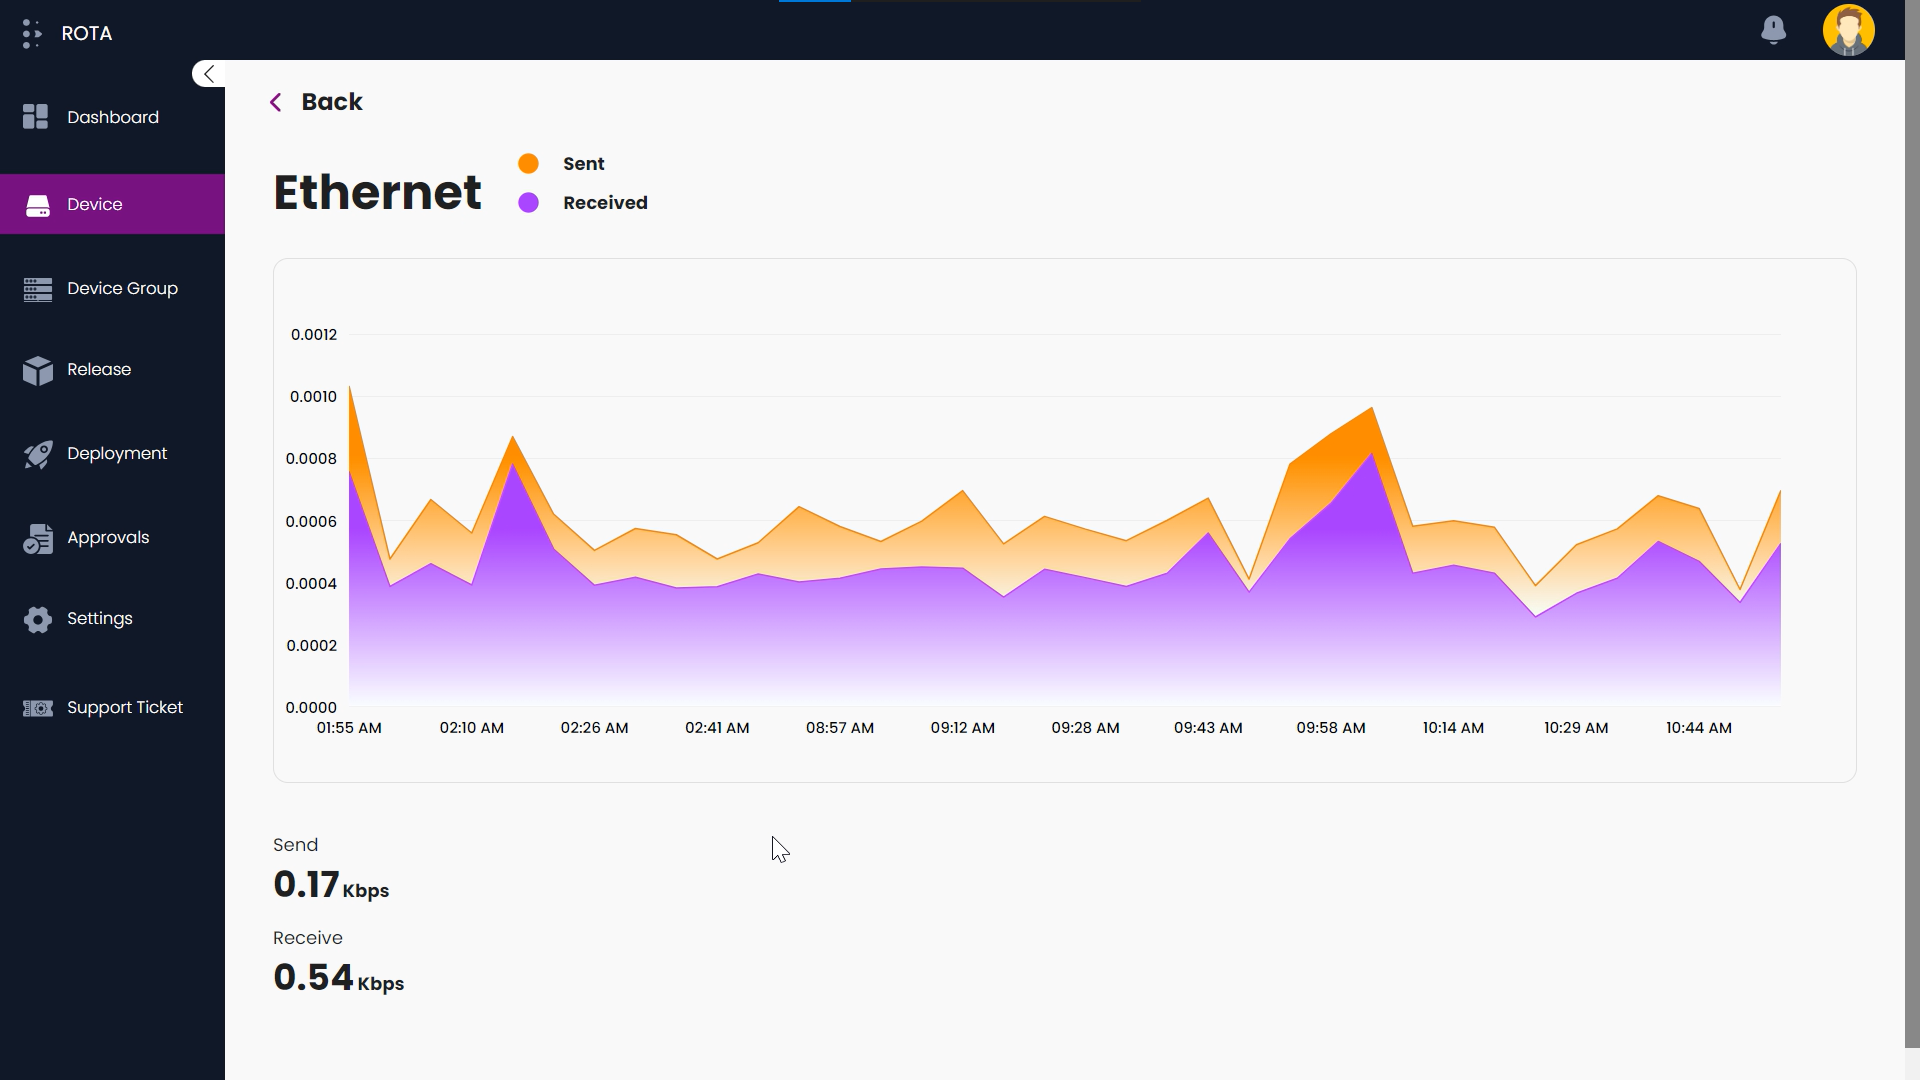
Step 3: Click on Back to navigate back to the device’s primary details and click on Device present in the sidebar to navigate back to the device list.
Note
If the device is connected to Wi-Fi, you can access the connectivity details of the device.
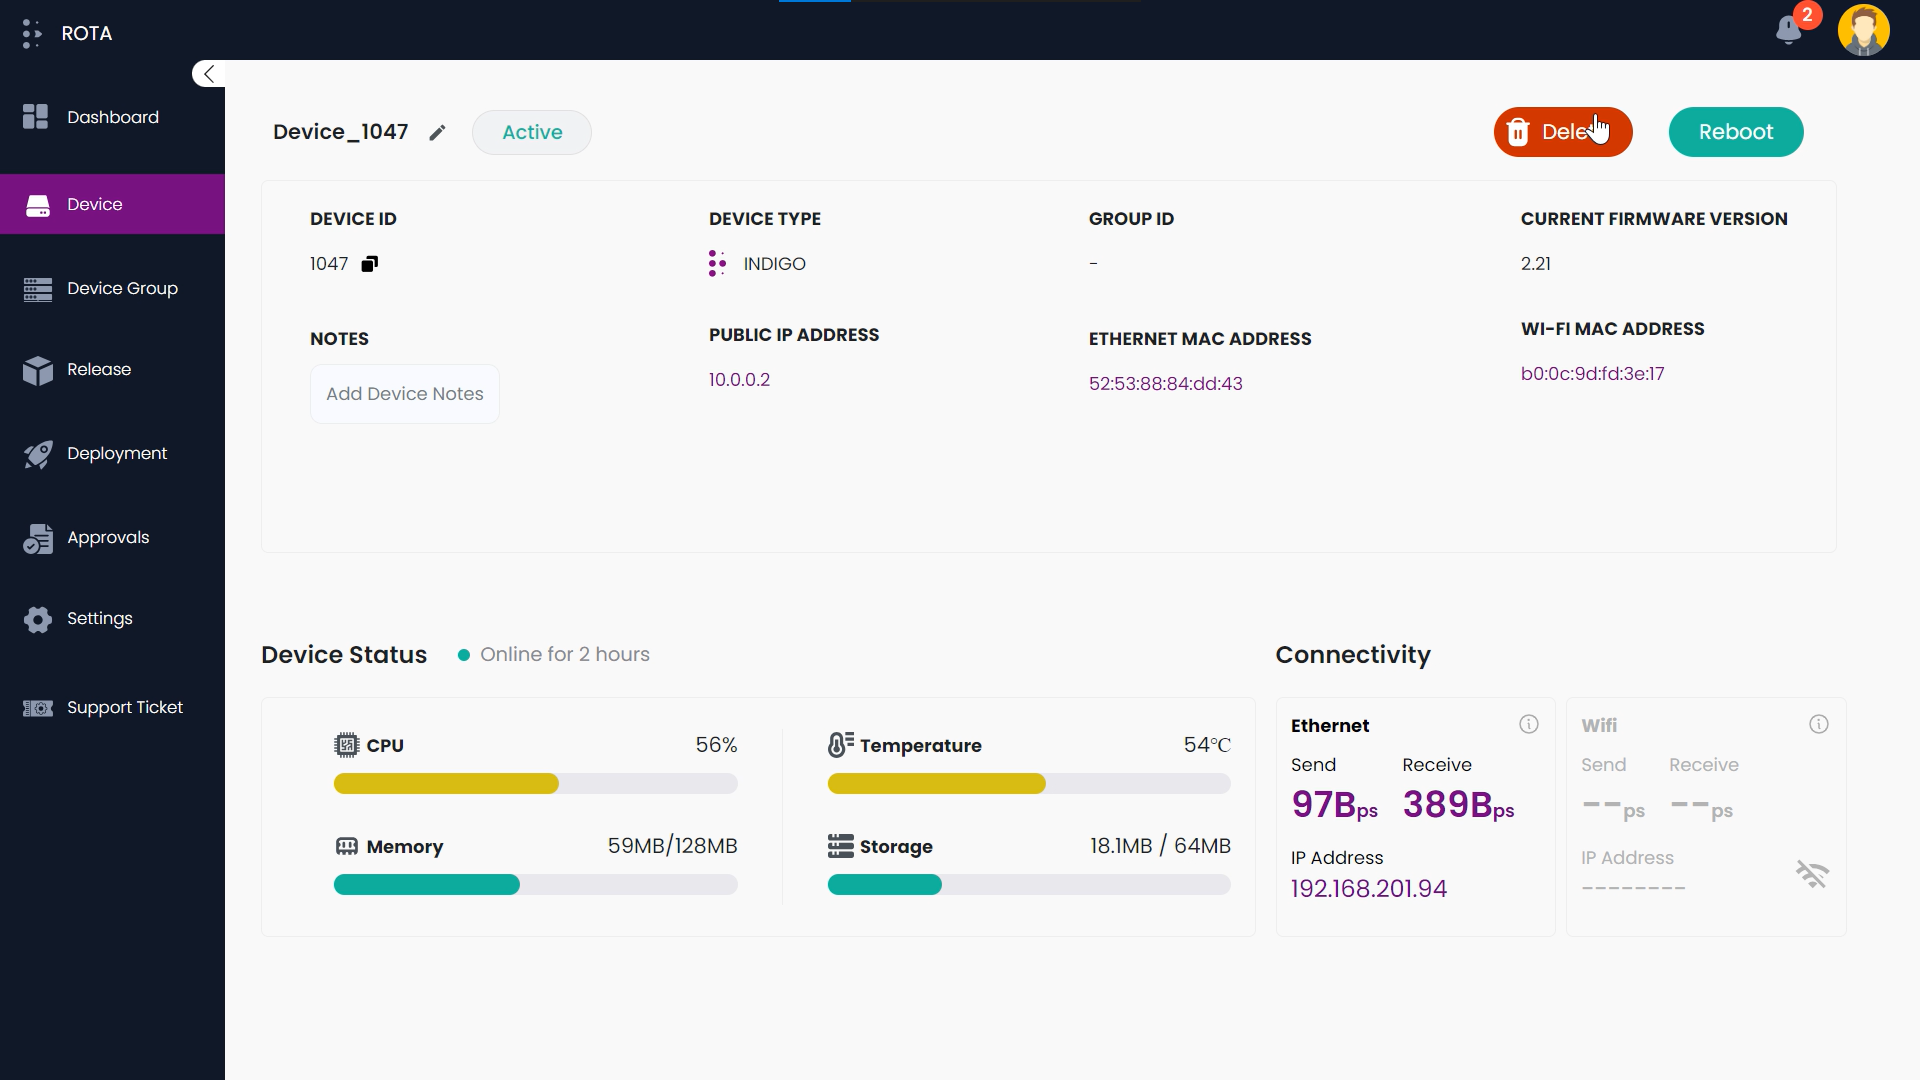
Delete Device
Steps to Delete Device:
Step 1: Choose the device that you want to delete and click on that device.
Step 2: Now you can see the details of the device, click on Delete present at the top right corner.
Step 3: A dialogue box will open asking for confirmation, if you want to delete the device click on Yes or else click on No.
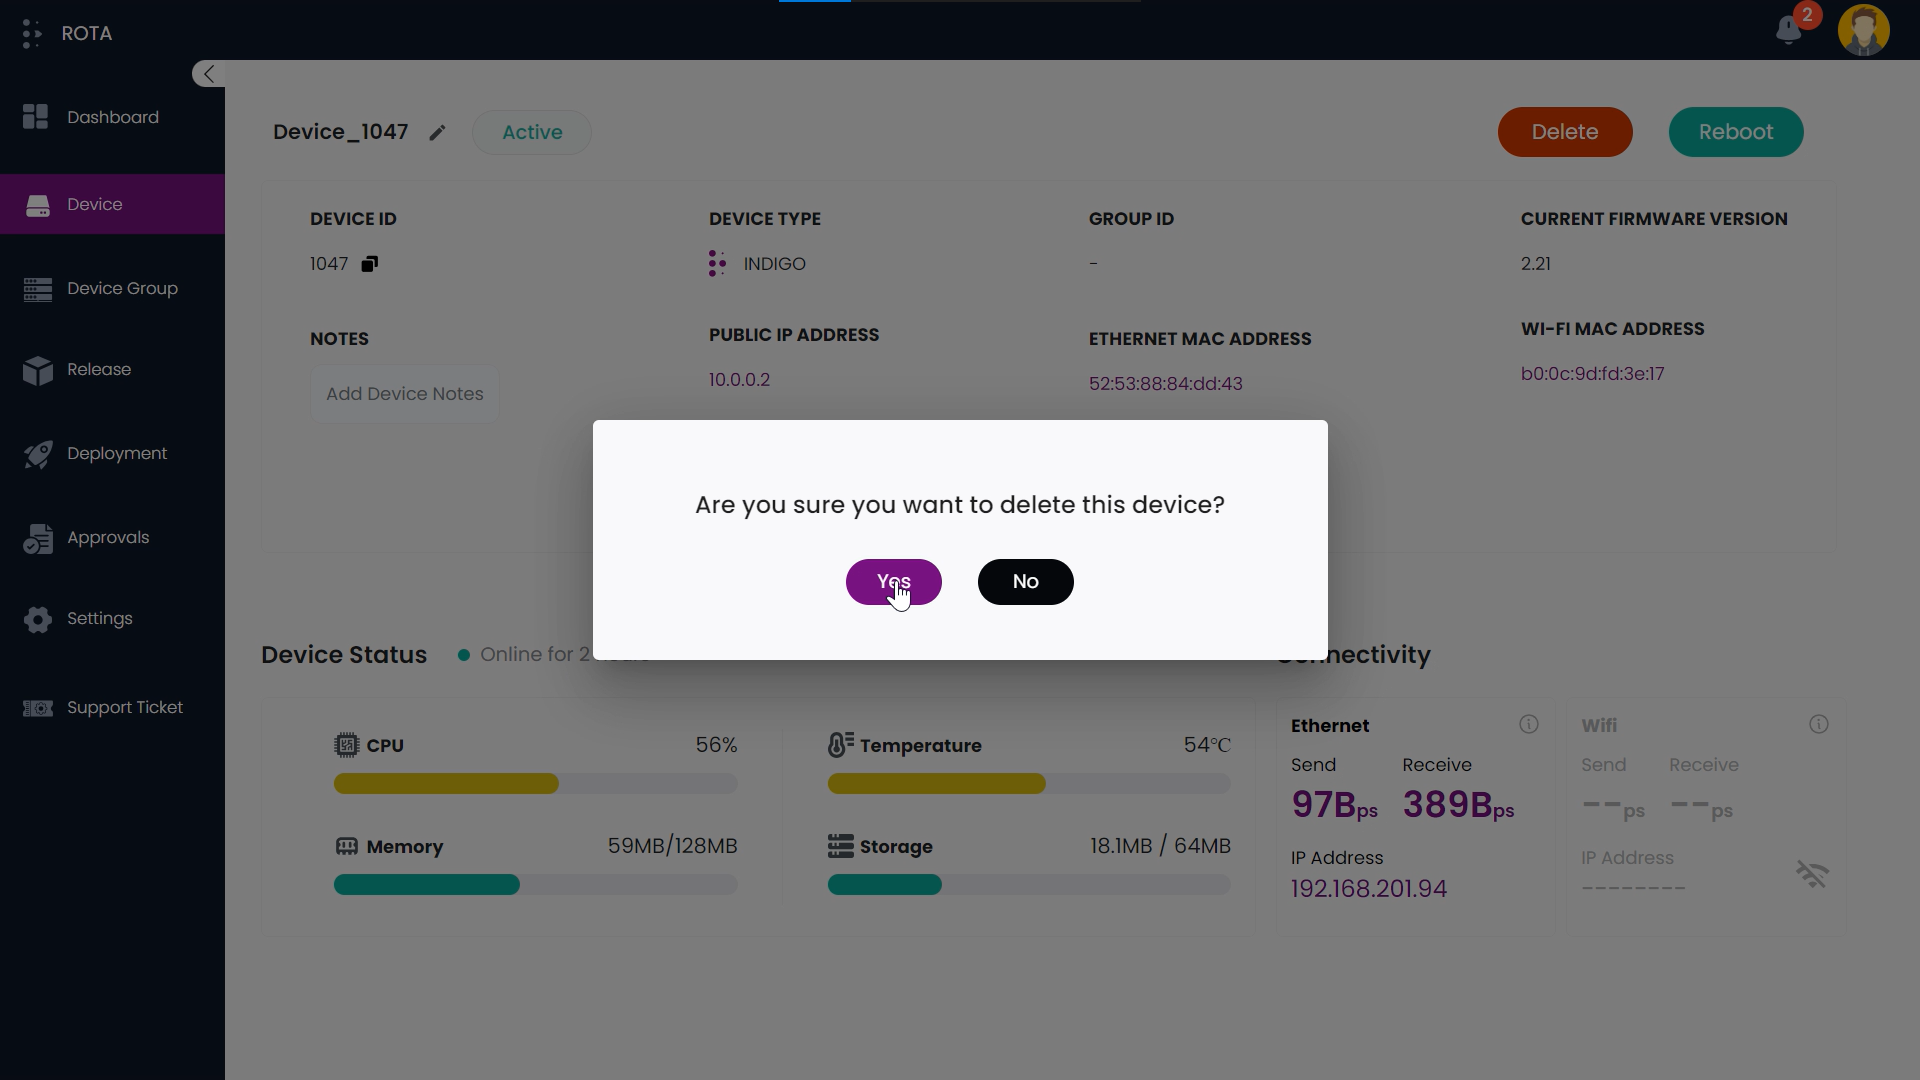
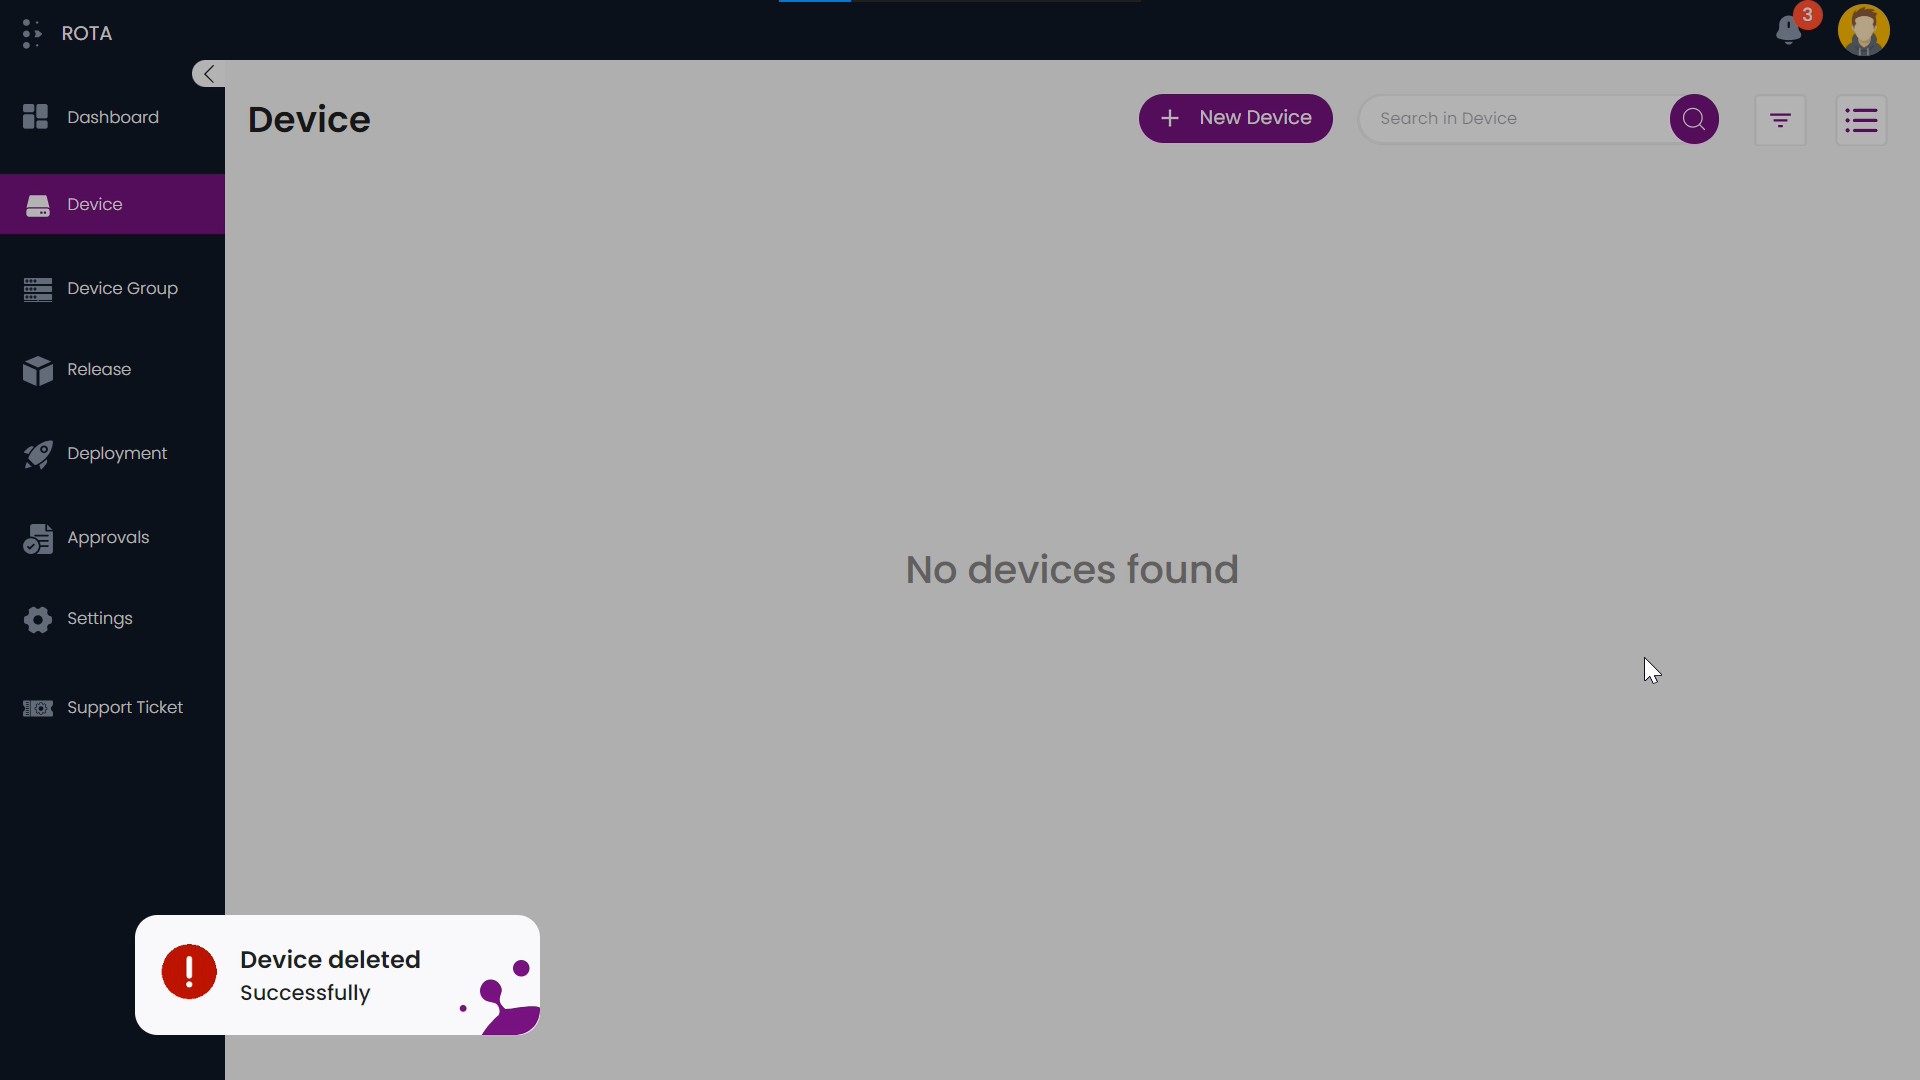
The device will be successfully removed.
Device Event History
Steps to view Device Event History:
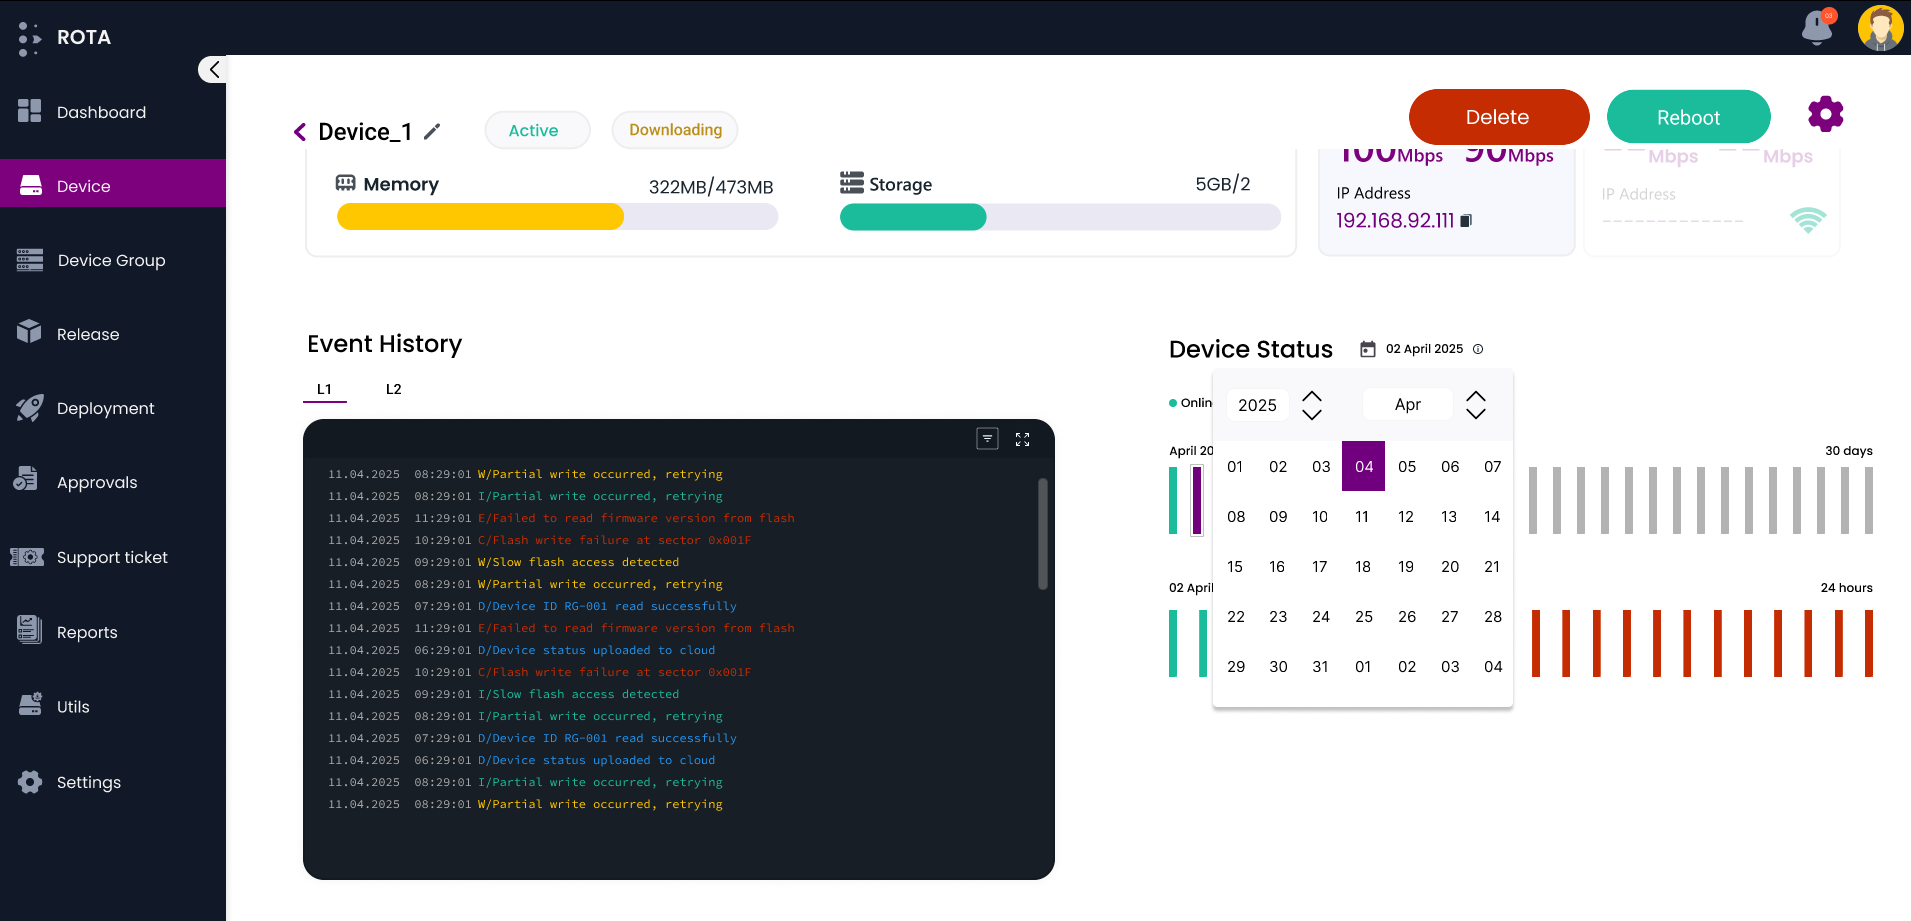
Step 1: Click on the required device from the device list to open its details page.
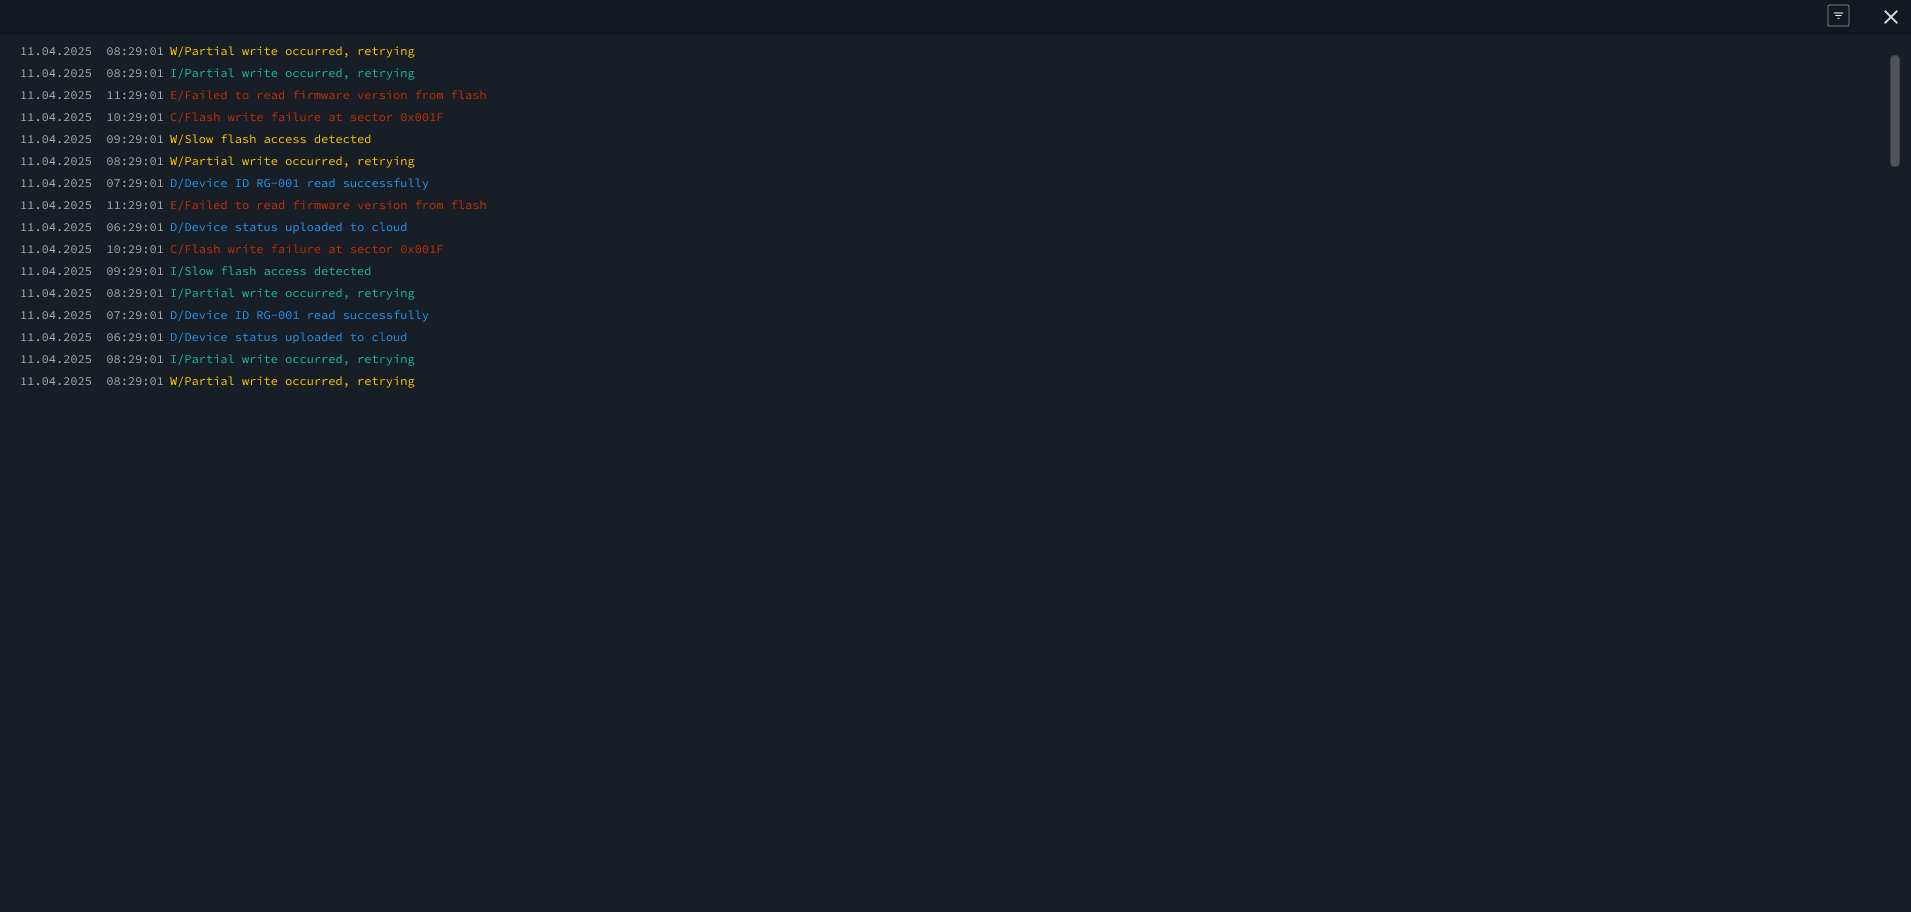
Step 2: Scroll down to the Event History section. On the left side, you will see logs categorized under L1.
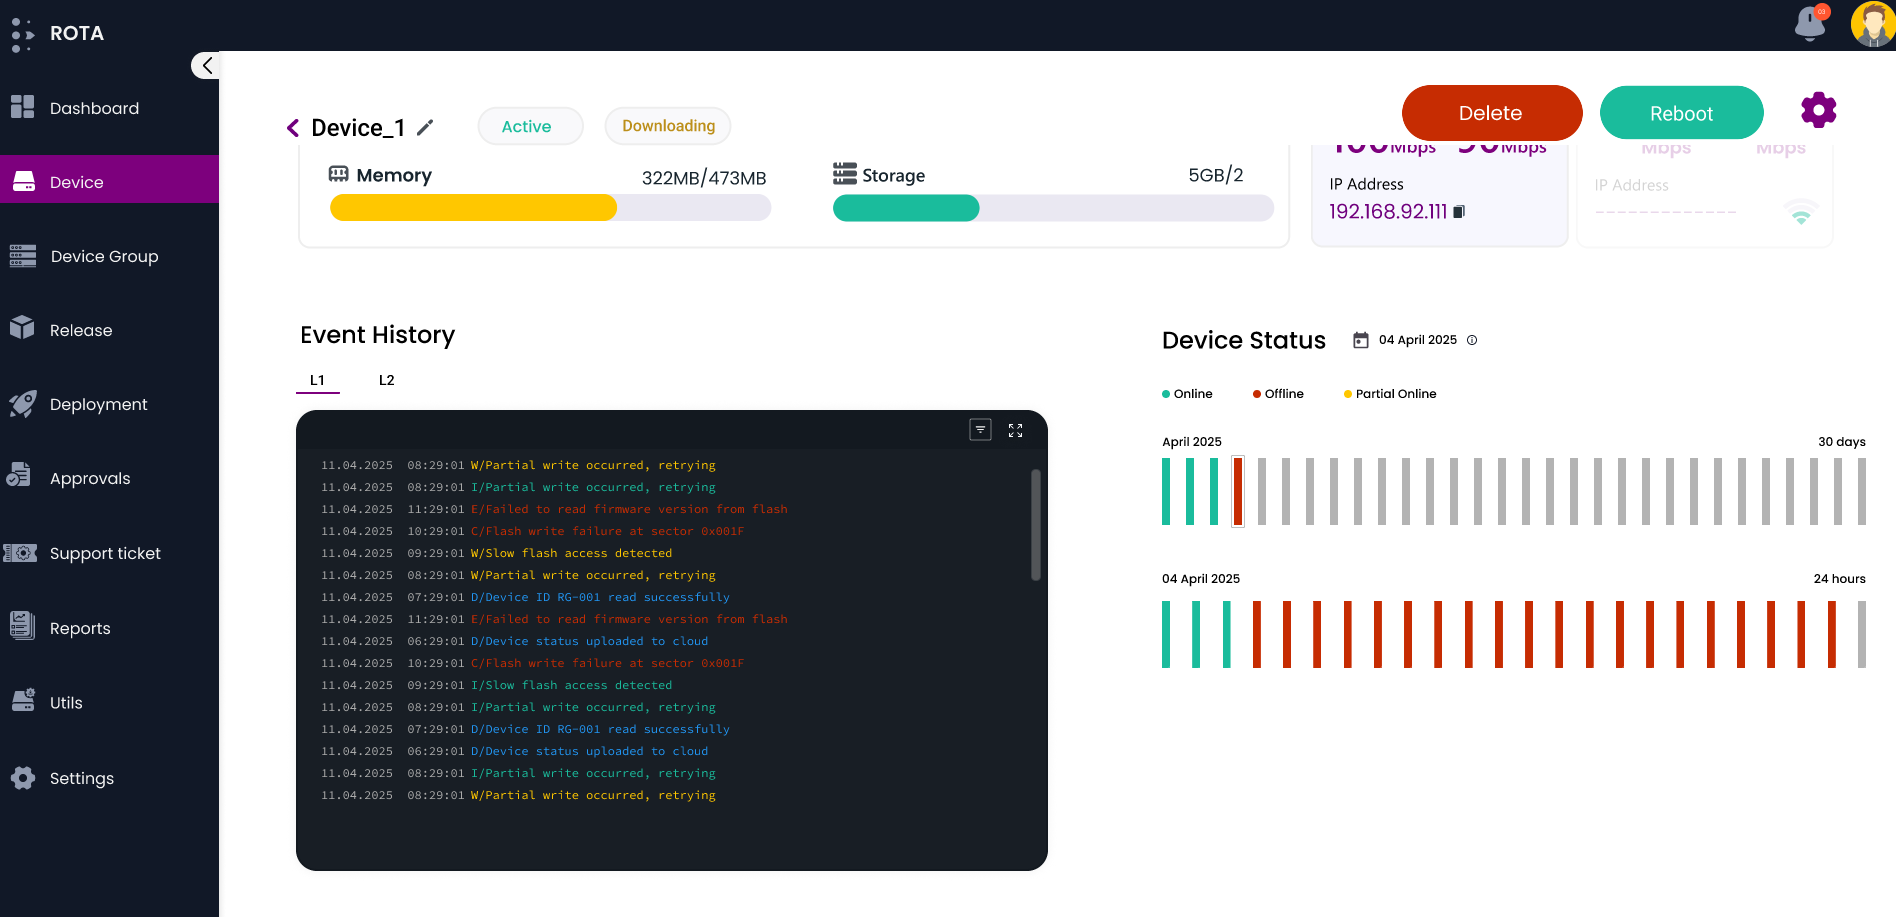
Step 3: Use the Filter option in the top-right corner of the Event History display to narrow down log entries by type.
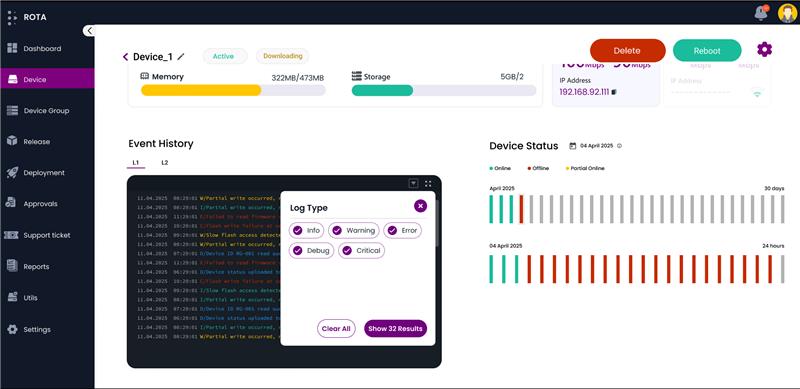
Step 4: Click the Expand button in the top-right corner of the Event History display to enlarge the logs view to full screen for better visibility.
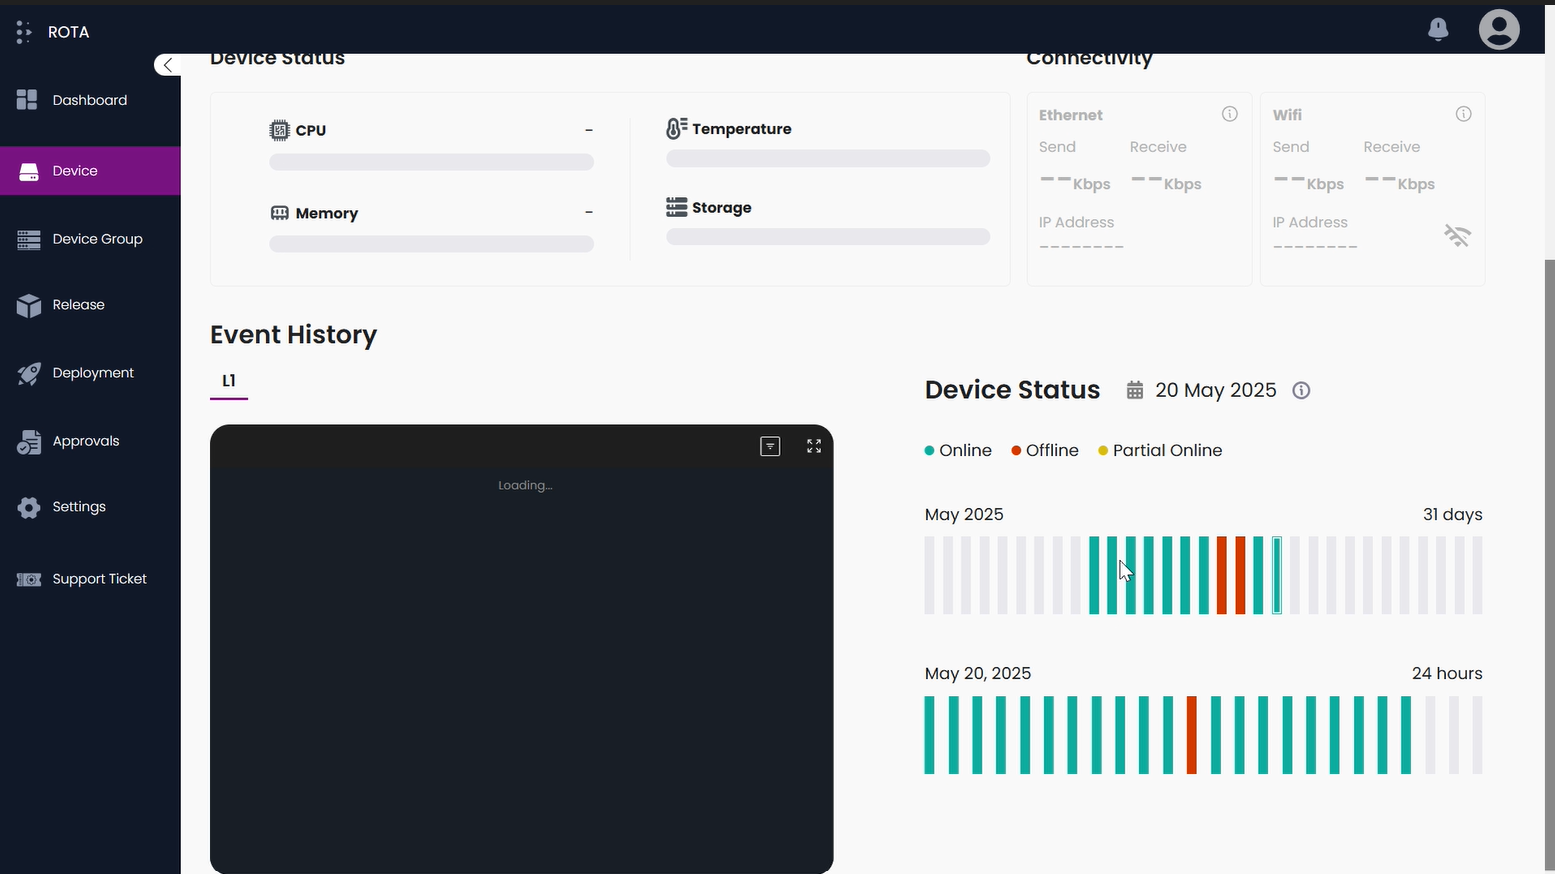
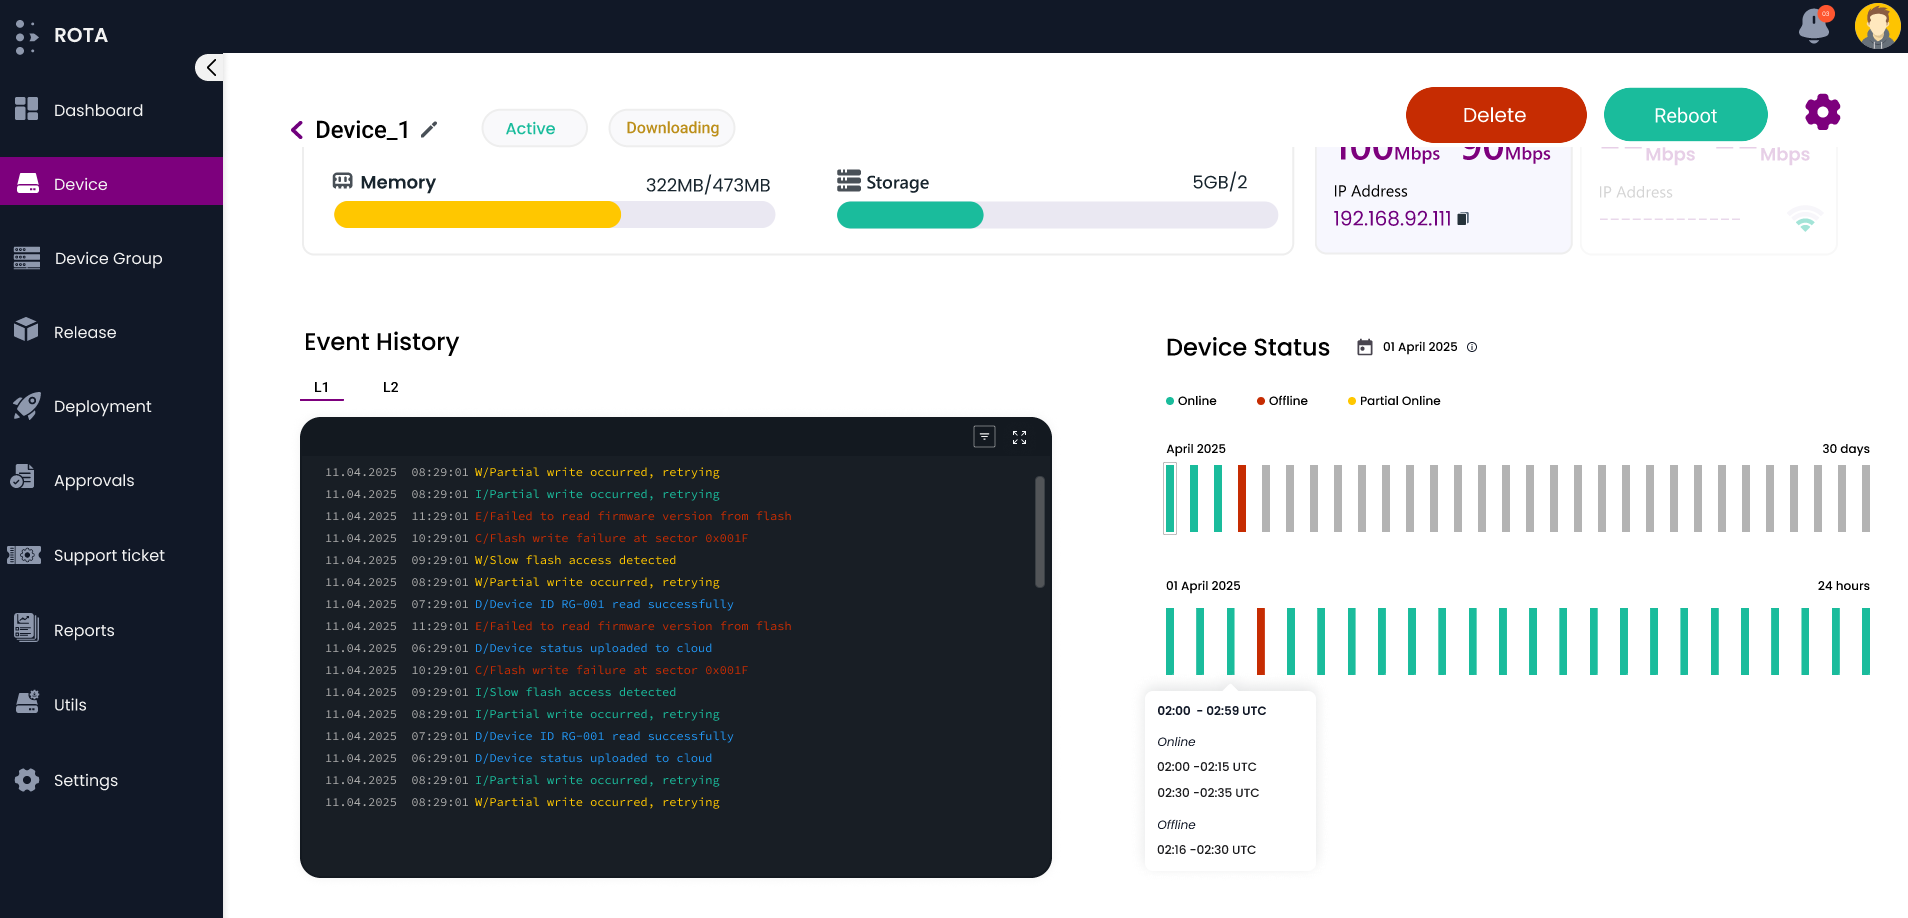
Device Status
Steps to view Device Status History:
Step 1: Click on the required device from the device list to open its details page.
Step 2: Scroll down to the “Device Status” section. On the right side,the status for the current day is displayed by default.
Note
- Green color indicates the device was mostly online, Red color indicates it was mostly offline, and Yellow Color means it was 50% online and 50% offline. There are two progress bars:
Month Bar.
Day Bar.
Step 3: The Month Bar displays vertical progress lines, each representing a day of the current month. When a specific bar in a month is selected, the Day Bar updates to show the status for that particular day.
- On Hovering the specific day on the Month bar, it will show the following details:
Number of releases as “Release”.
Number of Planned deployments as “Planned Deployment”.
Deployments executed on that day as “Deployment”.

Step 4: The Day Bar shows 24 progress vertical lines, each representing an hour of the selected day. Hovering on a specific hour will reveal the exact online and offline durations for that hour.
Step 5: When a user selects a specific date on the calendar, the status for that day will be displayed.
Note
Only past 90 days data from the current date are available for selection and viewing.